This post may contain affiliate links. Please read our disclosure policy.
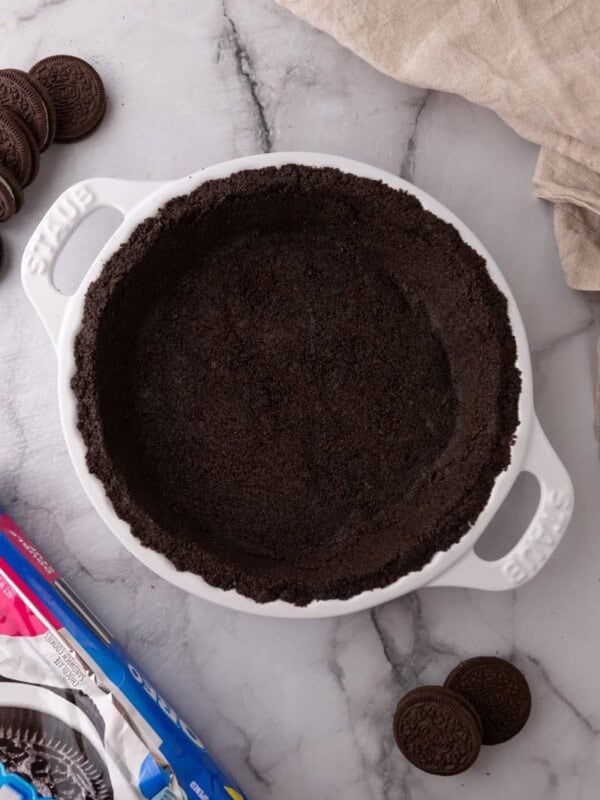
This Oreo Pie Crust Recipe is the perfect base for your desserts. The beauty of this recipe is that it is super easy to make and provides a nice change from a traditional pie crust. It can be enjoyed chilled or baked for a crunchier texture. Regardless of how you like to have it, it’s absolutely delicious!
If you’re used to buying a store-bought crust for your homemade pies, it’s time to change that! Making a homemade crust can be intimidating, but there’s no easier recipe to break into it than with this one. It literally only has two ingredients. And if the ease wasn’t enough, the dark cocoa flavor of Oreos enhances the filling flavor and pairs well with so many things!
One of the biggest differences between this recipe and others online is that we keep the cream filling instead of scraping and throwing it away. That saves us loads of time, reduces waste, and adds an extra layer of texture and flavor. Whether you’re a novice baker trying to get your feet wet in the kitchen or an experienced baker wanting to elevate your pie, this crunchy Oreo crust will meet and exceed your expectations.
Since you are looking at this Oreo cookie crust recipe, you’ll probably need a filling to accompany it! Check out this Chocolate Cream Pie, this Key Lime Pie Recipe, or this Brownie Pie Recipe.
Ingredients for this Buttery Oreo Pie Crust Recipe
Here are the ingredients you will need to make this homemade Oreo crust. Scroll down to the recipe card at the bottom of the page for the detailed ingredient measurements.
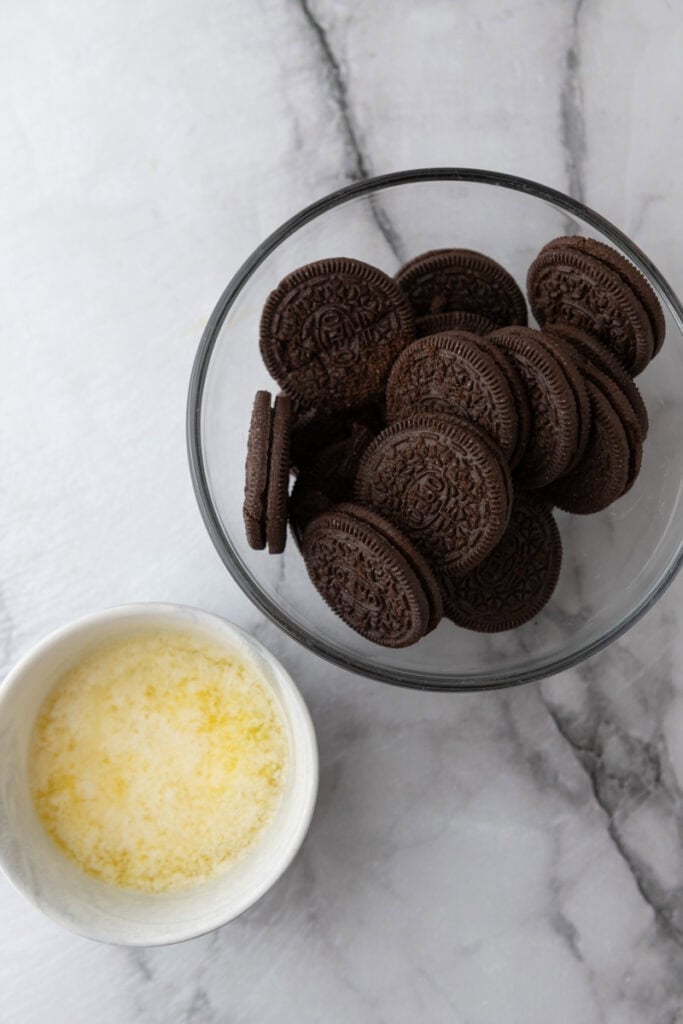
- Whole Oreo Cookies: The chocolate-flavored Oreos provide the base of this delicious crust.
- Unsalted Butter: The warm, melted butter coats the crushed Oreos and allows them to stick together.
How to make this Easy Oreo Pie Crust Recipe
This is how you can make your own homemade Oreo pie crust. Make sure to scroll down to the recipe card at the end of this post for the oven temp, baking time, and full recipe instructions!
- Melt the butter in a small bowl in the microwave in 20-second increments until melted.
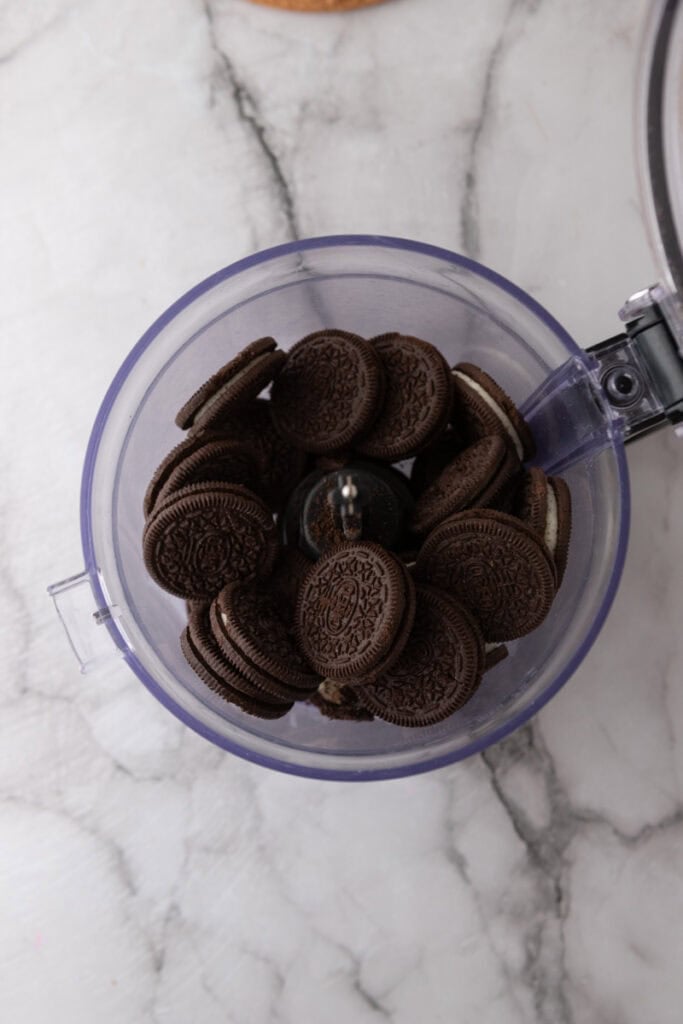
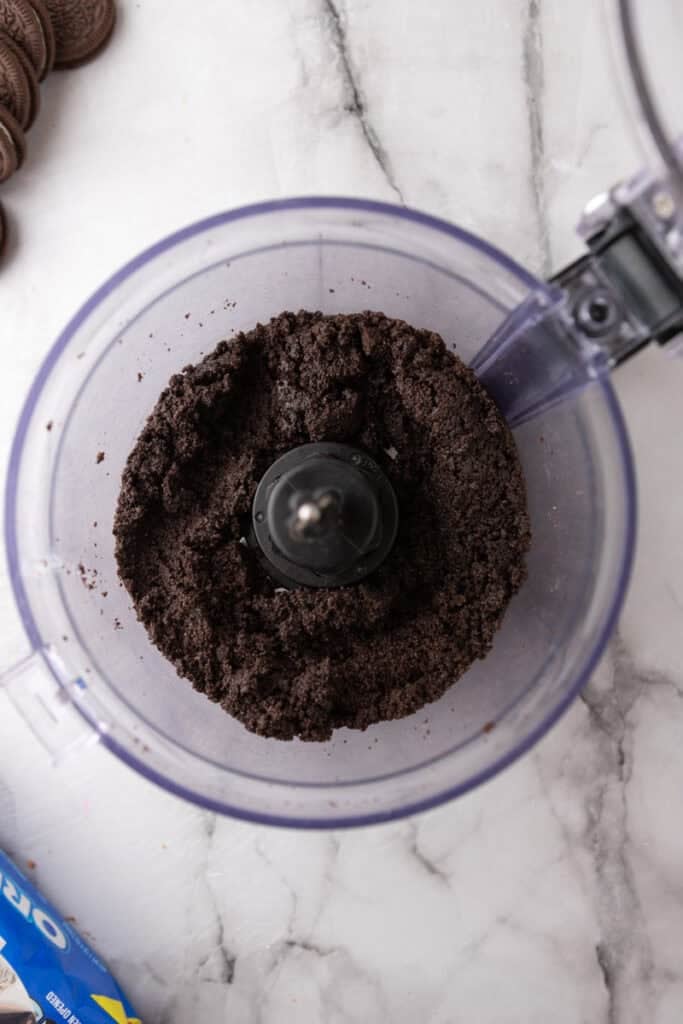
- Crush the Oreos into fine crumbs using a food processor. If you don’t have one, you can place the cookies in a zip-top bag and crush them with a rolling pin until they resemble coarse sand.
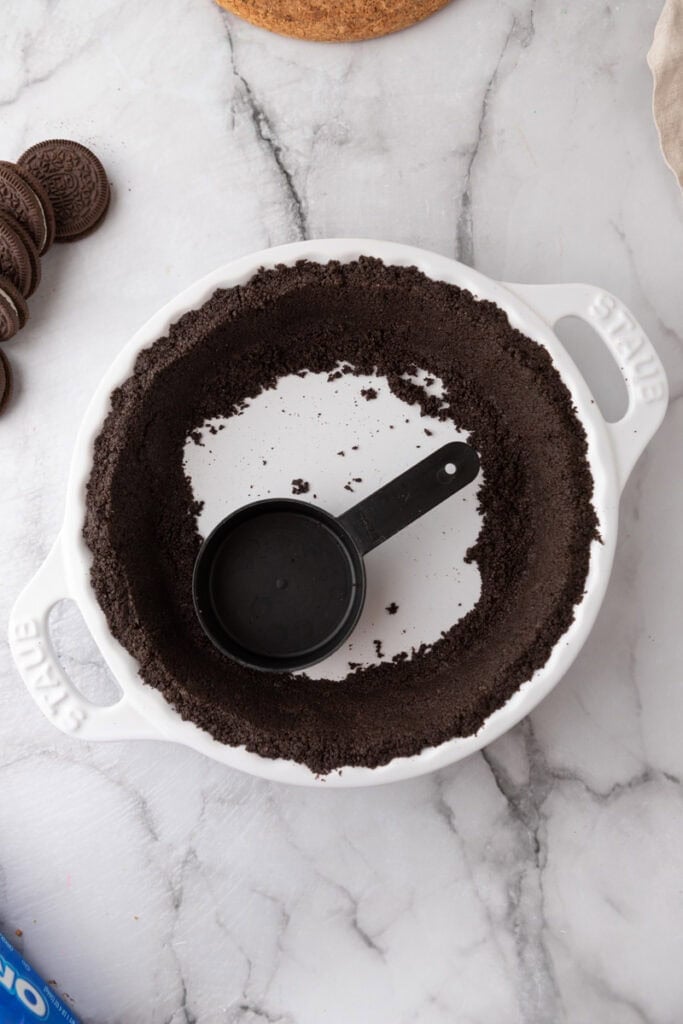
- Combine the cookie crumbs and melted butter in a large mixing bowl or in the bowl of a food processor. Stir until the mixture is evenly moistened and looks like wet sand.

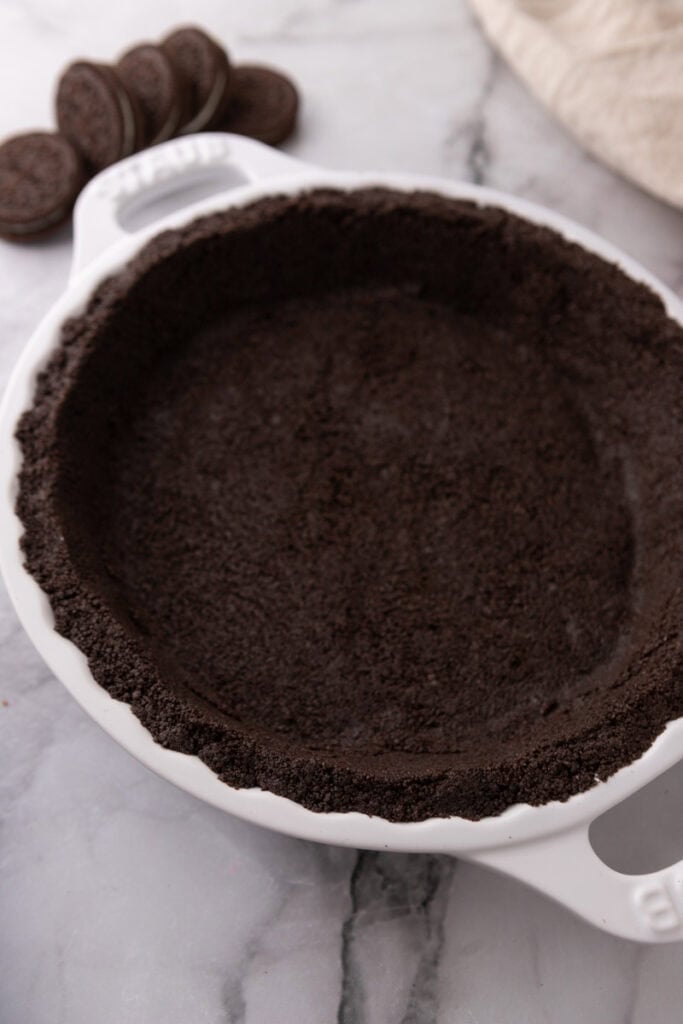
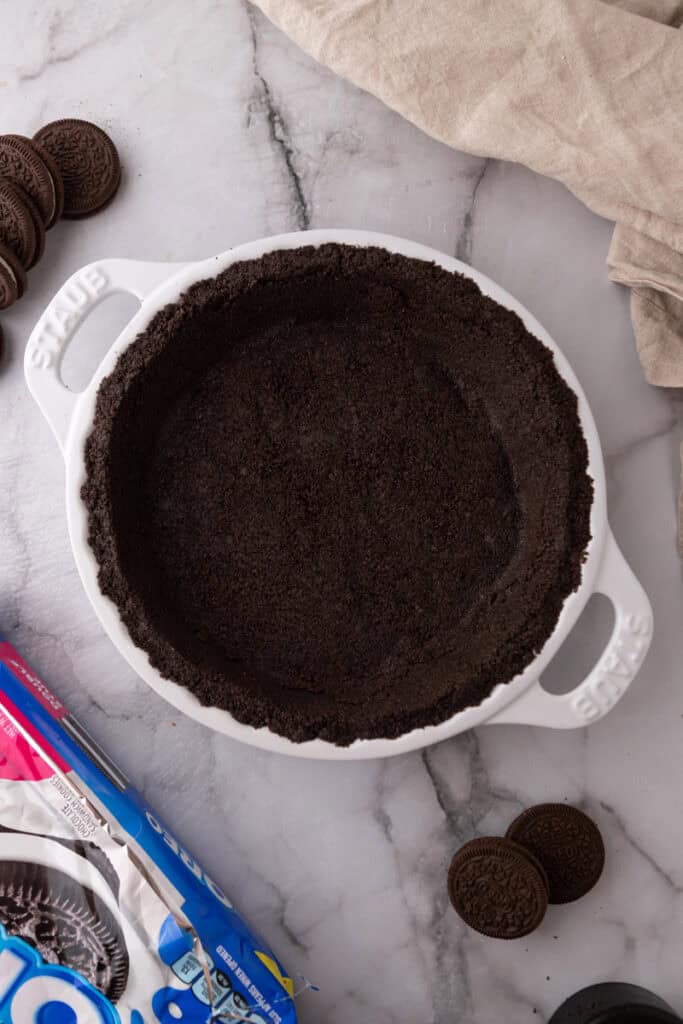
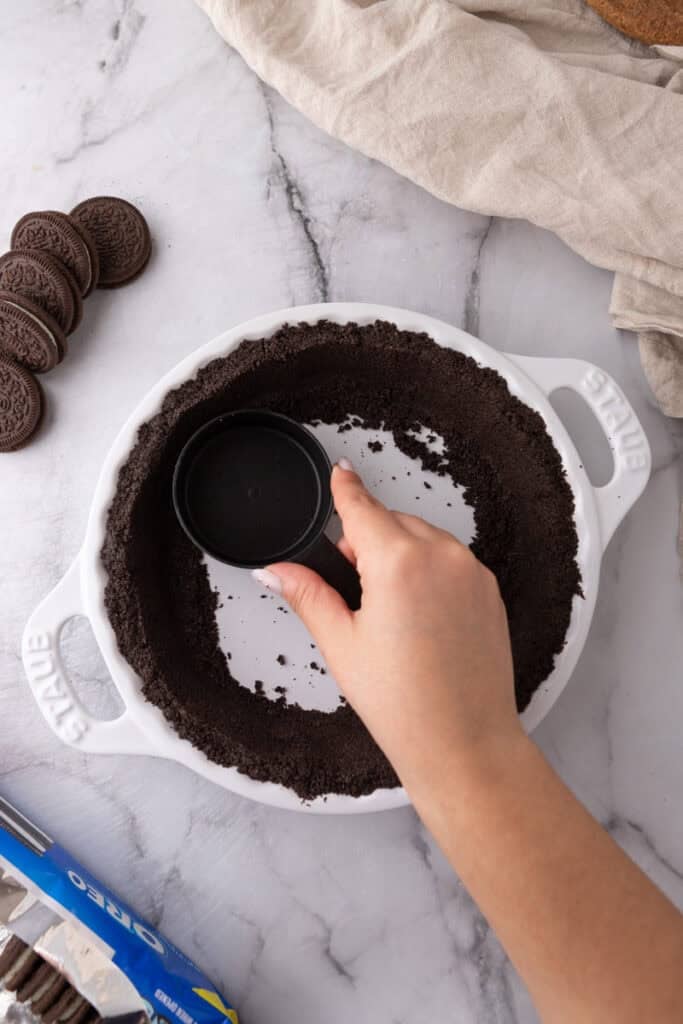
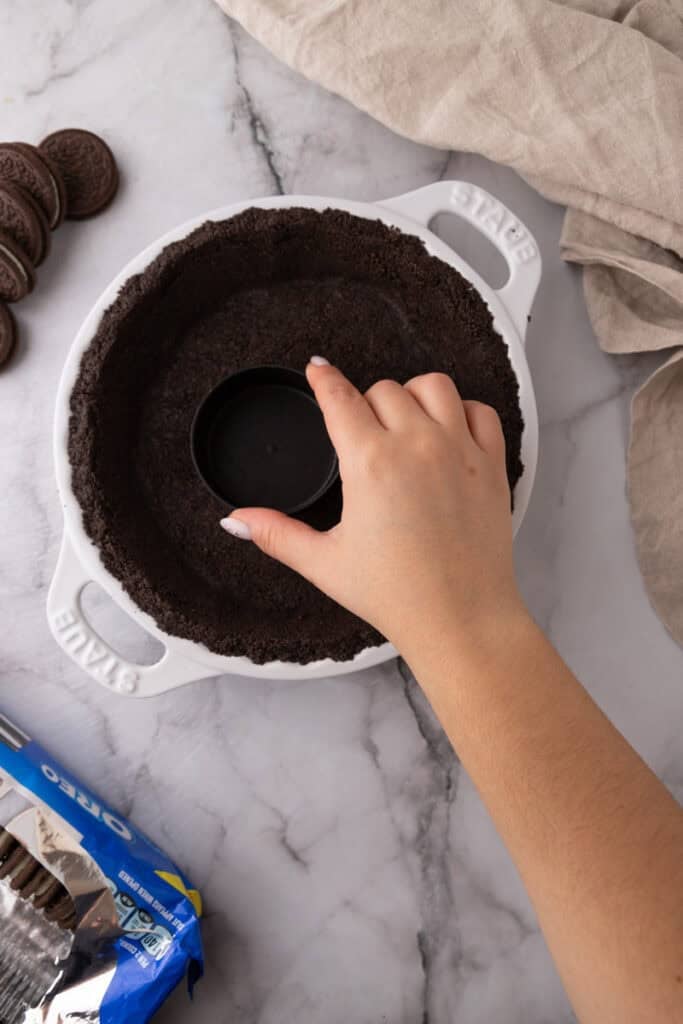
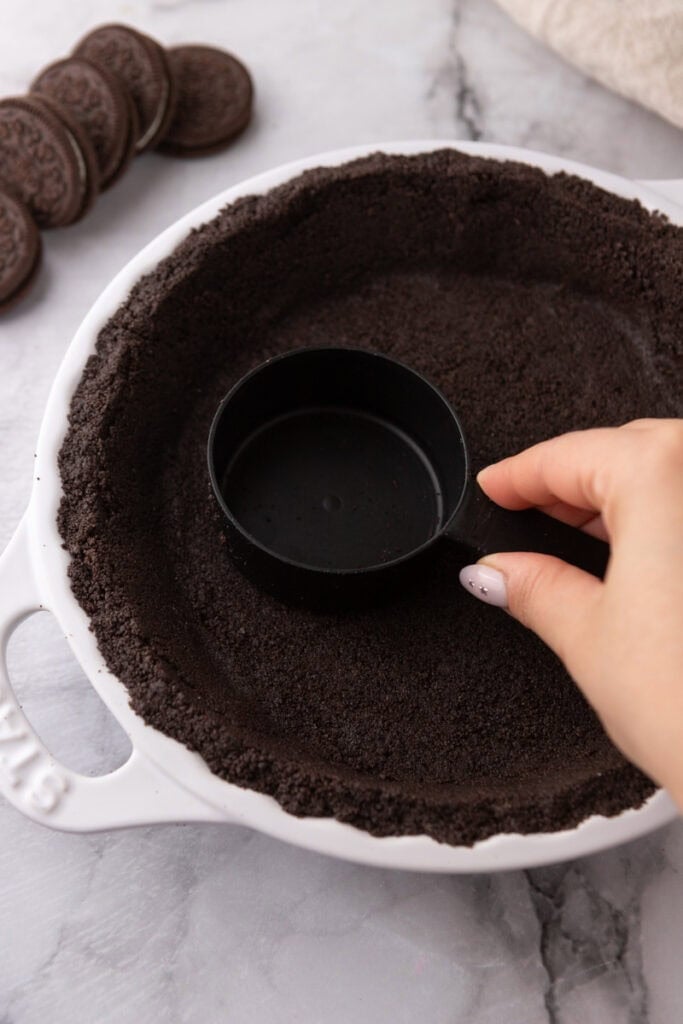
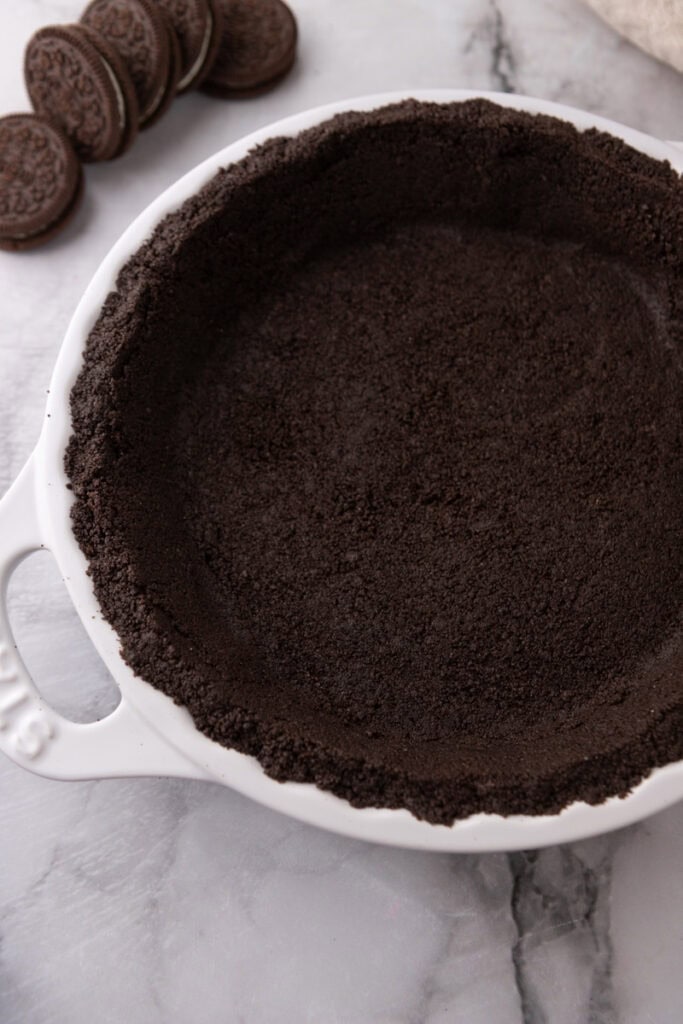
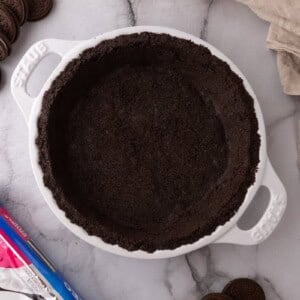
- Pour the 2/3 mixture into a 9-inch pie plate, then press it firmly up the sides using the back of a spoon or the bottom of a measuring cup, then add the rest of the mixture and press it into the base in an even layer.
- For a No-Bake Crust: Pop the pie pan in the fridge or freezer to set before adding your filling. This is ideal for chilled desserts, you’re serving the same day, or are making a no-bake dessert. I love doing this for my no bake chocolate pie recipe!
- For a Baked Crust: Bake in the preheated oven until it’s just set and you can smell a warm, toasty aroma. Let it cool thoroughly before adding your filling.
Oreo Pie Crust Recipe Tips and Tricks
- The butter should still be warm to coat the Oreo crumbs more smoothly.
- The smaller you grind the chocolate sandwich cookies, the better the crumb crust will hold together.
- Add a pinch of salt or use salted butter if you want to balance the sweetness of the Oreo cookie crumbs.
- Create a moisture barrier by brushing a thin layer of melted dark or white chocolate over the no-bake crust before filling.
- Press the crumb mixture hard into the bottom of the 9-inch pie dish to help the crust hold its structure.
Why do you need to make this recipe?
- It tastes so much better than a store-bought Oreo pie crust.
- This easy recipe only requires simple ingredients that you can find at any grocery store.
- Trying different flavors besides a shortbread crust or graham cracker crust is a great way to keep things exciting.
- This is a must-make recipe for anyone who is a big fan of Oreo cookies.
And since we’re talking about Oreos, I had to let you know all about my Crumbl chocolate oreo cookies, these no bake peanut butter oreo bars, and these incredibly chewy Oreo chocolate chip cookies!
Frequently Asked Questions – FAQ
When should I use the No-bake recipe?
The no-bake option is perfect for chilled, no-bake dessert fillings.
- Pudding pies are no-bake pies that are soft and set in the fridge.
- An Ice cream pie has a great no-bake filling.
- Mousse or whipped cream like a no-bake peanut butter pie or no-bake s’mores pie are no-bake pie fillings with an airy texture that holds best when kept cold.
When should I use the Baked crust option?
- An Oreo cheesecake recipe that has a rich, dense filling. A crunchier crust ensures it stays firm and doesn’t become soggy. You could also par-bake the crust to ensure it stays extra crispy.
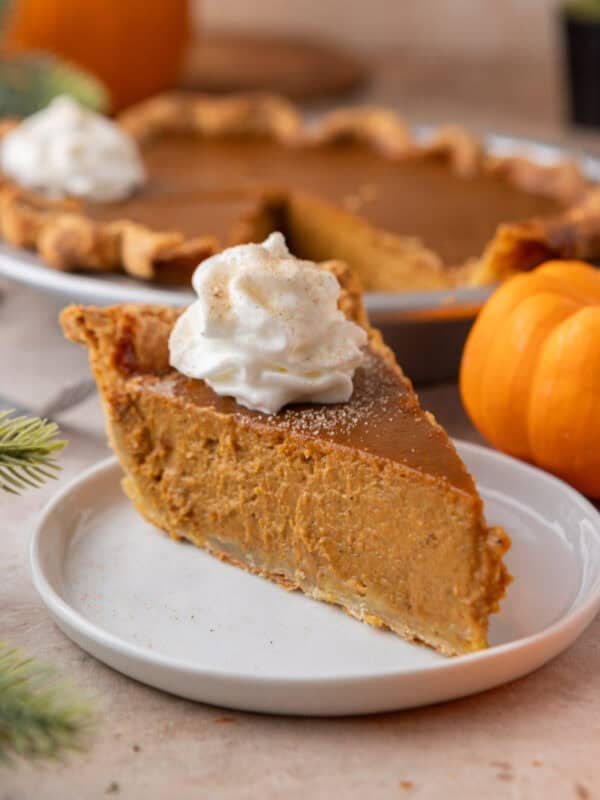
- Custard and cream pie recipes like pumpkin or banana benefit from a baked crust.
- A baked pie with delicate fillings such as lemon tart or French silk pie need a baked crust to maintain their structure.
- Heavy or wet fillings in baked dessert recipes like fruit pies need a pre-baked crust to create a barrier that helps prevent sogginess.
- Even for no-bake desserts, baking the crust can add extra crunch and help it hold together better especially if you’re making the pie ahead of time and storing it for a day or two before serving.
Could I try other Oreo flavors?
Absolutely! Aside from regular Oreos, you could try using double-stuf Oreos (make sure you reduce the amount of butter you use by a tad), golden Oreos, red velvet Oreos, or peanut butter Oreos! Get creative and adventurous and try this recipe with any of your favorite Oreo cookie flavor variations.
How do I store my leftover crust?
If your crust is unfilled and you want to store it for later, you can keep it in the pie plate, wrap plastic wrap or aluminum foil over the top, and keep it out on the kitchen counter at room temperature for up to 3 or 4 days. You could also keep it in the fridge for a little bit longer.
Can I make this crust ahead of time?
Yes! The prepared crust can be stored in the fridge or you can freeze it for up to a month. If freezing, be sure to wrap it tightly in plastic wrap without much air in the middle to prevent freezer burn. You can bake it from frozen and there’s no need to thaw once you’re ready to use.
Why do we keep the filling from the Oreo cookies?
The filling is helpful because it helps bind the crumbs together and adds extra sweetness and creaminess to the crust.
Can I make this recipe gluten-free?
Sure! You just have to make sure you’re using gluten-free Oreos and you should be good to go.
Oreo Pie Crust Recipe
Ingredients
- 24 Oreo cookies with filling
- 5 tablespoons unsalted butter melted
Instructions
Option 1: No-Bake Oreo Crust
- Use a food processor to pulse the cookies into fine crumbs. If using a rolling pin, place Oreos in a zip-top bag and crush until they resemble sand.24 Oreo cookies
- In a bowl, combine Oreo crumbs with melted butter and stir until the mixture is evenly coated.5 tablespoons unsalted butter
- Pour the 2/3 mixture into a 9-inch pie plate, then press it firmly up the sides using the back of a spoon or the bottom of a measuring cup, then add the rest of the mixture and press it into the base in an even layer.
- Refrigerate for at least 30 minutes (or freeze for 15 minutes) before filling.
Best for no-bake cheesecakes, pudding pies, and ice cream cakes!
Option 2: Baked Oreo Crust
- Preheat oven to 350°F.
- Follow Steps 1-3 above to crush the Oreos, mix with butter, and press into a 9-inch pie pan.
- Bake for 8-10 minutes, until slightly firm and fragrant.
- Cool completely before adding the filling.
Nutrition
Nutrition information is automatically calculated, so should only be used as an approximation.