
This post may contain affiliate links. Please read our disclosure policy.
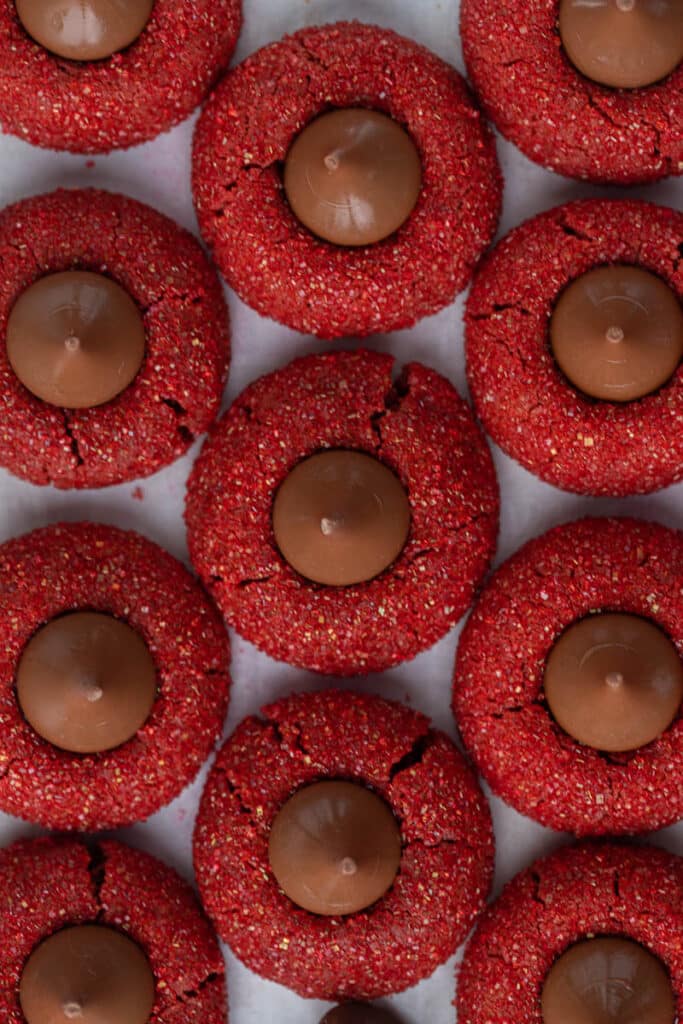
These easy Hershey’s Red Velvet Blossoms are soft red velvet cookies rolled in a sugar coating and topped with a classic Hershey’s Kiss. Similar to thumbprint cookies but with chocolate instead of jam, these red velvet blossom cookies are festive, simple to make, and perfect for Valentine’s Day or Christmas.
With a soft texture, subtle cocoa flavor, and that iconic chocolate center, this recipe is a fun twist on traditional red velvet cookies that’s great for gifting or holiday baking.

Why You’ll Love These Red Velvet Blossom Cookies
- Soft red velvet cookies with a sugar coating and chocolate center
- Easy recipe that bakes quickly in the oven
- Customizable with different Hershey Kisses or white chocolate
- Perfect for Valentine’s Day, Christmas, or holiday gifting
Ingredients for this red velvet blossoms cookie recipe
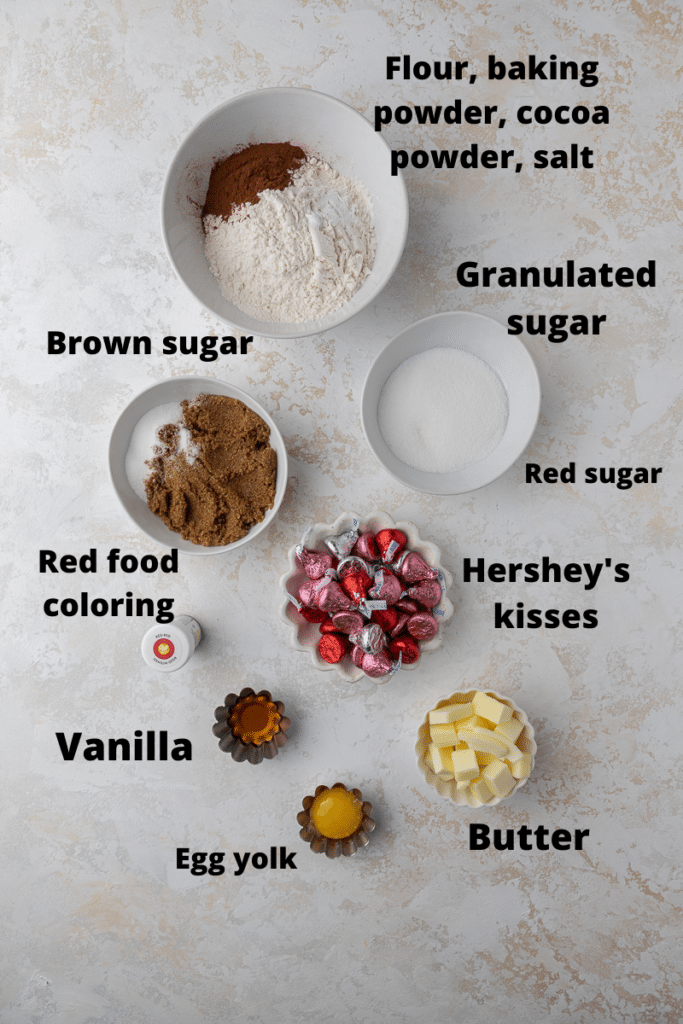
Here are the ingredients you will need to make these red velvet blossoms. Make sure to scroll down to the recipe card for the full detailed ingredient measurements.
- Butter – You will need softened butter. You can use salted or unsalted.
- Brown & granulated sugar – This cookie recipe uses a mixture of two sugar to get the perfect texture.
- Egg yolk– The egg yolk will be the binding agent of the cookie dough and will add extra fat to keep them moist and tender.
- Vanilla extract– The vanilla extract adds a nice depth of flavor.
- Flour– You can use AP flour for this recipe.
- Cocoa powder – Red velvet is made with cocoa powder and red food coloring, so this recipe uses a small amount to achieve that classic flavor.
- Salt– A little salt always helps enhance the sweetness of the cookie.
- Baking powder– The baking powder will give our cookies a little height.
- Red food coloring– To make these red, we will be using some Wilton red gel food coloring.
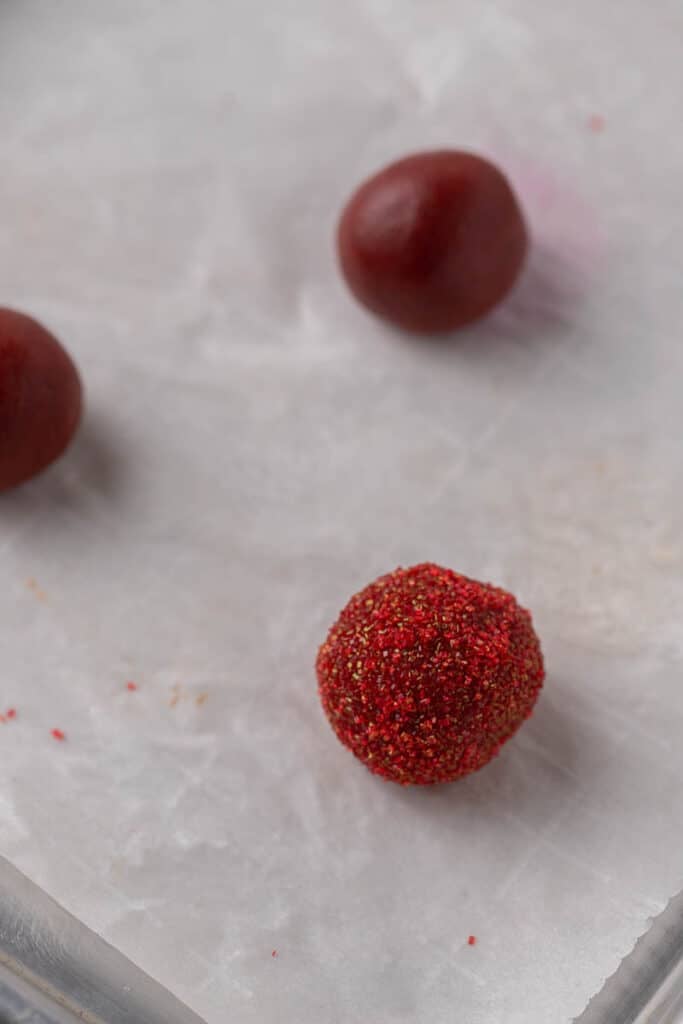
- Red sanding sugar– The red sugar is used to coat our cookies before baking.
- Hershey Kisses– I used the regular milk chocolate ones but you can use whichever ones you want! These are fun to play around with holiday themes little kisses too!
How to make red velvet blossom cookies
This recipe comes together quickly and does not require chilling the cookie dough.
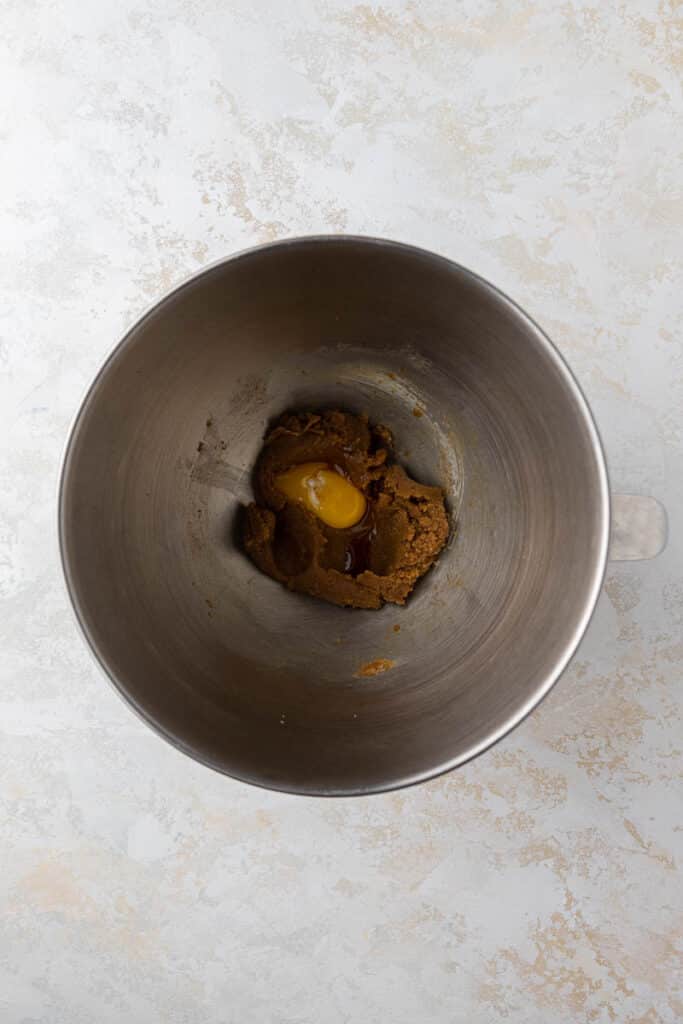
- Cream the butter and sugars together.
- Mix in the egg yolk, the vanilla extract, and the red food coloring.
- Add in the dry ingredients and mix.
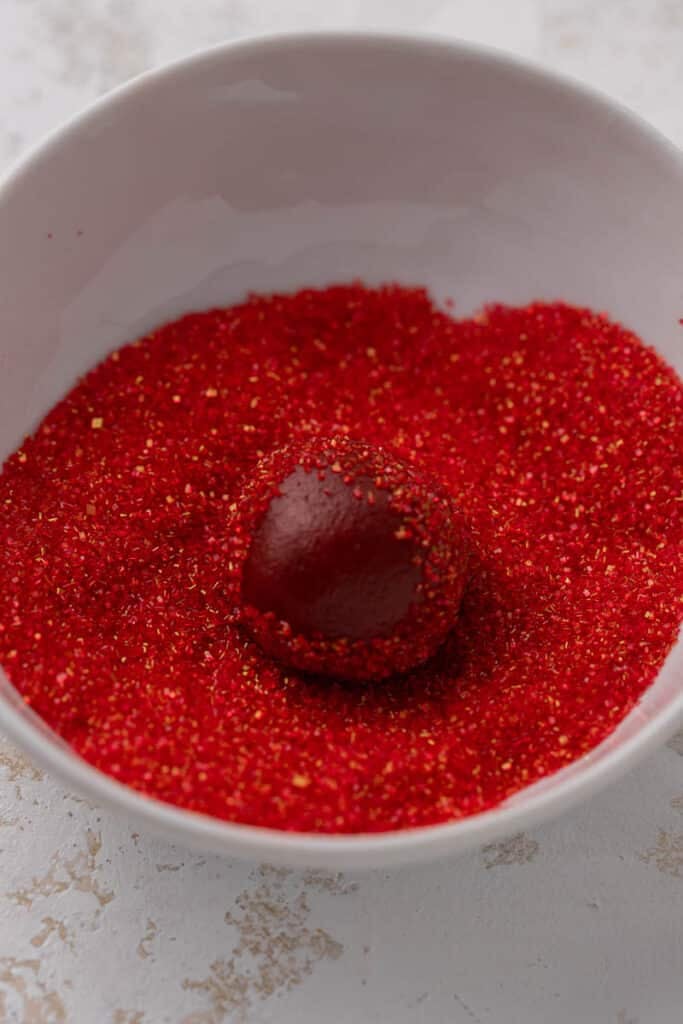
- Using a 1 tbsp, scoop out 18 equally sized cookie dough balls, roll them in between the palm of your hands, roll them in the red sugar, and place them on a baking sheet, then bake.
- Pull the cookie out of the oven and immediately top with a Hershey’s kiss chocolate in the center, press gently.

Looking for more Valentine’s Day recipes? Check out these Valentine’s Day Muddy Buddies /Puppy Chow, Cheesecake swirled red velvet brownies, Chewy Valentine’s Day Crinkle Chocolate Cookies with Sprinkles, and also The best 18 Valentine’s day cookie ideas.

Frequently asked questions – FAQ
Yes. You can freeze baked cookies in an airtight container for up to 2 months. Thaw at room temperature before serving.
These cookies can be stored in an airtight container at room temperature for up to 3 days or in the refrigerator for up to a week. Let them come back to room temperature before serving.
If you don’t have red sanding sugar, you can use regular granulated sugar. Thicker sugar works best. You can also use different colored sanding sugars for holidays like Halloween or Christmas.
They’re buttery with subtle cocoa and vanilla flavors. For a creamier twist, try topping them with a white chocolate Hershey’s Kiss.

Hershey’s red velvet blossoms
Ingredients
- 7 tbsp butter salted or unsalted, softened
- 1/2 cup brown sugar
- 2 tbsp granulated sugar
- 1 tsp vanilla extract
- 1 large egg yolk
- 1/4 tsp red food coloring gel
- 1 cup AP flour
- 1 tbsp cocoa powder
- 1/2 tsp baking powder
- 1/4 tsp salt
- 1/4 cup red sanding sugar
- 18 Hershey chocolate kisses
Instructions
- Preheat the oven to 350F then line a large baking sheet with parchement paper then set aside.
- In a stand mixer, cream the butter, brown sugar, and granulated sugar together until smooth. Add in the egg yolk, the vanilla, and the red food coloring and mix until combined.
- Add in the flour cocoa powder, baking powder, and salt, and mix just until the flour mixture disappears. Using a tablespoon, scoop out 18 equally sized cookie dough balls, roll them in between the palm of your hands, then roll them in the red sanding sugar.
- Place the cookie balls on the prepared baking sheet, and bake for 10 minutes. Place a chocolate kiss in the center of each cookie as soon as you pull them out of the oven, press down gently. Let the cookies cool down on the baking sheet for 10 minutes before transferring to a cooling rack.
Notes
Nutrition
Nutrition information is automatically calculated, so should only be used as an approximation.


Followed the recipe to a T and the dough turned out too “wet” and unrollable. Put them in the freezer and they at least stayed together enough to roll. They completely spread out while baking and were unusable as there was not enough cookie to put the Hershey in.
I’m so sorry that happened, that’s definitely frustrating. If the dough was too wet and they spread that much, it’s usually because the flour was under-measured. If you will give it a chance again, try using a kitchen scale instead of measuring cups to weigh the flour. It’s much more accurate this way and your dough will not be wet again 🙂
This recipe was simple and tasted delicious! It was perfect for our annual cookie swap and looked beautiful on our dessert table. A perfect addition to our Christmas cookie repertoire.
Thank you so much for giving them a try 🙂
Beautiful looking cookies! However, I would just dip the tops of the balls in sanding sugar before baking. I rolled the entire ball in sanding sugar and it’s like eating extremely sweet sand.
Everyone’s preference is different! I’m glad you found what works best for you! 🙂
Made these and they spread flat
Oh no! That usually happens if the butter is too soft or the dough gets a little warm before baking. Next time, try chilling the dough for about 20–30 minutes before baking. It helps the cookies keep their shape better. Hope you’ll give them another try!
I love this recipe, highly recommend!! The dough is incredibly easy to work with, and I didn’t have to adjust anything about the recipe when baking.
Very glad to hear!
I used Hersheys Hugs instead of Kisses. Soo yummy!