This post may contain affiliate links. Please read our disclosure policy.
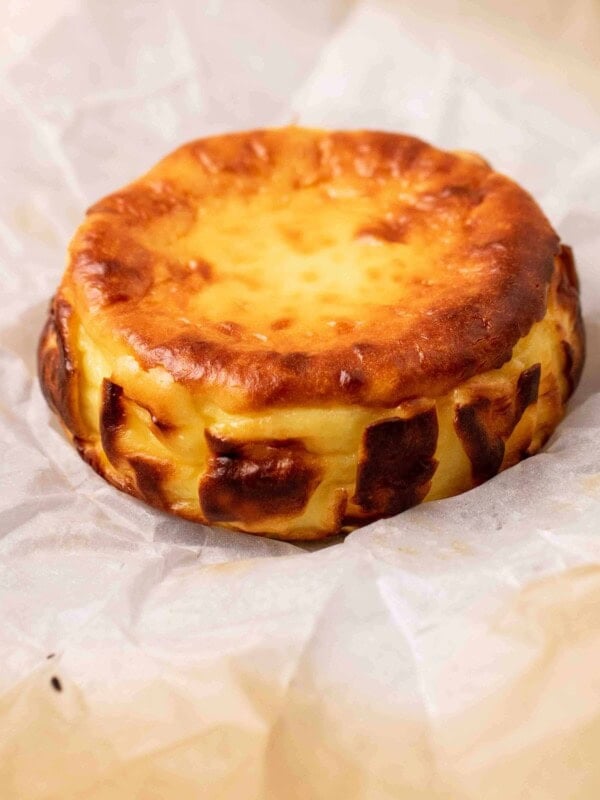
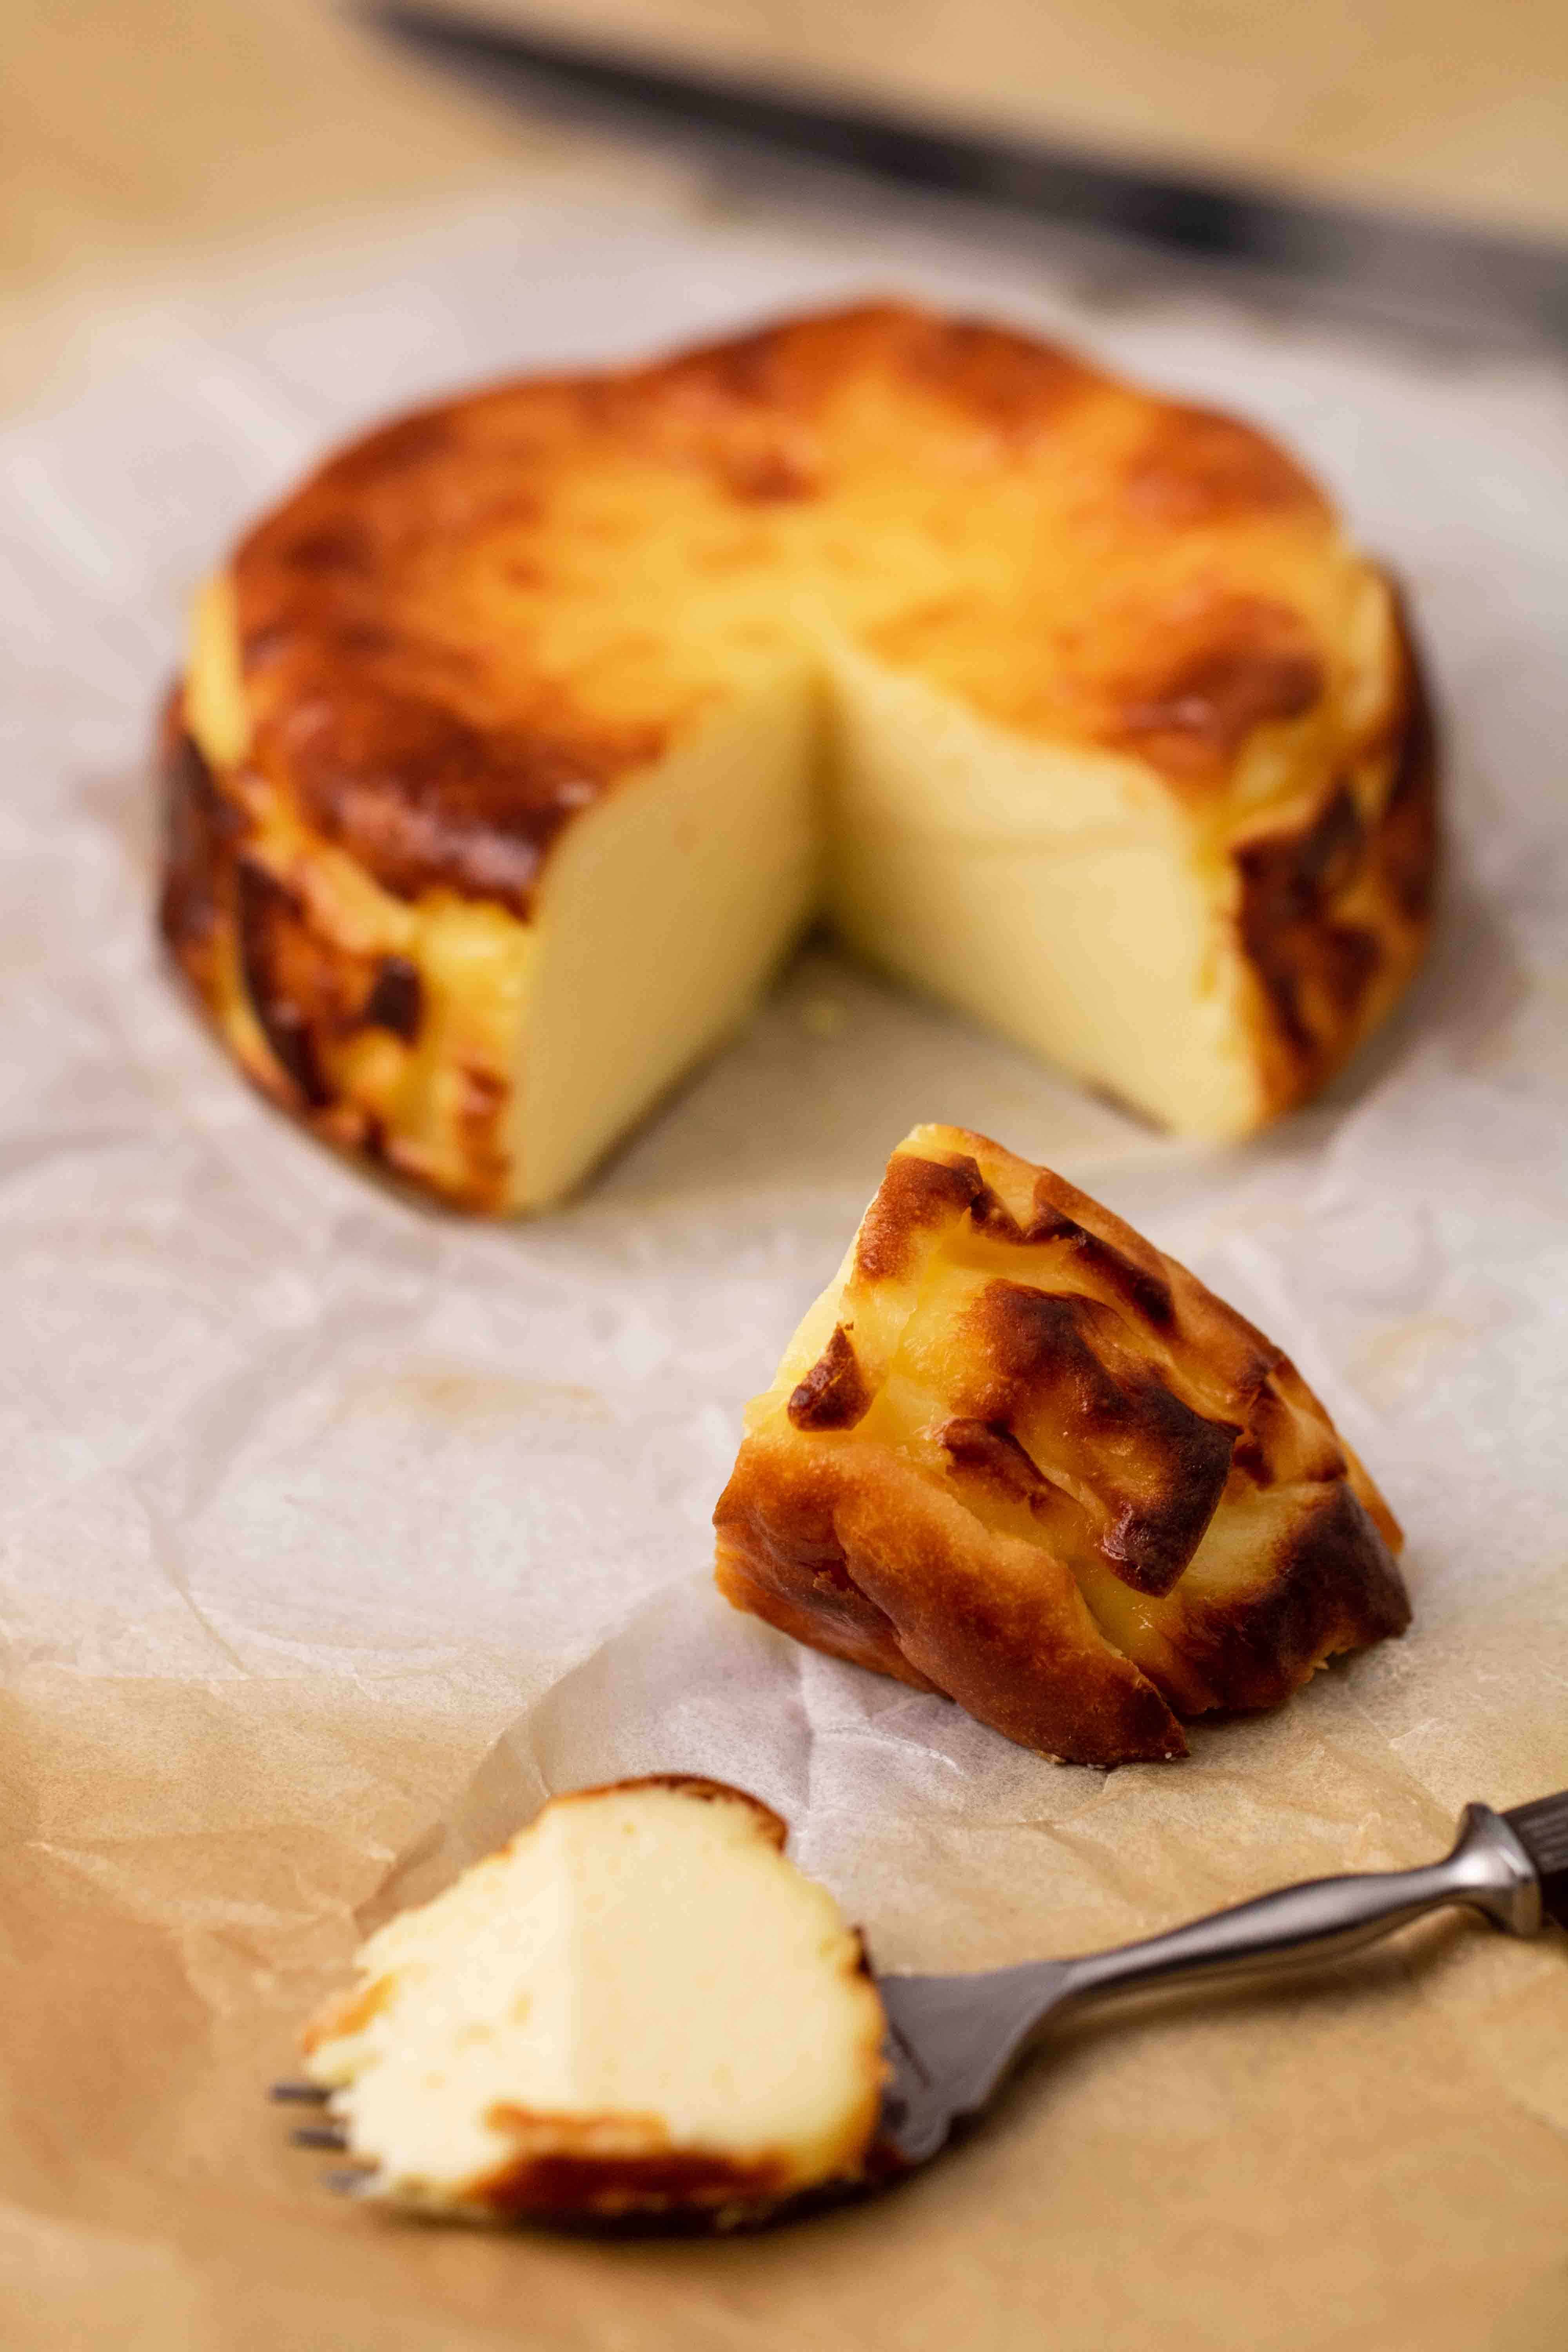
Small burnt basque cheesecake, a classic recipe that you can make time and time again. This creamy 4 inch basque cheesecake is the perfect dessert for one or two, bye bye leftovers and hello fresh baked goods!
This is the best 4-inch single serve burnt basque cheesecake recipe
Say goodbye to leftovers and hello to freshly baked goodness with this creamy, 4-inch burnt Basque cheesecake! Perfect for one or two people, this crustless cheesecake is rich, caramelized, and incredibly easy to make.
Pair it with with a cup of coffee or tea. One of my obsessions right now has to be this Irish coffee on the side of it!
Table of Contents
- What is a Basque burnt cheesecake?
- Why you will love making this cheesecake,.
- Ingredients for this small batch mini burnt basque cheesecake
- How to Make a Burnt Basque Cheesecake for Two
- Frequently Asked Questions – FAQs
- Can I double this recipe?
- What to serve with a basque cheesecake?
- How to store burnt basque cheesecake?
- Can you freeze burnt basque cheesecake?
- Is basque cheesecake supposed to be eaten cold or warm?
- Mini 4 inch burnt basque cheesecake recipe
- 4-inch Mini Burnt Basque Cheesecake for One/Two Recipe
- If you enjoyed this 4-inch basque cheesecake recipe for one or two make sure to pin it again for later!
What is a Basque burnt cheesecake?
A burnt basque cheesecake or as I like to call it, the cheesecake that’s impossible to mess up is a dessert that originated in Spain back in 1990s.
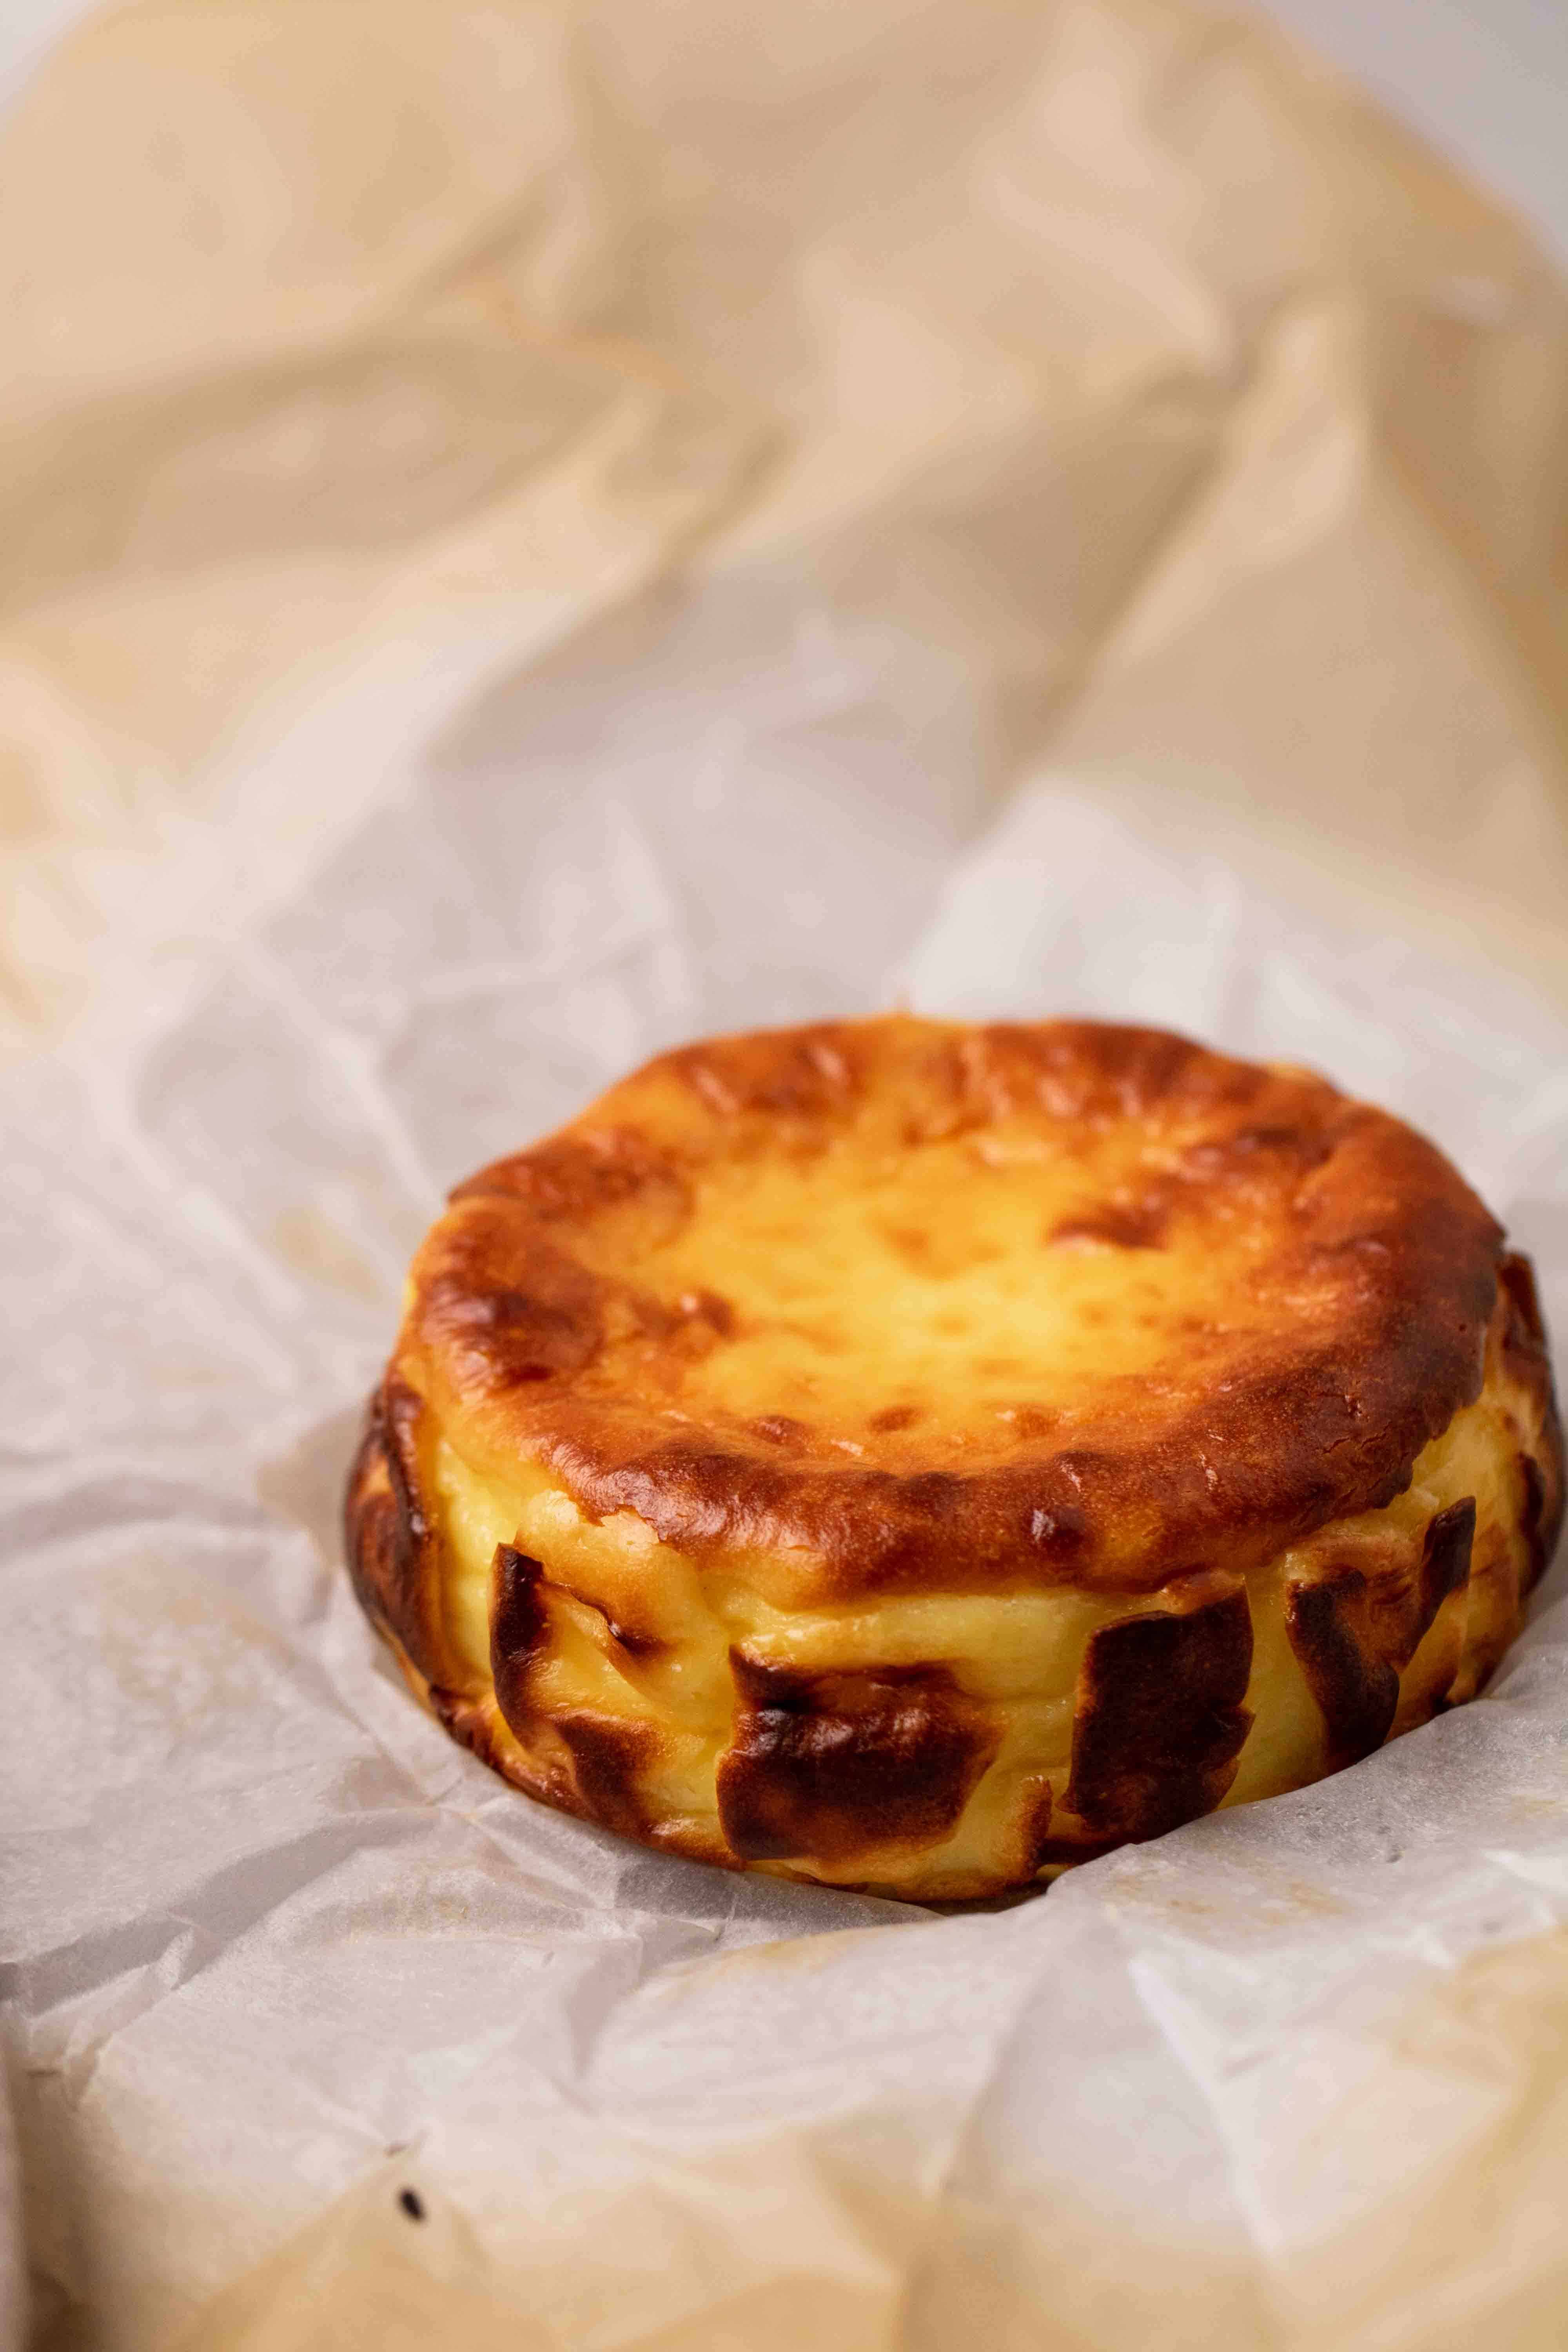
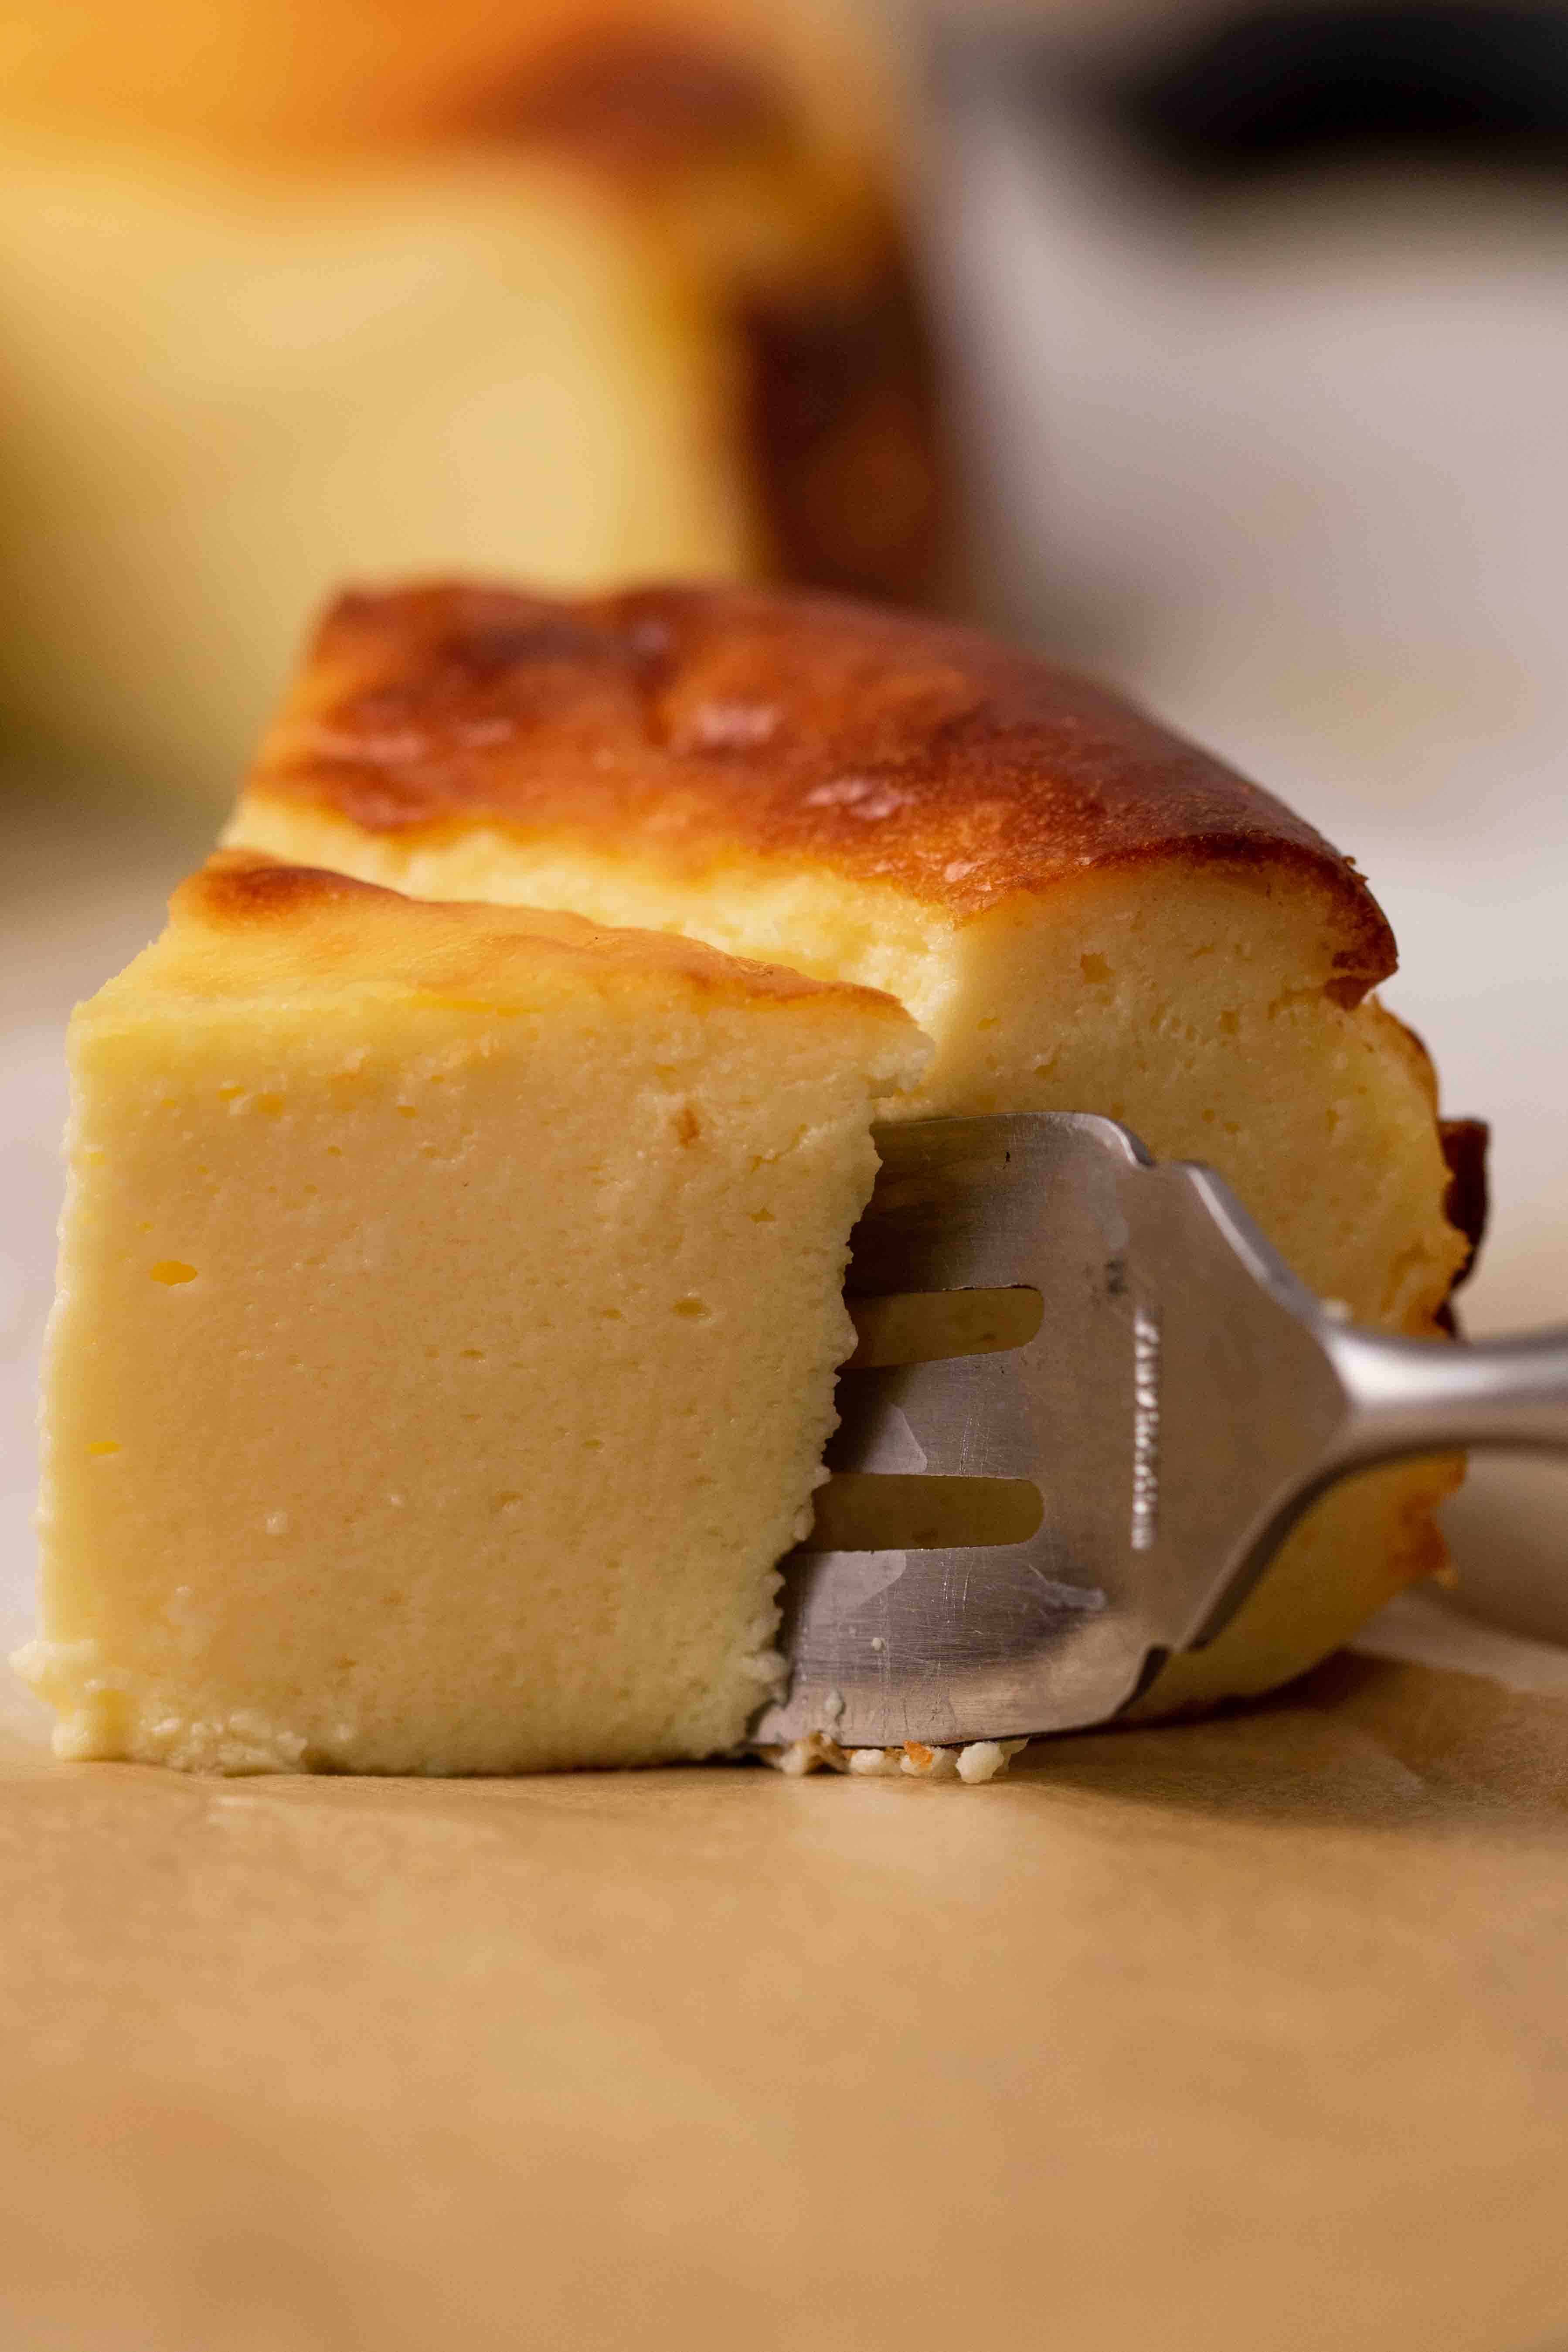
This cheesecake is known for its signature burnt top and caramelized sides, which contrast beautifully with its soft and creamy center. Unlike traditional American cheesecakes, the Basque version skips the crust entirely! Trust me, it doesn’t need one!
The flavor is subtly sweet with a hunt of tanginess, and the caramelization adds depth of flavor that is so hard to resits. It’s rustic, elegant, and effortless all at once!
Want to read more about this glorious dessert checkout taste cooking and devour San Sebastian posts.

How does burnt basque cheesecake taste like?
The first time I tried a burnt basque cheesecake, I immediately thought of Cannelés. It doesn’t taste like a Cannelés per se but it resembles it in the baking process as well as in that caramel-ly attribute.
Burnt Basque cheesecake is a cremay, curtard-like dessert with notes of rich caramel from its deeply browned top and edges. The contrast between the silky center, and slightly firmer. caramelized texture of the exterior is pure magic.
The Burnt top adds a subtle bitterness, balancing the richness much like the crusty edges of a toasted marshmallow. Its caramel-like flavor, achieved without any actual caramel, is also mind-blowing! It might just make you forget traditional cheesecakes entirely!
Why you will love making this cheesecake,.
When it comes to mini cheesecakes, I’m the queen. Here is exactly why I think you should give this one a try!
- Perfect size for two: No more leftovers! This small cheesecake serves two perfectly.
- Foolproof recipe: No crust, no water bath, just mix, bake, and enjoy!
- Rich and creamy: Every bite melts in your mouth, balances by the slightly burnt top.
- Quick to make: Simple ingredients and minimal prep time make this recipe a breeze.
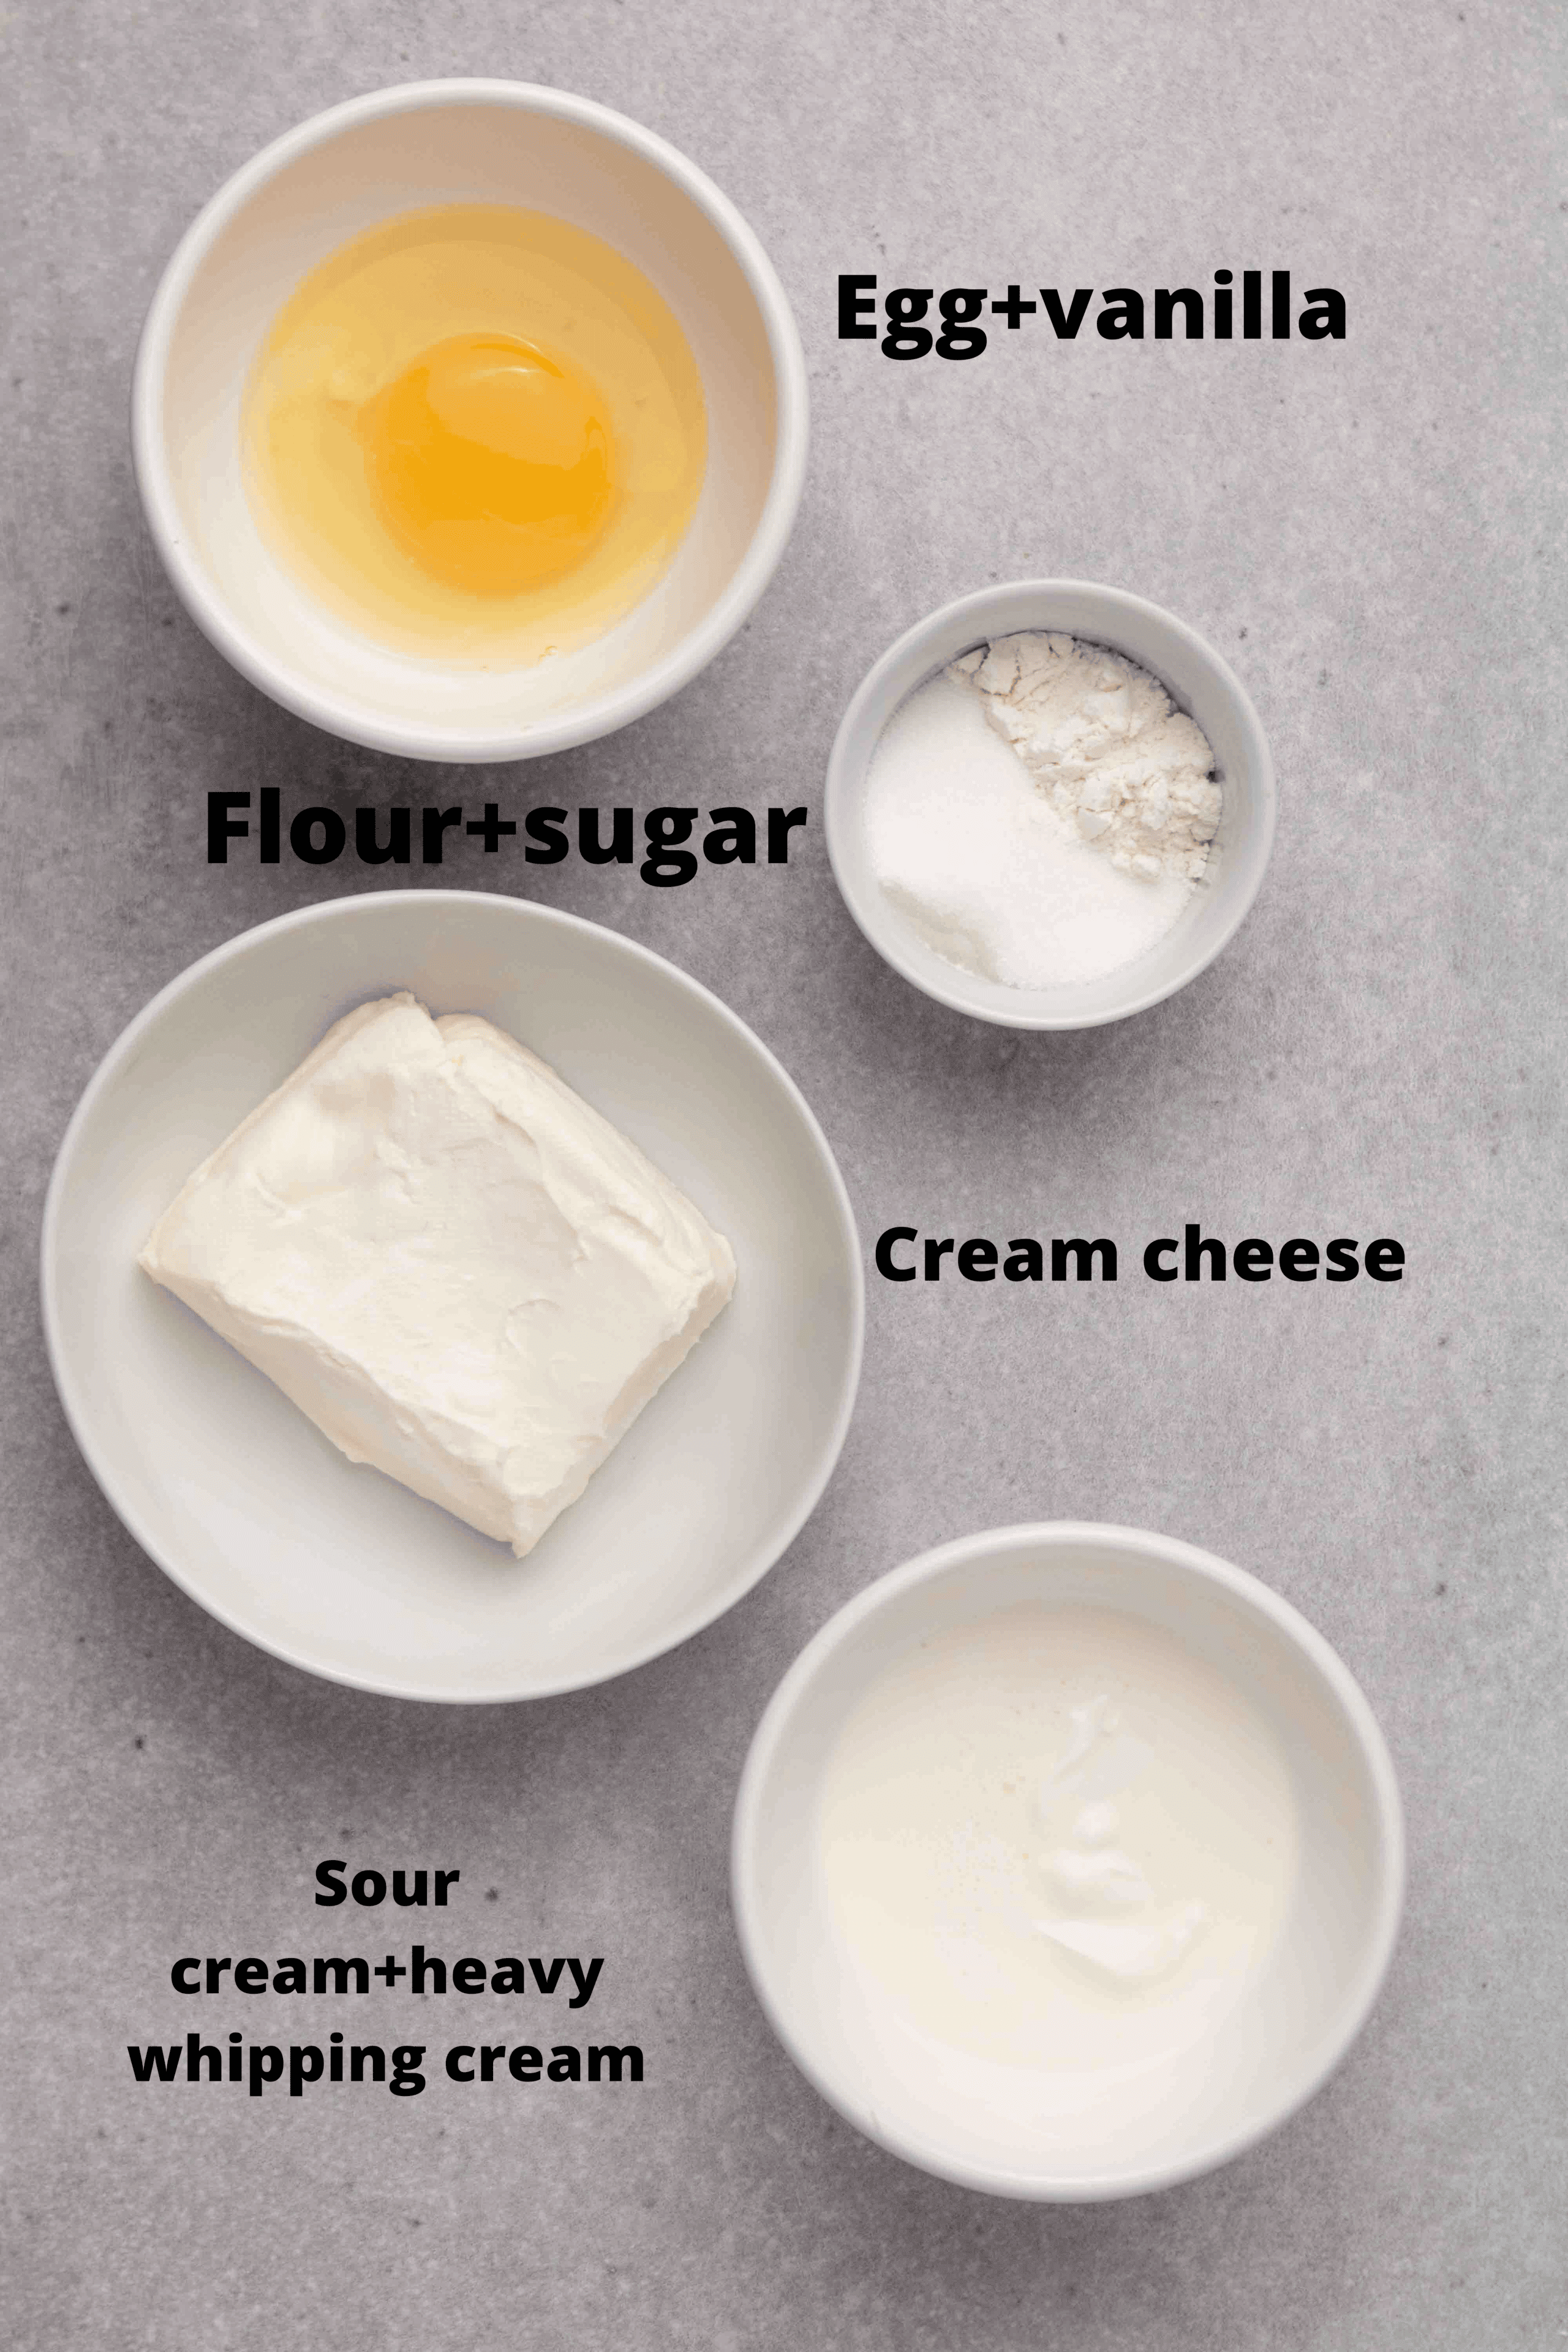
Ingredients for this small batch mini burnt basque cheesecake
Here are the ingredients you will need to make your own mini basque cheesecake for one or two, for the detailed recipe and ingredient measurements make sure to go to the recipe card:
- Cream cheese– Use full fat cream cheese for this recipe. Any brand works.
- Heavy whipping cream– The heavy cream will give more richness to the burnt cheesecake while keeping it soft and creamy.
- Sour cream– The sour cream is another component that will keep the cheesecake moist.
- Egg– You will need one large egg at room temperature for a smooth batter.
- Sugar– A little sugar goes a long way in this recipe.
- Vanilla– The vanilla extract will brighten the flavor of your basque cheesecake, you can also use vanilla bean paste for a more elevated look and flavor.
- Flour– A little all purpose flour to make sure that the mini cheesecake is stable enough.
Make sure that all your ingredients are at room temperature so that the cheesecake batter is smooth and creamy before baking it.
How to Make a Burnt Basque Cheesecake for Two
Here is how you can make your own homemade small burnt basque cheesecake recipe:
- Set your oven to 500°F (260°C) to achieve that classic burnt top. If your oven doesn’t go this high, 450°F works too, though the caramelization may be lighter and baking time slightly different.
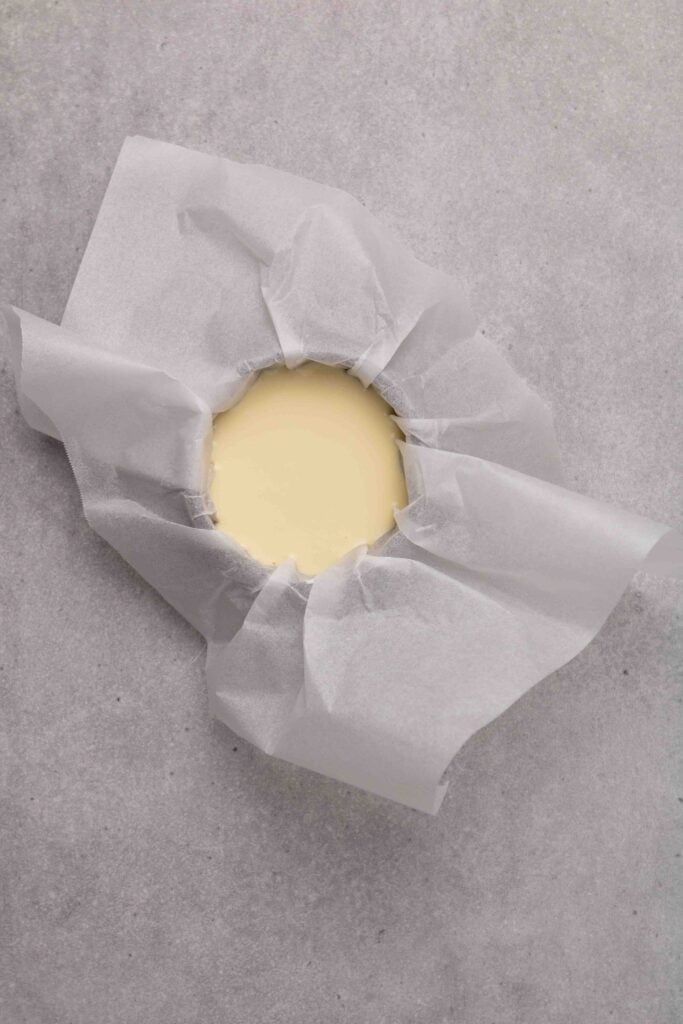
- Line a 4-inch round cheesecake pan or springform pan with parchment paper, ensuring the paper extends above the edges. This makes it easy to remove the cheesecake later.
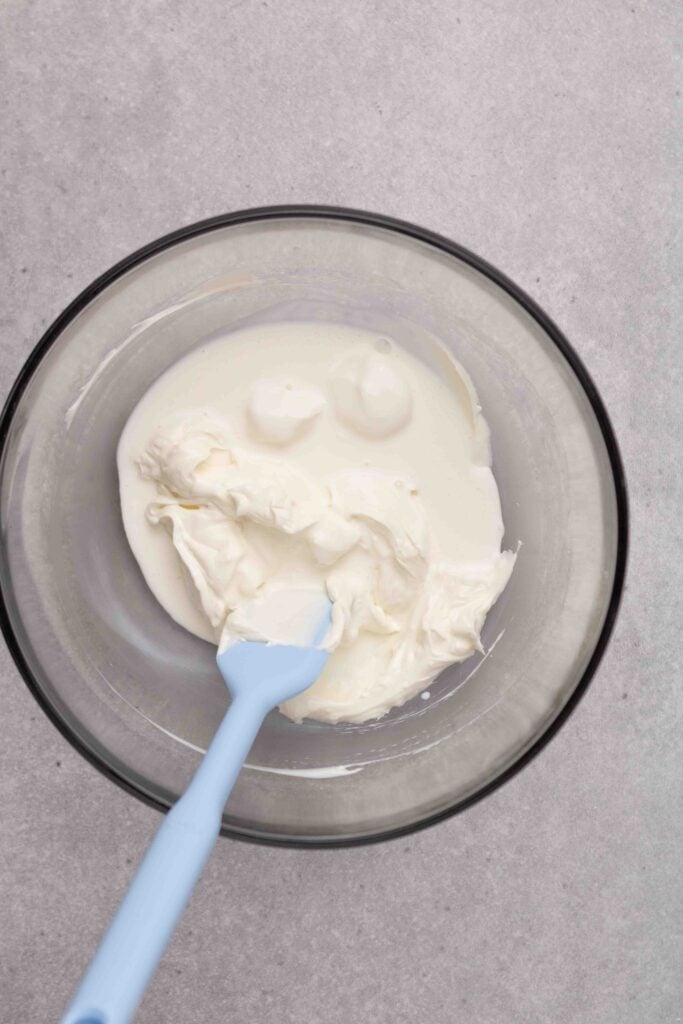
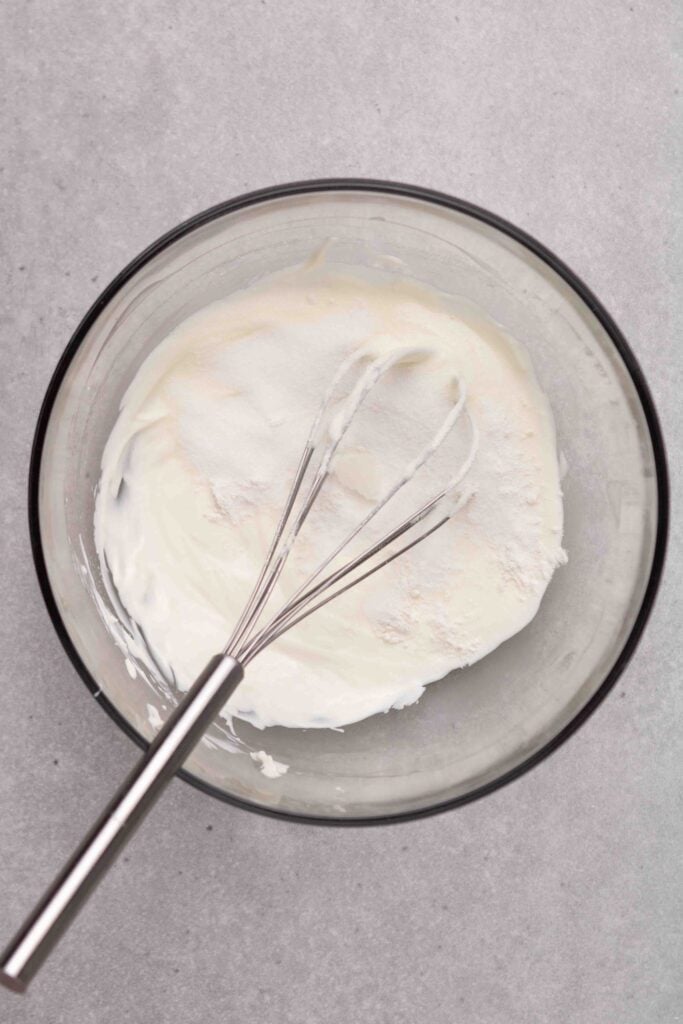
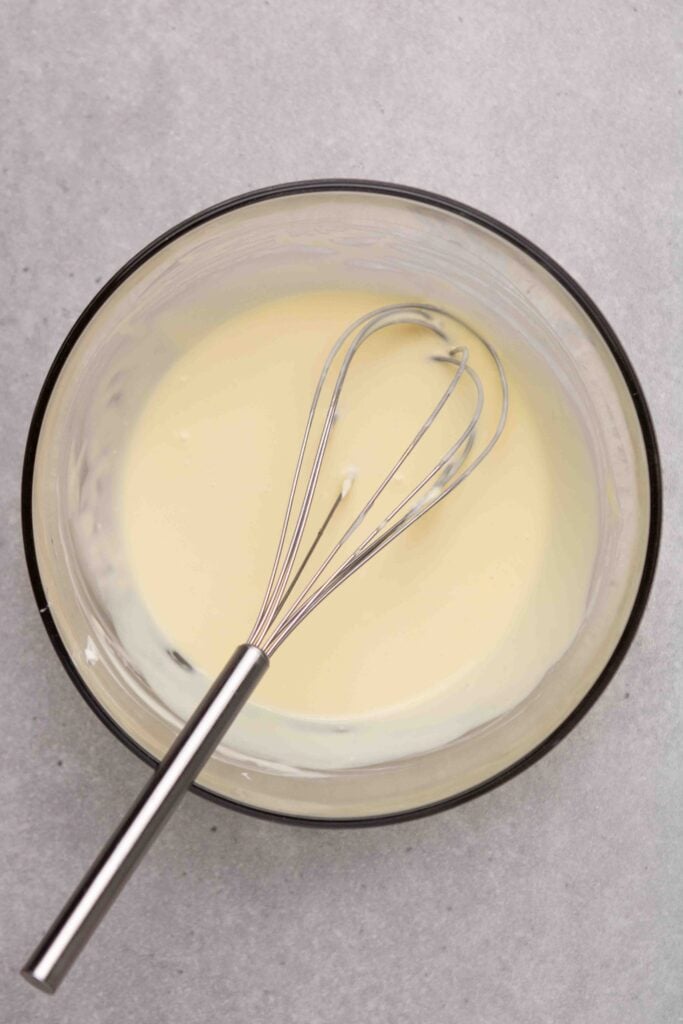
- Mix the wet ingredients and sugar together in a mixing bowl making sure that they are all at room temperature then add in the flour and mix, make sure to scrape the sides as you go. You can mix everything using a hand mixer on low speed or by hand using a rubber spatula and a whisk. I find that since this recipe uses such a small amount of ingredients, a stand-mixer doesn’t work as well.
- Pour the cheesecake batter into your parchment lined baking sheet.
- Reduce the heat of the oven to 450F then bake the cheesecake for 20 minutes.
- Let your mini burnt cheesecake cool before slicing into it and enjoying your personal sized burnt basque cheesecake!
Tips for Success
- Room Temperature Ingredients: Always use room-temperature cream cheese and eggs for a silky, lump-free batter.
- Your Oven Needs to Be Very Hot: Preheat your oven to 500°F to create the signature caramelized top. When placing the cheesecake in, do it quickly to avoid losing heat.
- Position the Oven Rack: Place the rack at the top to position the cheesecake in the hottest part of the oven for optimal browning.
- Place the Pan Deep in the Oven: Position the cheesecake closer to the back of the oven to maximize exposure to heat. Adjust based on your oven’s heat distribution.
- Parchment Paper Hack: Crumple parchment paper before lining the pan to make it easier to fit snugly.
- Watch the Bake Time: Over baking leads to dryness. Stop baking when the center is still slightly wobbly—it will set as it cools.
With these tips, you’ll achieve a perfectly creamy, caramelized cheesecake every time!
Frequently Asked Questions – FAQs
Is lining the mini cheesecake tin with parchment really important?
Absolutely!
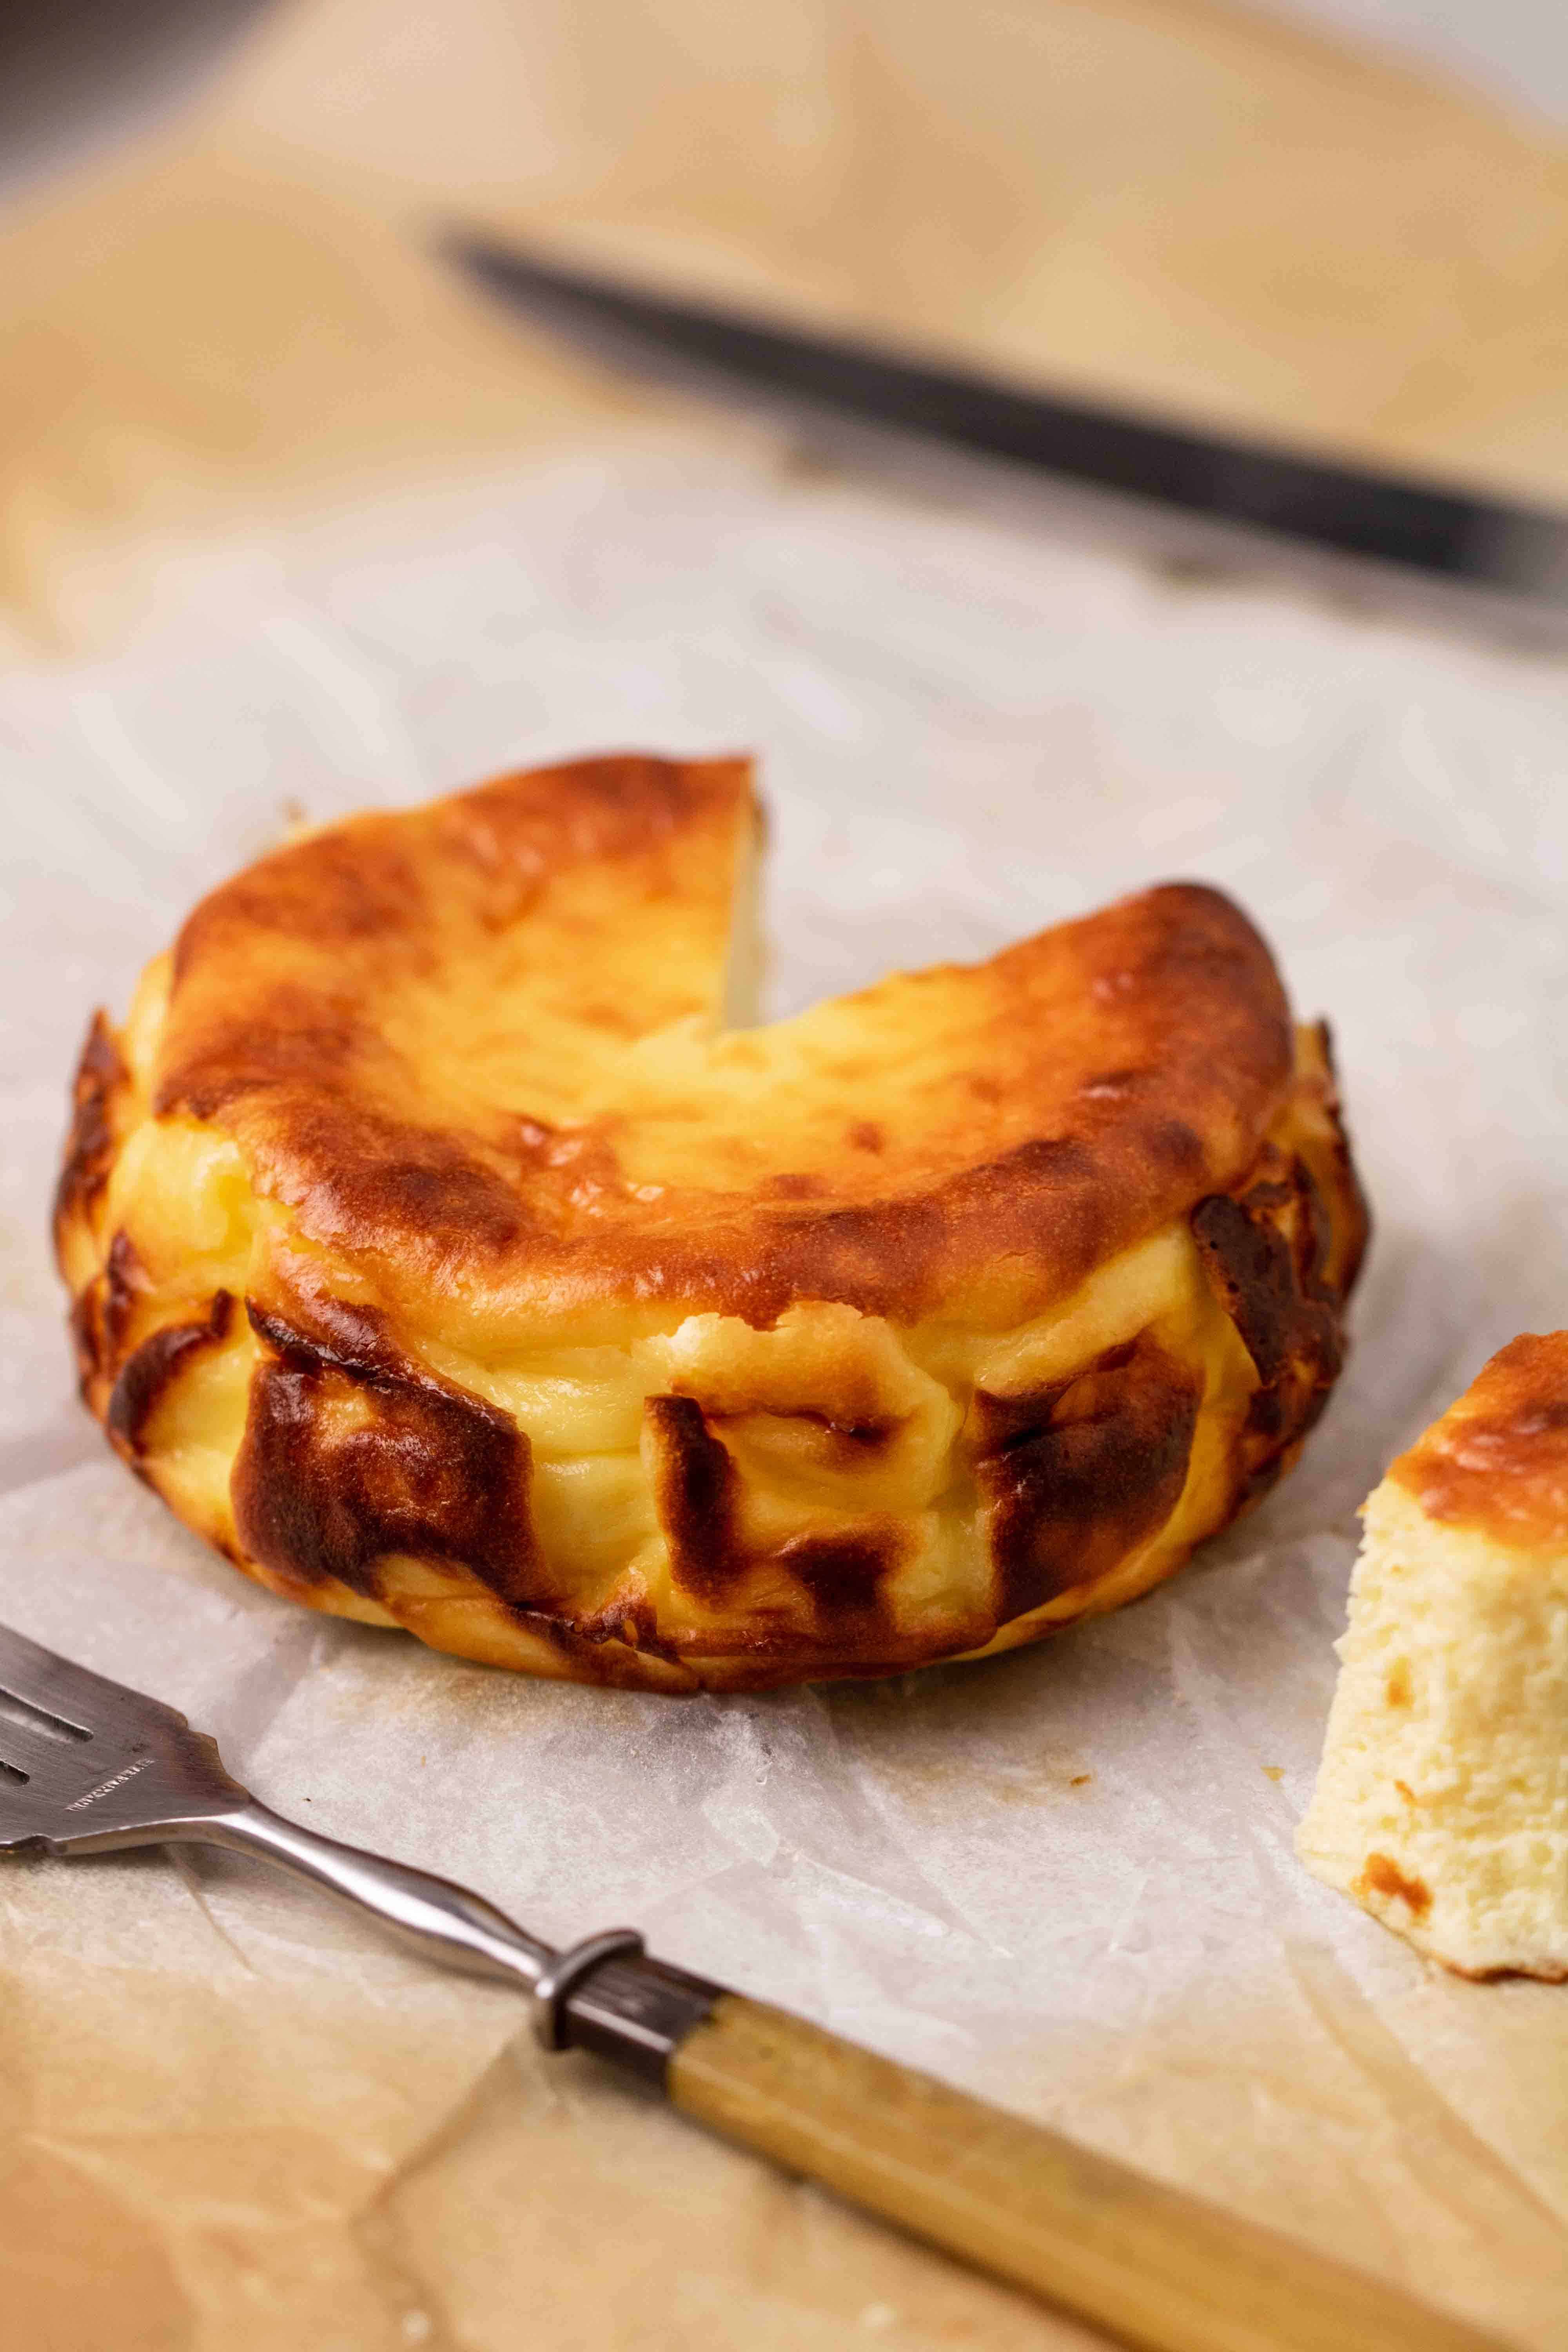
That’s how you will be able to pull out your cheesecake and most importantly the parchment paper is what will give your cheesecake those iconic crinkled burns on the side!
Can I make this cheesecake ahead of time?
yes! This mini burnt cheesecake recipe is even better when made ahead of time and chilled in the refrigerator overnight. Store it in an airtight container in the fridge for up to 3 days.
Why should I preheat the oven to 500F?
Making sure that your oven is really hot before placing your cheesecake in is a must. It will allow the cheesecake to brown on top and around the sides without burning the center.
In this case, we heat up the oven to 500F then reduce the heat to 450 once we put our small basque cheesecake in. I have made this recipe so many times and this is the setting that works best!
Can I double this recipe?
I haven’t doubles this recipe but if you are looking for feed a crowd, try my 6 inch burnt basque cheesecake recipe! It’s just as delicious and is perfect for a crowd!
What to serve with a basque cheesecake?
This cheesecake is delicious on its own but pairs beautifully with fresh berries, a drizzle of honey, or a dollop of chipped cream. If you want to feel that instagrammy vibe too, then you can slice the cheesecake, serve it on it’s side, and drizzle warm chocolate ganache on it before serving.
How to store burnt basque cheesecake?
You can place your basque cheesecake in an airtight container in the fridge for up to 3 days.
Can you freeze burnt basque cheesecake?
Yes you can!
You can either pre slice your cheese cake and then wrap each slice individually in plastic wrap then freeze of freeze the whole thing in an airtight container for up to one month.
When you’re ready to enjoy it, place it in the fridge to thaw overnight. Pull it out for 20-30 minutes so that it gets to room temperature then enjoy it!
Is basque cheesecake supposed to be eaten cold or warm?
Burnt basque cheesecake is supposed to be enjoyed at room temp. If you decide to store it in the fridge pull it out about 20-30 minutes before you’re ready to devour it for the ultimate culinary experience.
I, on the other hand, like my cheesecake on the harder and more dense side so I like to have it right out of the fridge. My sister likes it about 30 minutes to an hour after baking. She says that it tastes like a custard flan dessert.
So try it in different ways and see which way you like best!
Mini 4 inch burnt basque cheesecake recipe
4-inch Mini Burnt Basque Cheesecake for One/Two
Equipment
Ingredients
- 4 oz cream cheese at room temperature
- 3 tbsp heavy whipping cream at room temperature
- 1 tbsp sour cream at room temperature
- 1 egg
- 1/4 tsp vanilla
- 2 tbsp sugar
- 1.5 tsp flour
Instructions
- First start by placing your oven rack at the top of the oven then preheat your oven to 500 degrees F for at least 15 minutes, then line the inside of the 4-inch cheesecake pan with parchment paper. Check the notes for a detailed explanation on how to line it perfectly.
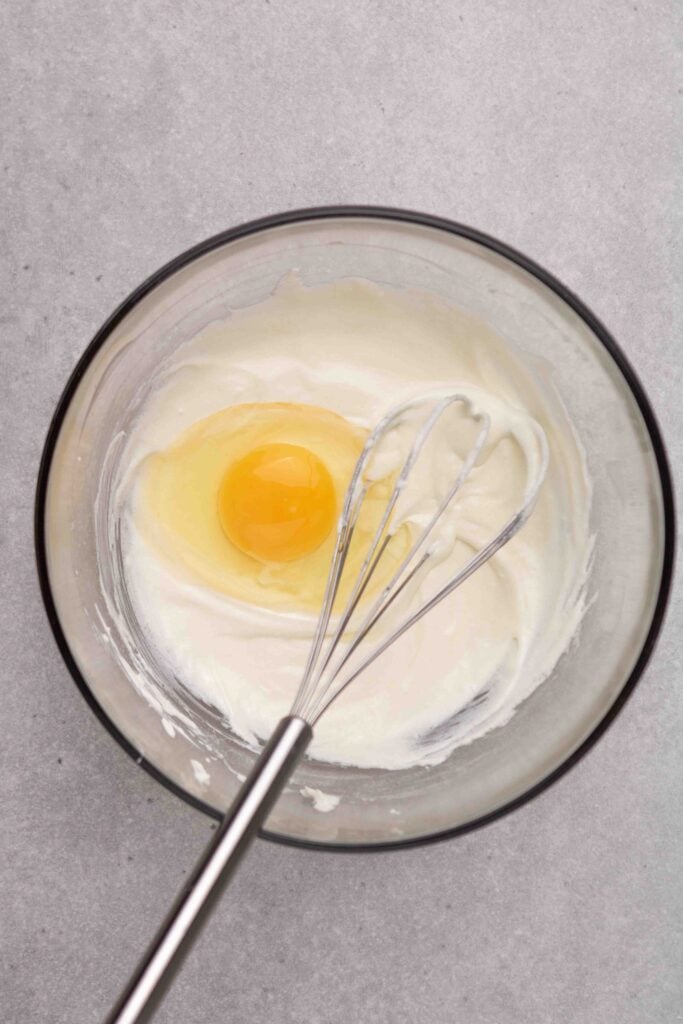
- In a medium bowl, star by mixing the softened cream cheese, heavy whipping cream, and sour cream together until combined. Add in the egg, the vanilla, and the sugar and whisk one more time until combined. Lastly, add in the flour and mix one last time.
- Pour the cheesecake batter in the prepared cheesecake tin and place in the oven, making sure to place it in the top rack all the way in the back of the oven, this is where the highest temperature will be, and where your cheesecake will burn the best. Reduce the heat to 450F and bake for 20 minutes.
- Pull the cheesecake out of the oven and let it cool in the pan for 20 minutes before lifting it from the parchment paper and setting it on a cooling rack. You can enjoy your cheesecake once it has cooled to room temperature or you can place it in the fridge if you prefer a more set cheesecake.
Notes
- To Line your 4-inch cheesecake pan perfectly, remove the bottom of the pan and place it on your precut sheet of parchment paper.
- Press the removable bottom and the parchment paper back into the cheesecake pan ring, tighten the ring and press the parchment paper around the sides of the pan to fit.
- Re-open the cheesecake pan ring, and gently remove the bottom part and the parchment paper. Place the removable bottom back into the 4-inch cheesecake pan, tighten the ring, and place the parchment paper mold into the cake pan. Press the parchment down to fit perfectly.
Nutrition
Nutrition information is automatically calculated, so should only be used as an approximation.

If you enjoyed this 4-inch basque cheesecake recipe for one or two make sure to pin it again for later!

I had to give this a try since I never had tried it before, the taste is really good, it’s like a cheese cream flan and a cheese cake had a baby. 😍
That is honestly the perfect description of it 😍 It really is like flan and cheesecake combined into one creamy dessert. So glad you gave it a try and enjoyed it!
Freakin’ amazing! Creamy, not too sweet- just perfect! I am making this for a dinner party but don’t want to change a thing! So I’m making it multiple times so I know it will be – just perfection!!! Thanks so much! We love it!
Very glad to hear that enjoyed it so much! That makes me so happy!
Thank you for this recipe. Its a keeper for sure.
Hi!! I am a mom of 5 boys, in Belgium, Europe.
Here, we don’t really eat or like cheese cake, it’s not so much an habit.
But i do love them and try to bake THE one i will love since so many years (you can’t find them in store or bakery…).
And this is it! This is the perfect one..
First of all, i made two of them (one for me and one for my husband, and tho he doesn’t like it). The fact it comes in tiny shape is so perfect so i don’t need to eat cheesecake 1 week in a row!
Second of all, it is PERFECT and so easy!
The texture is creamy, the taste is balanced and sweet but not too sweet (American bakery is often way to sweet for us here in Europe), it is PERFECT!
Thank you so much for sharing.
I think it is gonna be my « go to » dessert each times i will have a sweet tooth to satisfy pretty quickly!
Xoxo from Belgium…
This means a lot to me, thank you so much!!
Tried this using vegan alternatives as I can’t eat dairy (still added the egg) and it turned out soo good! very happy with this recipe:)
I’m glad your adjustments turned out well!
What they do to line the tin in the original recipe is to wet and crumple up the greaseproof paper, open it out, give it a shake to remove drops and place on base and sides of tin. It fits much bettter than dry.