This post may contain affiliate links. Please read our disclosure policy.
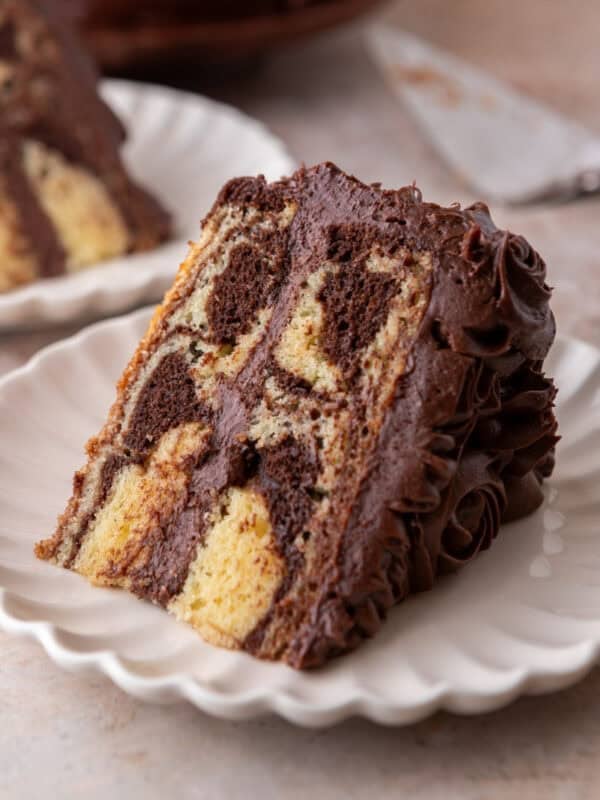
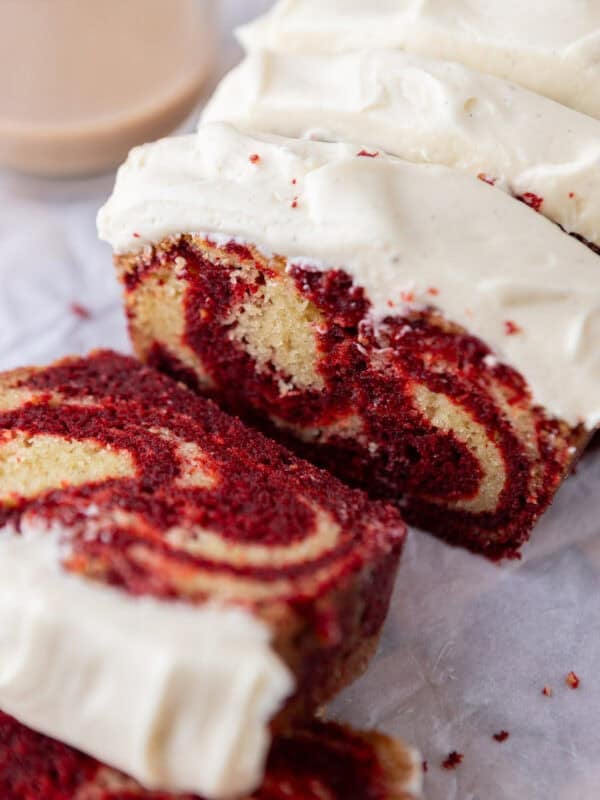
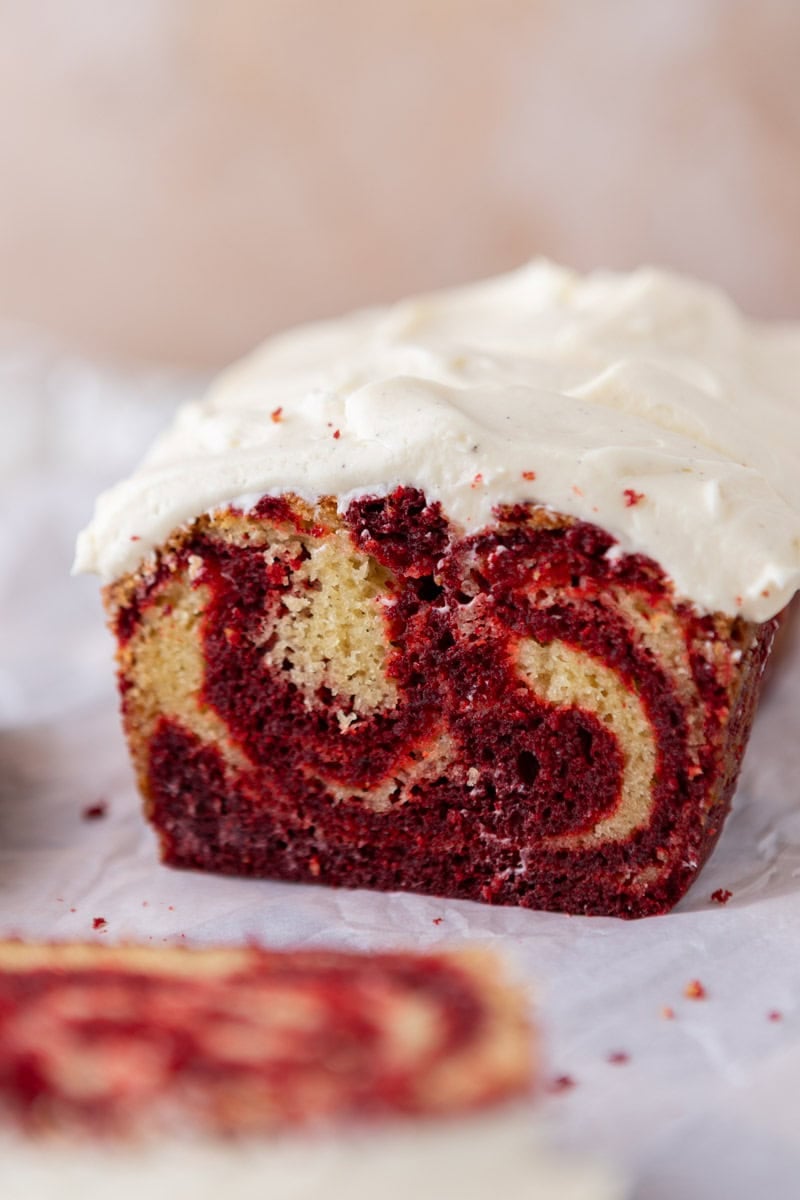
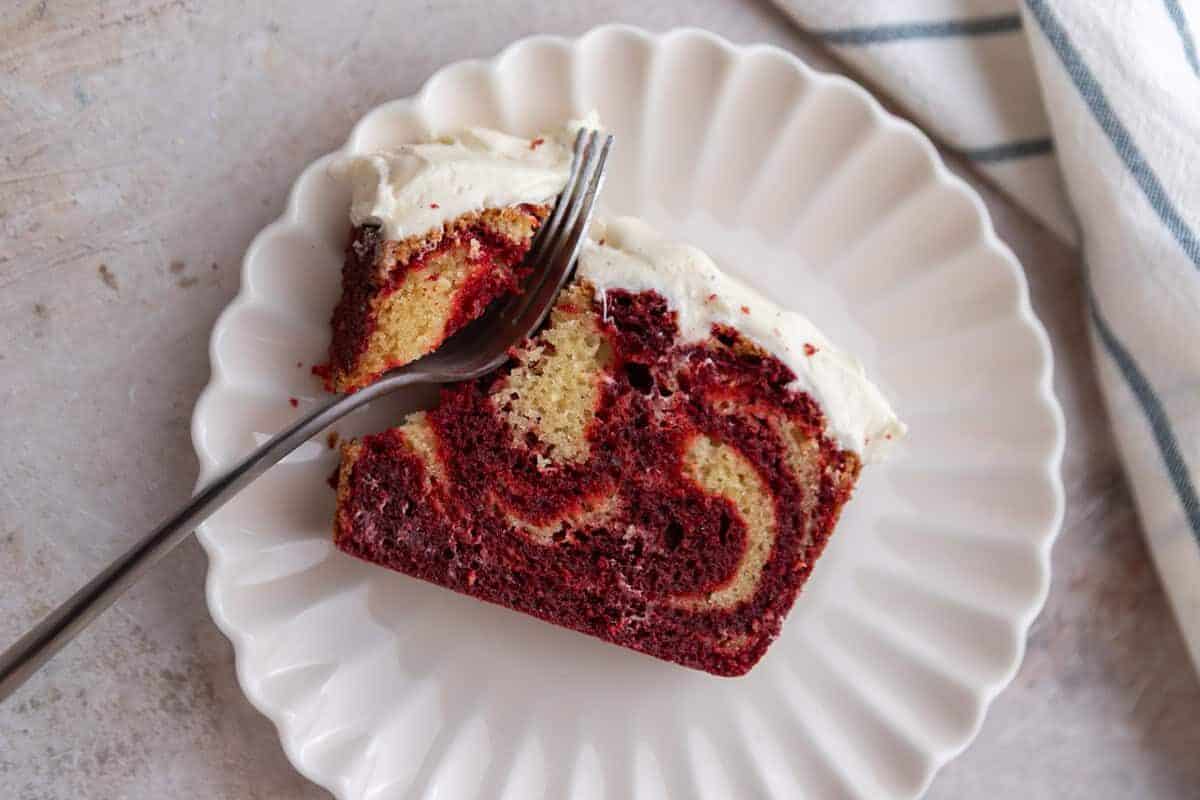
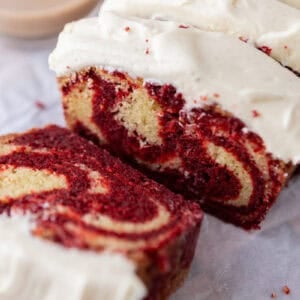
If you love red velvet and you love a good loaf cake, this red velvet marble loaf cake is about to become your new favorite thing to bake. It’s dense, buttery, and almost pudding-like in the center, exactly what you’d expect from a NY-style bakery loaf, but with those gorgeous red velvet swirls running through every slice.
And then we top the whole thing with a tangy cream cheese frosting that’s thick, swoopy, and not overly sweet. It’s the perfect match for the subtle cocoa in the red velvet. This is a loaf cake that looks like it came from a bakery window, but you’re making it at home with a bowl and a whisk.
Since you’re here, I know you will also love these red velvet brownies, my viral red velvet edible cookie dough, and this red velvet snack cake recipe.
Let’s Chit Chat
I’ve been on a loaf cake kick lately, and honestly? I think loaf cakes are the most underrated format in baking. They’re easier than layer cakes, they slice beautifully, and there’s something about a thick slab of dense cake that just hits different than a fluffy slice of layer cake.
This red velvet marble loaf cake came from me wanting to combine two things I love: the drama of red velvet and the comfort of a buttery pound-style loaf. I tested this recipe multiple times to get the fat ratio right. Too much butter and the cake was heavy but dry the next day. Too much oil and you could taste it. The combination of both melted butter plus oil plus sour cream is what finally nailed that bakery texture.
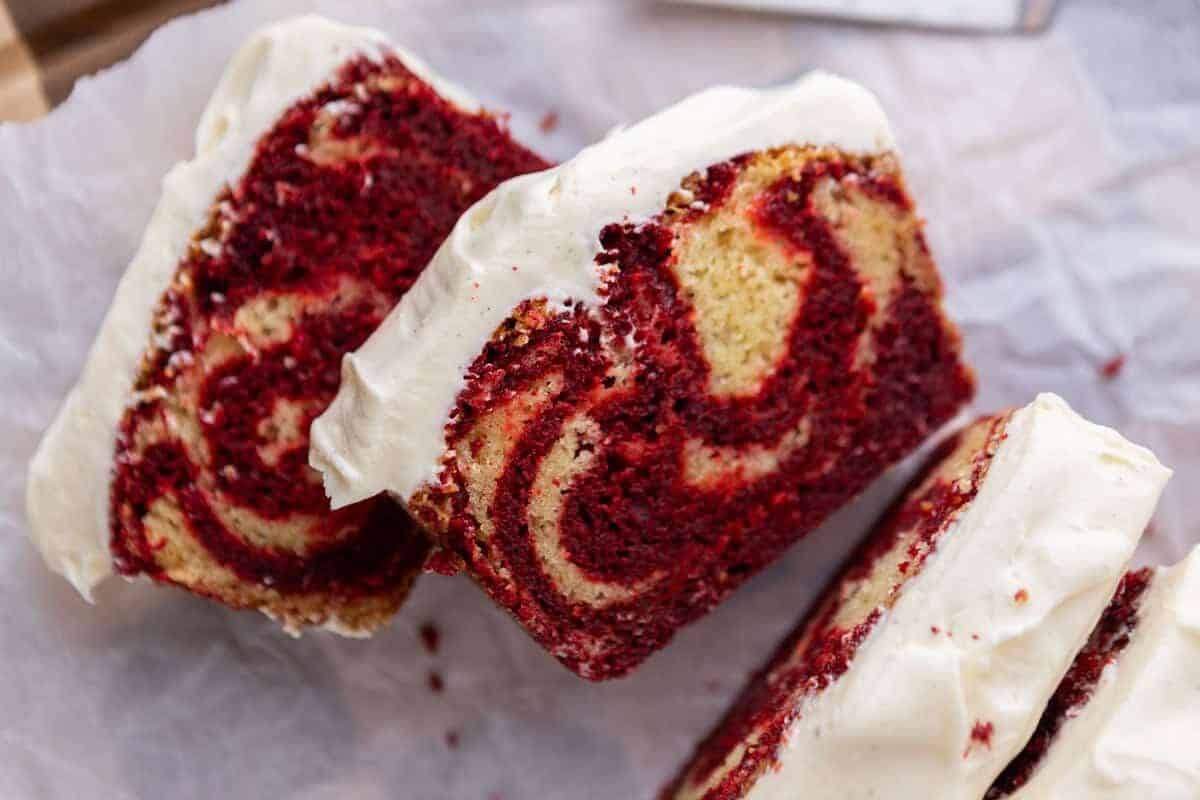
The marbling is so satisfying to look at when you cut into it. Every slice is different. And the sour cream cream cheese frosting on top? Kyle literally stood in the kitchen eating frosting off the knife while I was trying to photograph this thing. That’s how you know it’s good.
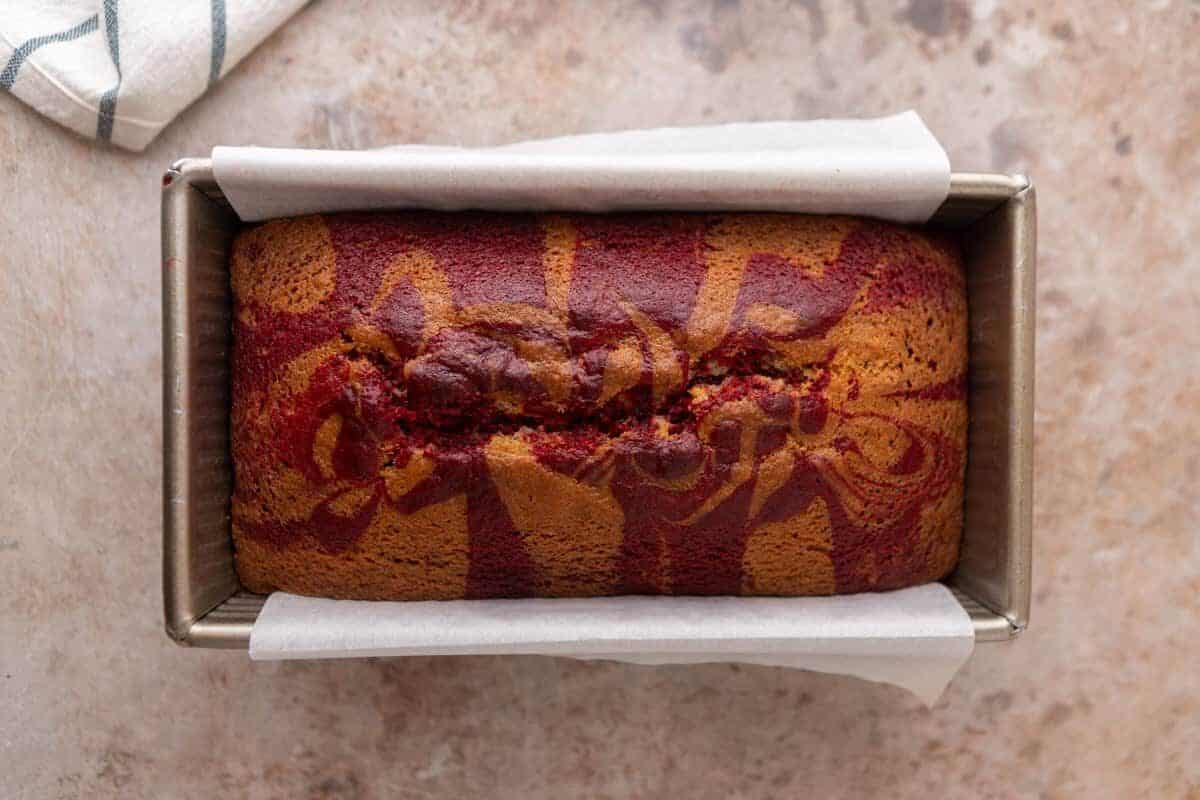
Table of Contents
- Why This Red Velvet Marble Loaf Cake Is So Moist
- Ingredient Notes
- How to Marble a Loaf Cake (Without Turning It Pink)
- How to Get a Perfect Dome (and Avoid a Sunken Middle)
- The Cream Cheese Frosting
- How to Store This Red Velvet Marble Loaf Cake
- Tips for the Best Red Velvet Marble Loaf Cake
- Frequently Asked Questions
- Red Velvet Marble Loaf Cake with Cream Cheese Frosting Recipe
Why This Red Velvet Marble Loaf Cake Is So Moist
This isn’t just a “throw it together and hope for the best” situation. Every ingredient choice in this recipe has a reason behind it:
- Melted butter instead of creamed. Creaming butter with sugar whips in air, which makes cake light and fluffy. We don’t want that for this specific loaf cake. Melting the butter coats the flour proteins directly, which keeps the crumb tight, dense, and super moist. Think pound cake texture, not birthday cake texture.
- Vegetable oil. Butter solidifies when it cools, which is why all-butter cakes can taste dry the next day. Oil stays liquid at any temperature. So the cake stays soft and moist even straight from the fridge. Using both gives you butter flavor with oil texture.
- Sour cream. This is doing triple duty. The fat adds moisture. The acid activates the baking soda for lift. And the protein helps build structure so the cake holds together despite all that fat. It also makes the crumb incredibly tender.
- Extra egg yolk. Yolks are pure fat and natural emulsifiers. Adding an extra yolk (without the white) gives you more richness and moisture without the extra water and protein from the white that would lighten the crumb.
- Low and slow baking at 325°F. Loaf pans are deep and narrow. At 350°F or higher, the edges set into a crust before the center bakes through, which gives you a cracked top and a gummy middle. At 325°F, the whole cake bakes evenly from edge to center, which is how you get a smooth dome instead of a crater.
Ingredient Notes
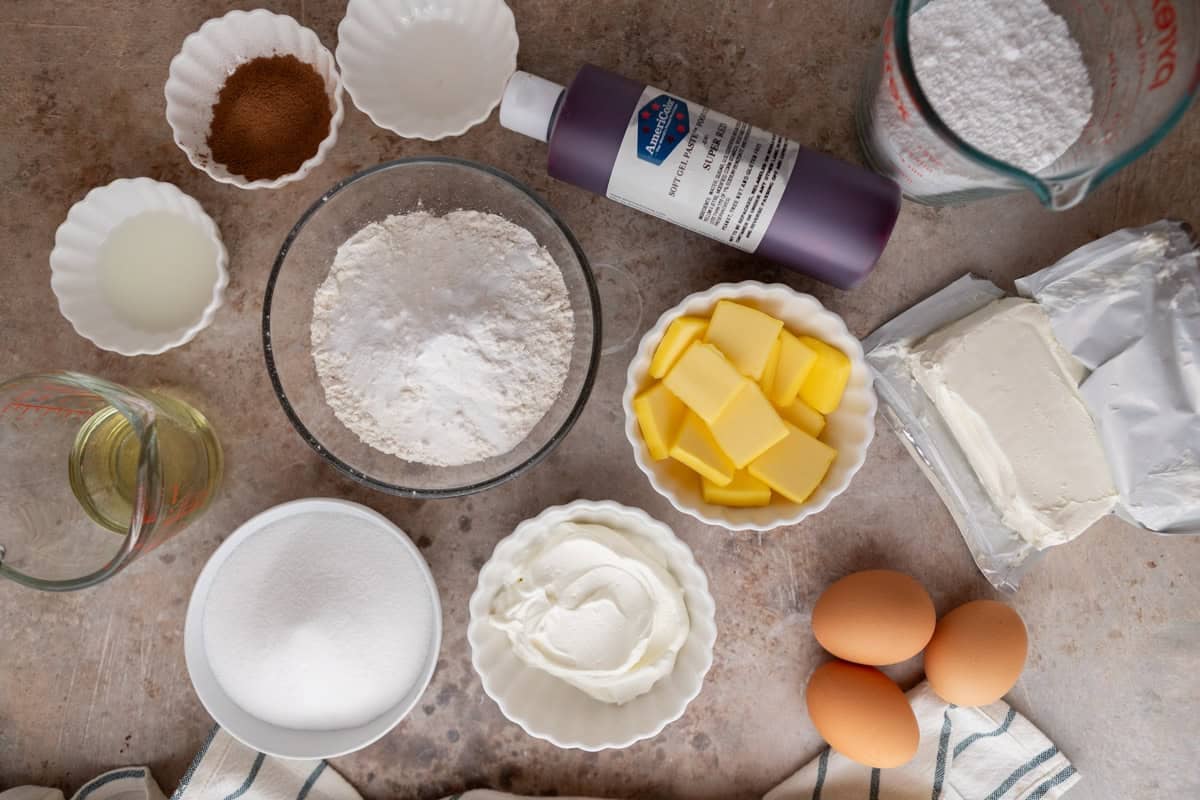
- All-purpose flour: Don’t use cake flour here. Cake flour would make the crumb too delicate and airy. All-purpose gives you the slightly chewy, dense structure you want in a loaf cake. If you can, weigh your flour, cup measurements can vary by up to 30g depending on how you scoop.
- Granulated sugar : Sugar does more than sweeten, it’s hygroscopic, meaning it pulls moisture from the air and holds onto water in the batter. More sugar means a more moist cake. It also tenderizes by competing with flour for water, which means less gluten development.
- Unsalted butter : Melted, not softened. This is important. You’re melting and whisking, not creaming. The melted butter coats the flour instead of aerating it.
- Vegetable oil : Any neutral oil works, canola, avocado, sunflower. Just not olive oil. You don’t want that flavor competing with the vanilla and cocoa.
- Full-fat sour cream : Full-fat only. Reduced fat sour cream has added starches and gums that will change the texture of your cake. Room temperature so it blends smoothly into the batter.
- Eggs + extra yolk: 2 whole eggs and 1 extra yolk. All room temperature. Cold eggs will seize the melted butter and create lumps in the batter.
- Red gel food coloring : Gel, not liquid. Liquid food coloring is mostly water, so you’d need a lot more of it, which throws off the batter’s moisture balance. Gel is concentrated, you get deep color without extra liquid.
- Unsweetened cocoa powder : Just enough for that subtle chocolate undertone that makes red velvet taste like red velvet. Use natural cocoa, not Dutch-processed.
- Distilled white vinegar : This reacts with the baking soda for a touch of extra lift in the red velvet portion, and it helps bloom the cocoa for a deeper flavor. You won’t taste it at all.
How to Marble a Loaf Cake (Without Turning It Pink)
The marble is the whole point of this cake, so let’s talk technique. The biggest mistake people make is over-swirling. You think more swirls will make it prettier, but what actually happens is the two batters blend together into a muddy pink. Not the thing we are going for here.
Here’s how to get clean, dramatic swirls:
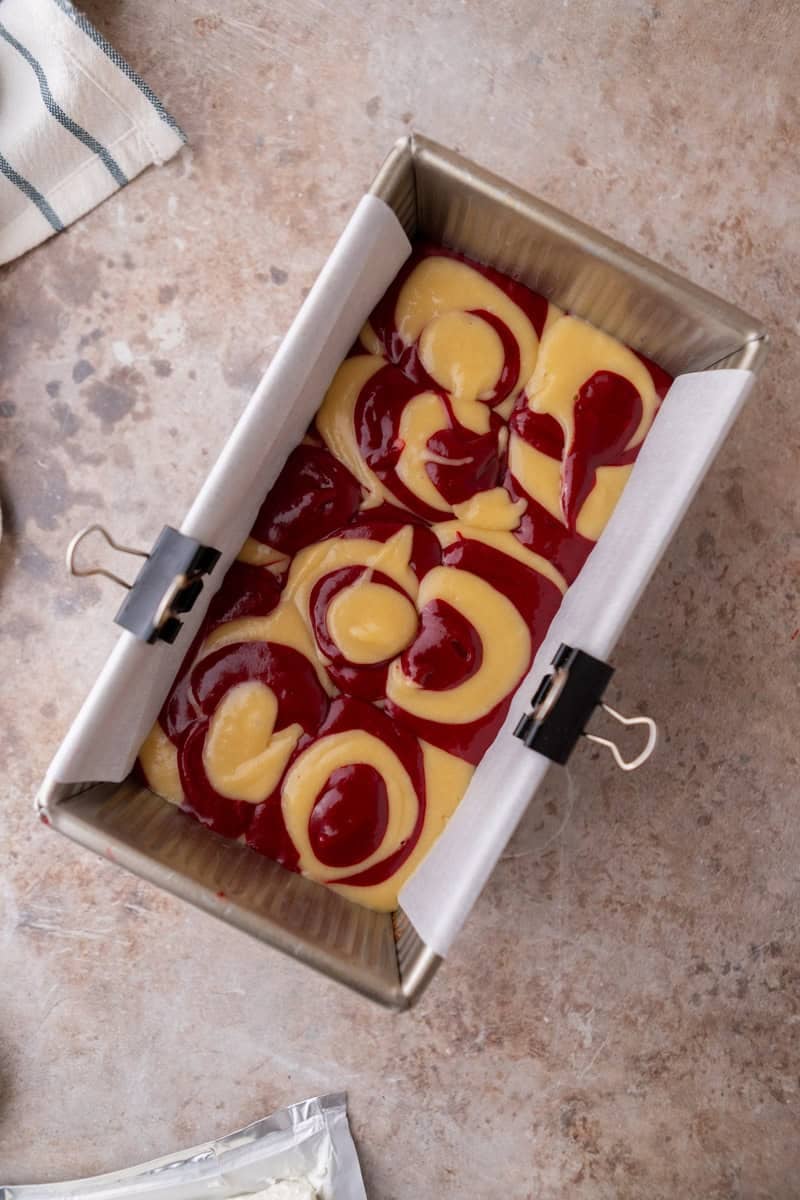
- Alternate your dollops. Spoon vanilla batter on the bottom first, then red velvet, then vanilla, alternating until both bowls are empty. Don’t try to be precise, randomness actually creates better marbling.
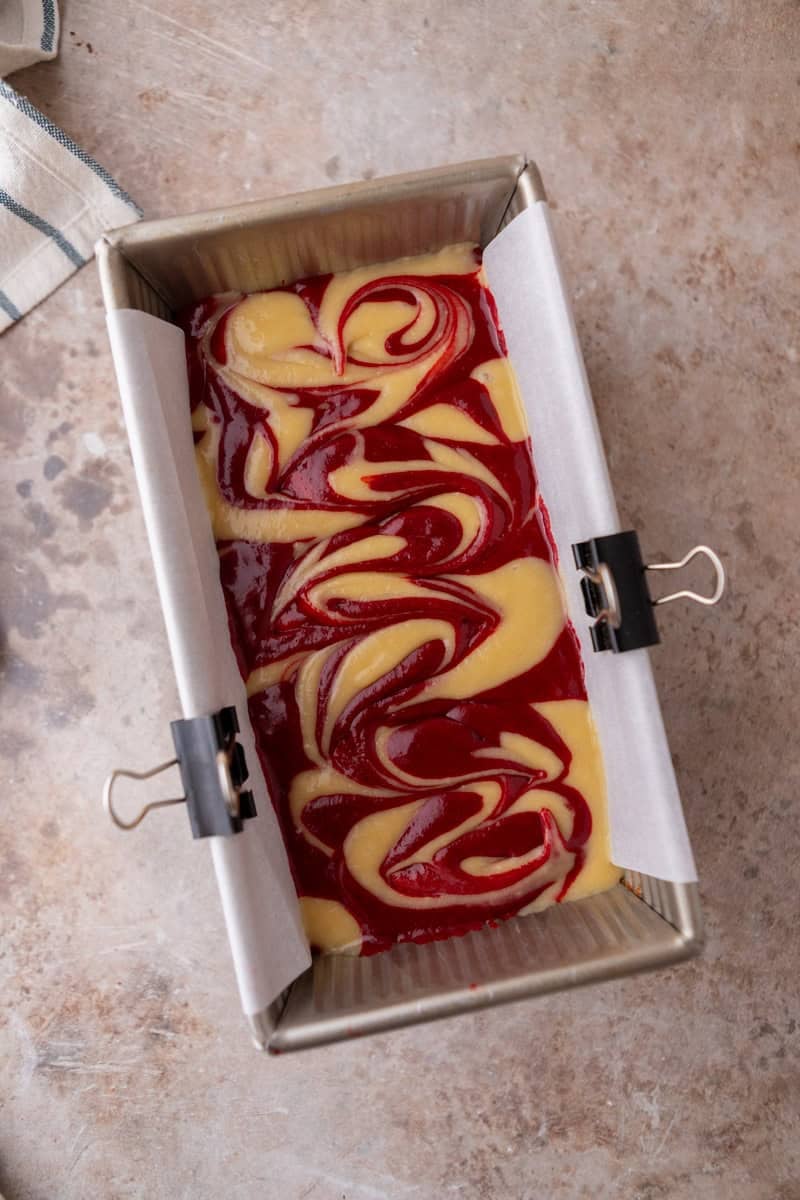
- Swirl gently and minimally. Take a butter knife or skewer and drag it lengthwise down the center once. Then do one or two zigzag passes. That’s it, 2-3 passes maximum.
- Let the oven do the rest. The two batters have slightly different densities because of the cocoa powder. As they bake, they naturally shift and swirl a little more. The depth of the loaf pan does some of the work for you.
How to Get a Perfect Dome (and Avoid a Sunken Middle)
Nobody wants to pull a loaf cake out of the oven and see a crater in the middle. Here’s what prevents that:
- Bake at 325°F, not 350°F. A lower temperature means the edges and center set at closer to the same rate. When you bake too hot, the edges lock into a rigid crust, the center keeps pushing up from leavening gases, and then it collapses when those gases escape.
- Don’t overmix the batter. Overmixed batter develops too much gluten, which creates tunnels and cracks instead of a smooth dome. Fold gently, 30-40 strokes max.
- Don’t open the oven for the first 40 minutes. The sudden temperature drop can collapse the still-liquid center.
- Cool in the pan for 20 minutes before unmolding. The center is the last part to set. If you flip it out too early, the weight of the top compresses the soft center and you get a dip.
- Pull it slightly early. For loaf cakes, carry-over heat is real. The deep pan holds heat and continues cooking the center for 5-10 minutes after you take it out of the oven. A toothpick with a few moist crumbs is perfect. Internal temp should read about 200-205°F.
The Cream Cheese Frosting
I kept the frosting on the balanced because the cake itself has plenty of sugar (while still not feeling too sweet), So I made sure both of the components are working together. I also wanted the tang of the cream cheese to actually come through. The key moves:
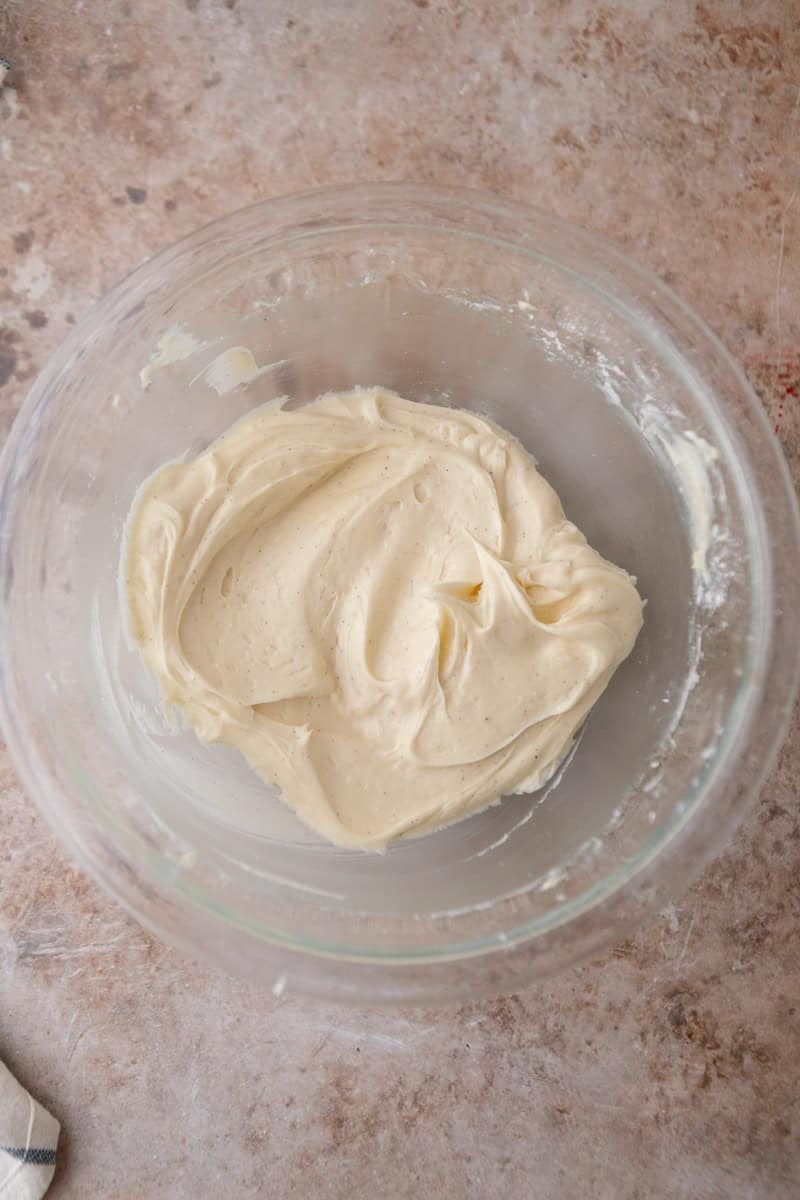
- Cold cream cheese. Always. Room temp cream cheese makes runny, soupy frosting. Cold cream cheese holds its structure and stays thick.
- Don’t overbeat. Once the cream cheese is in, mix just until smooth and stop. Overworking it shears the fat molecules apart and breaks the emulsion. If it looks loose, refrigerate for 20 minutes and stir gently.
- Frost just the top. The classic NY bakery move is a thick, rustic layer on top with swoops from an offset spatula. Not on the sides. Let the cake speak for itself.
How to Store This Red Velvet Marble Loaf Cake
This cake actually gets better on day 2. The fats redistribute overnight and the crumb becomes even more moist. Wrap it tightly in plastic wrap or store in an airtight container. It’ll keep in the fridge for up to 5 days. Bring it to room temperature for about 20 minutes before serving for the best texture.
You can also freeze the unfrosted loaf for up to 3 months. Wrap tightly in plastic wrap, then foil. Thaw overnight in the fridge and frost once it’s fully thawed.
Tips for the Best Red Velvet Marble Loaf Cake
- Weigh your flour. If you don’t have a scale, use the spoon-and-level method: fluff the flour, spoon it into the measuring cup, and level with a knife. Scooping directly from the bag can pack in up to 30g extra flour, which will make the cake drier and denser.
- Use room temperature ingredients. Cold eggs or cold sour cream will seize the melted butter and create a lumpy batter that bakes unevenly.
- Line with a parchment sling. One long strip of parchment up the sides with overhang on both ends. This lets you lift the loaf out cleanly without flipping the pan and risking the dome.
- Tent with foil if it’s browning too fast. Check around the 35-40 minute mark. If the top is getting dark, loosely tent a piece of foil over it for the remaining bake time.
- Use gel food coloring, not liquid. Liquid food coloring is mostly water, so you’d need a lot more of it. Gel is concentrated, you get vibrant color without adding extra moisture that throws off the batter.
Frequently Asked Questions
You can, but the texture will be different. Buttermilk is thinner than sour cream, so you’d be adding more liquid and less fat. The cake will be lighter and less dense. If you do swap, use ¾ cup buttermilk and omit the milk.
Yes! Double the recipe for a standard 10-12 cup bundt pan. Bake at 325°F for about 55-70 minutes. The marbling will look beautiful in a bundt shape.
Absolutely. Without the food coloring, you’ll get a chocolate marble loaf cake instead of red velvet. The cocoa flavor is subtle but still delicious. The marbling won’t be as dramatic visually, but the taste will still be great.
The most common reasons: opening the oven door too early, underbaking, too much leavening, or unmolding before it’s set. Make sure you don’t open the oven for the first 40 minutes, bake until a toothpick comes out with just moist crumbs (not wet batter), and cool in the pan for a full 20 minutes.
I’d stick with natural unsweetened cocoa powder. Dutch-processed is less acidic, which means it won’t react with the baking soda the same way. It can also mute the red color from the food coloring.
Refrigerate the frosted loaf for at least 30 minutes before slicing. Use a sharp, thin knife and wipe it clean between each cut. A warm knife (dipped in hot water, wiped dry) also helps.
This cake is great for making ahead. Bake the loaf up to 2 days in advance, wrap tightly, and refrigerate. Frost the day you’re serving. It actually tastes better the next day because the fats redistribute and the crumb becomes even more moist. Just make sure that you are serving it at room temperature.
Red Velvet Marble Loaf Cake with Cream Cheese Frosting
Ingredients
Red Velvet Marble Loaf Cake
- 1 & 1/2 cup all-purpose flour
- 1 cup granulated sugar
- 1/2 teaspoons baking soda
- 1/4 teaspoons baking powder
- 1/2 teaspoons fine salt
- 6 tbsp butter salted or unsalted, melted and slightly cooled
- 1/4 cup vegetable oil
- 1/2 cup full-fat sour cream room temp
- 2 large eggs room temp
- 1 egg yolk room temp
- 1.5 teaspoons pure vanilla extract
- 2 tbsp whole milk room temp
- 1 tablespoon unsweetened cocoa powder
- 1/2 tablespoon red gel food coloring
- 1/2 teaspoon distilled white vinegar
Cream Cheese Frosting
- 4 ounces cream cheese
- 1/4 cup butter salted or unsalted, for frosting
- 1 cup powdered sugar
- 1/2 teaspoons vanilla extract for frosting
- 1 pinch pinch of salt for frosting
Instructions
Red Velvet Marble Loaf Cake
- Preheat oven to 325°F. Grease and line a loaf pan with parchment.
- In a bowl, whisk together all dry ingredients except the cocoa powder.1 & 1/2 cup all-purpose flour, 1 cup granulated sugar, 1/2 teaspoons baking soda, 1/4 teaspoons baking powder, 1/2 teaspoons fine salt
- In another bowl, whisk melted butter, oil, sour cream, milk, vanilla, eggs, and egg yolk. Mix until smooth.6 tbsp butter, 1/4 cup vegetable oil, 1/2 cup full-fat sour cream, 2 large eggs, 1 egg yolk, 1.5 teaspoons pure vanilla extract, 2 tbsp whole milk
- Add dry ingredients to wet and fold just until combined.
- Divide batter evenly into two bowls. Mix cocoa powder, red food coloring, and vinegar into one of the cake batter bowls, and mix until combined1 tablespoon unsweetened cocoa powder, 1/2 tablespoon red gel food coloring, 1/2 teaspoon distilled white vinegar
- Spoon alternating batters into the pan. Gently swirl with a knife (2–3 times only).
- Bake for about 50 minutes, tent with foil if needed. Check doneness with a toothpick (a few moist crumbs is perfect).
- Cool in pan for 20 minutes, then transfer to cool completely.
Cream Cheese Frosting
- Beat butter and cream cheese until fluffy.4 ounces cream cheese, 1/4 cup butter
- Add powdered sugar, vanilla, and salt. Mix just until combined.1 cup powdered sugar, 1/2 teaspoons vanilla extract for frosting, 1 pinch pinch of salt for frosting
- Spread frosting over cooled loaf then chill for 30 minutes before slicing.
Video
Nutrition
Nutrition information is automatically calculated, so should only be used as an approximation.