This post may contain affiliate links. Please read our disclosure policy.
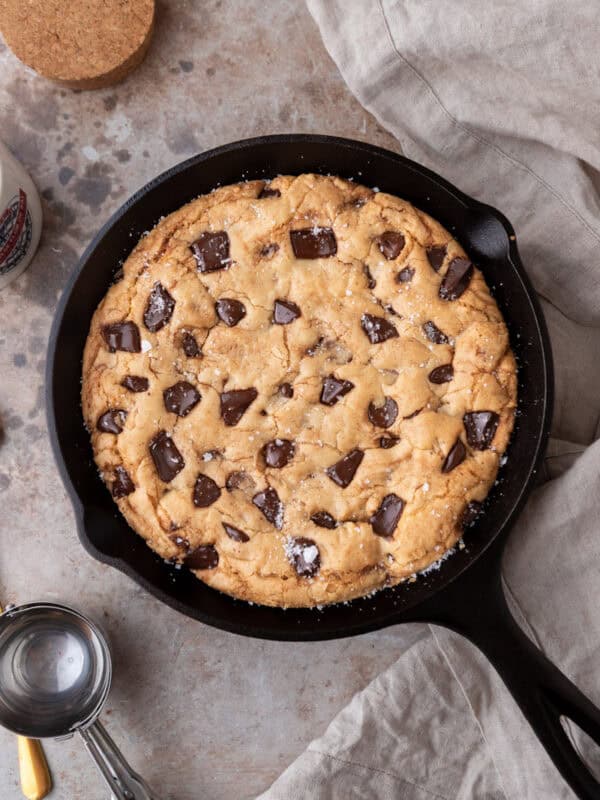
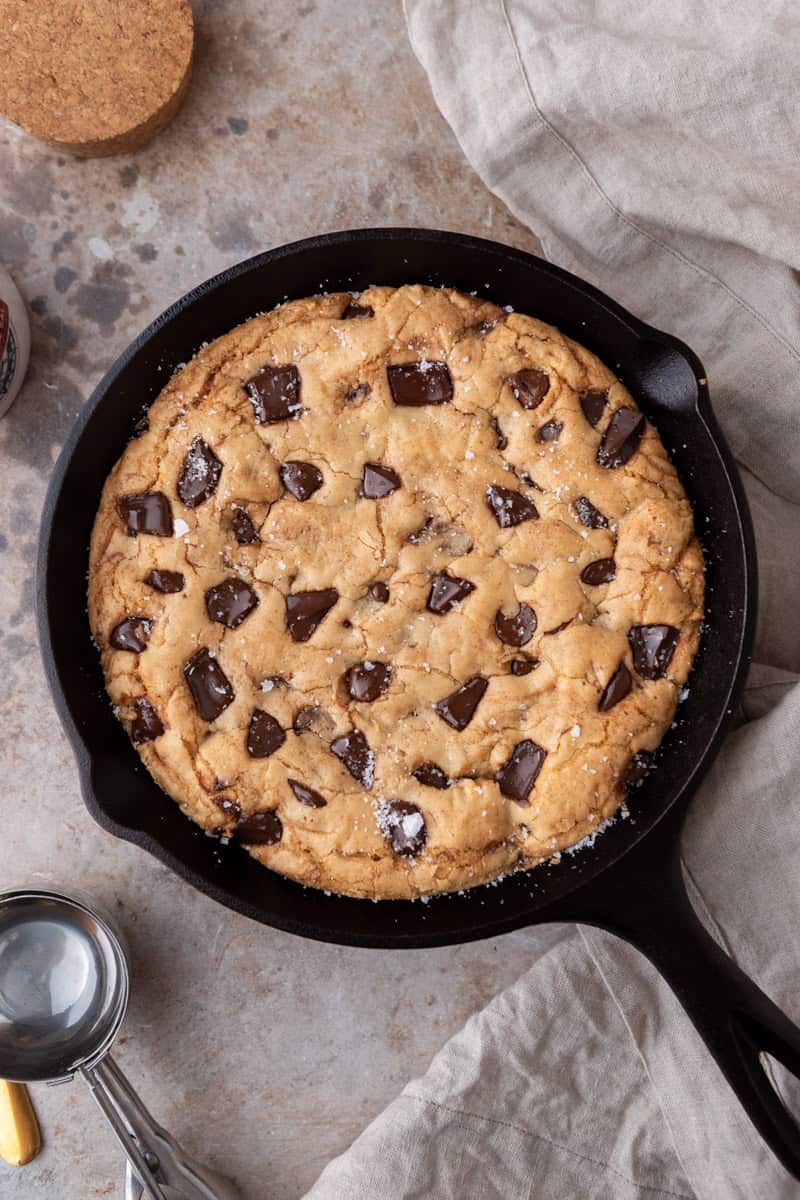
This brown butter chocolate chip skillet cookie is baked in an 8-inch cast iron skillet instead of the usual 10 or 12-inch pan, and honestly? That smaller size is the whole secret. You get a thicker cookie with a dramatic soft, gooey center, perfectly chewy edges, and pools of melty chocolate in every single bite. Add the nutty, toffee-like depth from the brown butter, finish it with flaky salt, and top the whole thing with a scoop of vanilla ice cream and you’ve got a homemade pizookie that puts every restaurant version to shame.
I know what you might be thinking, smaller pan, less cookie, what’s the point? But hear me out. An 8-inch skillet gives you the perfect ratio of crispy edge to gooey center that you just can’t get in a bigger pan. The dough is thicker, it bakes more evenly, the center stays softer for longer, and it’s the ideal size when you’re not trying to feed a crowd. This cookie comfortably serves about 6 people, making it perfect for date night, a small dinner party, or a weeknight treat you can actually finish.
If you’ve ever had a skillet cookie that turned out too thin, overbaked around the edges, or caved in as it cooled, the 8-inch pan fixes all of that. I tested this recipe multiple times to get the ratio just right, and I’m so excited for you to try it!
Let’s Chit Chat — Why I Downsized My Skillet Cookie (and Never Looked Back)
Okay, real talk. I already have my classic chocolate chip skillet cookie recipe on this blog (it’s a 10-inch, and it’s amazing, go make that one too!). But I kept running into the same thing: when it was just me and Kyle, or just a couple of friends over, a 10-inch skillet cookie was almost too much. We’d eat half and the rest would sit there getting stale. And when I tried to just use less dough in the big skillet, it spread too thin and overbaked.
So I started playing around with an 8-inch skillet, and the difference blew me away. The cookie is noticeably thicker, almost like a deep-dish cookie situation. Which means the center stays soft and gooey way longer than a thinner version. The edges still get that gorgeous golden crust from the cast iron, but the middle? Absolute fudgy, melty perfection.
Then I added the brown butter, and that’s when it went from “oh this is really good” to “okay I need to put this on the blog immediately.” If you’ve never browned butter for a cookie, you are about to have your whole baking game changed. You’re essentially toasting the milk solids in butter until they turn golden and release this incredible nutty, almost caramel-like fragrance. It adds a depth of flavor that regular melted butter just can’t touch. Combined with the brown sugar and a generous amount of chocolate, this smaller skillet cookie has more flavor per bite than any giant one I’ve made.
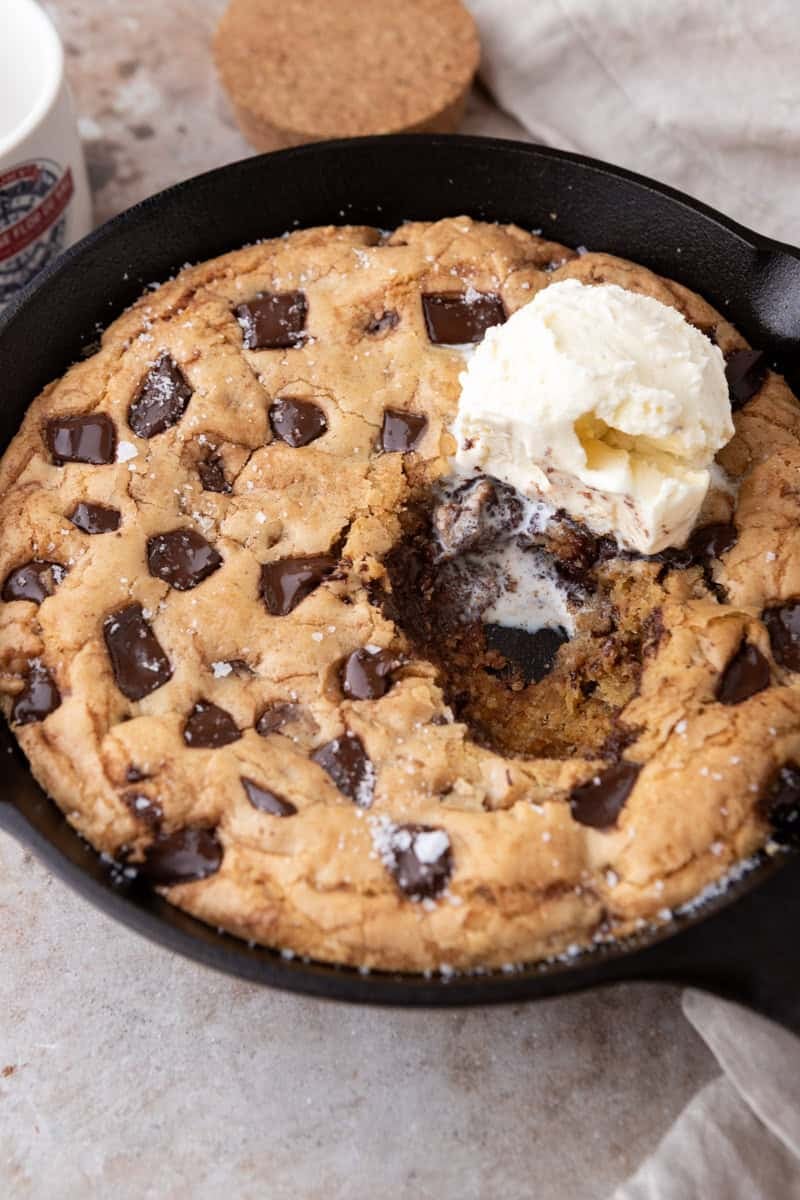
Table of Contents
- Why an 8-Inch Skillet Makes a Better Cookie
- Ingredient Breakdown
- How to Brown Butter (Step by Step)
- How to Make This Brown Butter Skillet Cookie (8-Inch)
- Tips for the Perfect 8-Inch brown butter skillet cookie
- How to Serve This Brown Butter Skillet Cookie
- How to Store and Reheat
- Can I Make This in a Different Size Pan?
- Frequently Asqued Questions About 8 inch skillet cookie – FAqs
- Brown Butter Chocolate Chip Skillet Cookie (8-inch) Recipe
Why an 8-Inch Skillet Makes a Better Cookie
Most skillet cookie recipes call for a 10 or 12-inch cast iron skillet. Those are great for feeding a big group! But there are real, tangible reasons why an 8-inch skillet produces a better cookie in terms of texture:
- Thicker dough = gooier center. The same amount of dough that spreads thin in a 10-inch pan becomes a thick, substantial layer in an 8-inch pan. That extra thickness means the center stays soft and slightly underdone even after the edges are perfectly set. It’s the difference between a cookie that’s gooey for 5 minutes and one that stays gooey for 30.
- Better edge-to-center ratio. In a bigger skillet, you get a LOT of edge and a thin center. In an 8-inch skillet, the crispy edge is a ring of golden perfection, and the soft center takes up most of the cookie. You get that amazing contrast in every bite.
- More even baking at 325°F. A smaller surface area means heat distributes more evenly across the dough. Combined with the lower 325°F bake temperature, you get a cookie that’s cooked through consistently from edge to center, no raw middle or overdone perimeter. This also means the cookie won’t dome up and then cave in as it cools.
- Stays soft longer. Because the cookie is thicker, it retains heat and moisture longer after it comes out of the oven. A thin skillet cookie firms up fast. This one is still warm and gooey 20–30 minutes later.
- Perfect serving size. An 8-inch skillet cookie comfortably serves 4–6 people. Ideal for date night, a small gathering, or when you want a special dessert without a mountain of leftovers.
- Brown butter adds bakery-style flavor. Browning the butter before mixing it into the dough gives this cookie a rich, nutty, toffee-like depth that regular melted butter can’t touch. It’s the same technique used in high-end bakeries, and it takes just 5 minutes.
- Cornstarch keeps the center soft without being underbaked. A small amount of cornstarch inhibits gluten development, keeping the center tender and soft even after the cookie has fully cooled. It also prevents that “cakey” texture that can happen in a thicker cookie.
- Slightly higher flour ratio means no sinking. I’ve adjusted the flour just enough to give the thicker cookie structure, so it holds that flat, even surface rather than puffing up and collapsing.
- Flaky salt on top is the perfect the finishing touch. That pop of salt against the warm brown butter and melty chocolate is everything. Don’t skip it!
Ingredient Breakdown
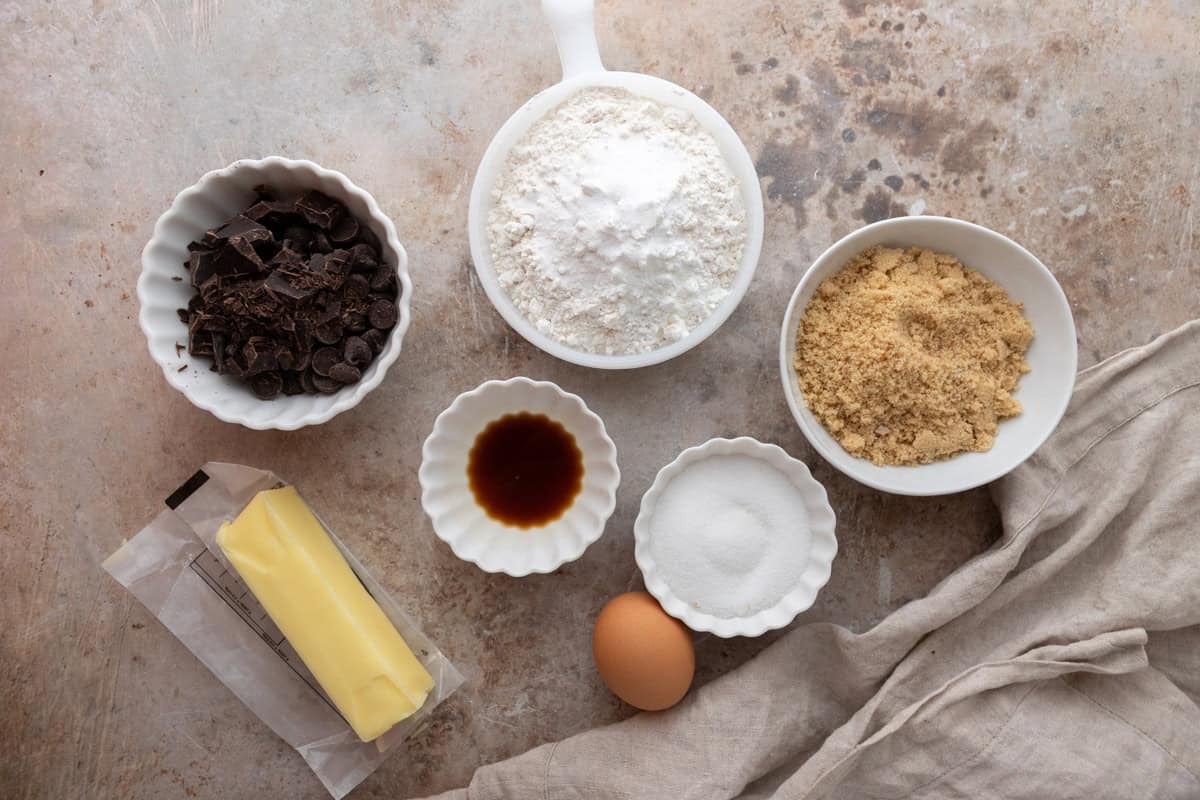
- Unsalted butter : We’re browning this to add that signature nutty, toffee flavor. Use unsalted so you can control exactly how salty the cookie is.
- Light brown sugar : Adds moisture, chewiness, and warm molasses flavor. I prefer light brown sugar here so the molasses doesn’t overpower the brown butter. Dark brown sugar works if you want a deeper, more intense flavor.
- Granulated sugar: A smaller amount of white sugar helps create slightly crisp edges while keeping everything sweet.
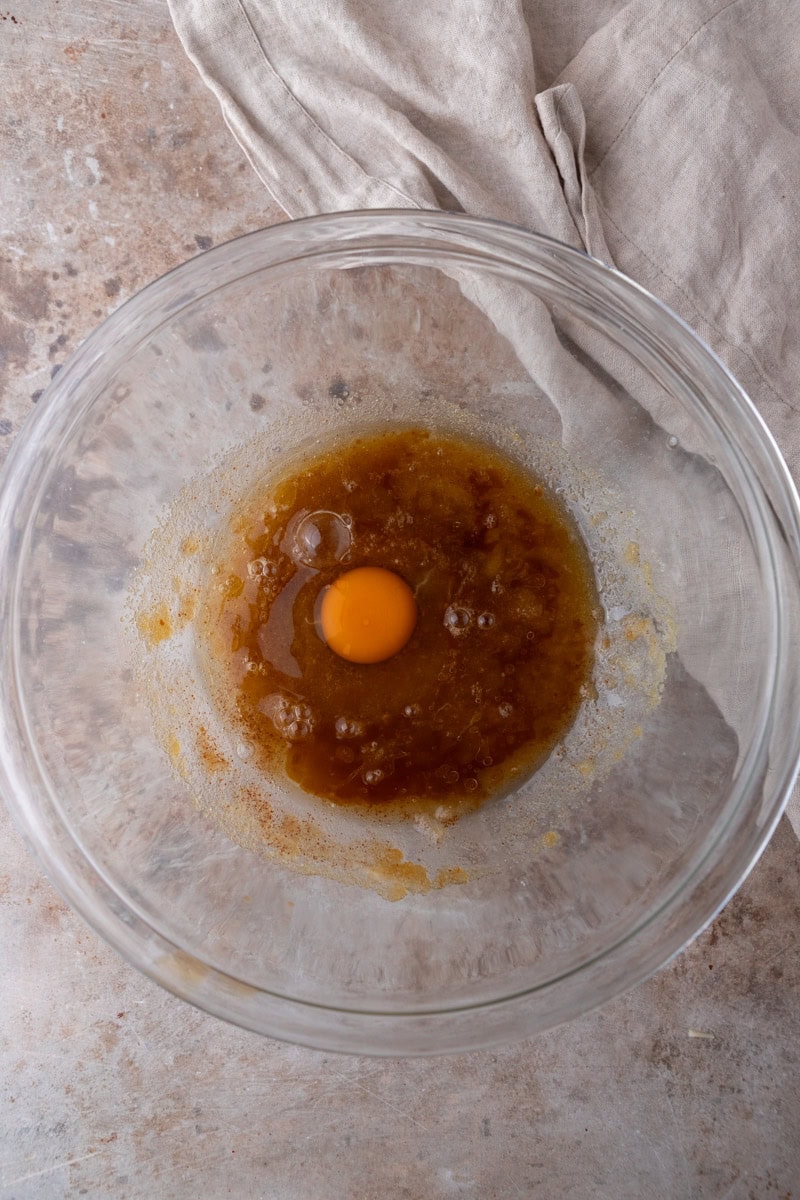
- 1 large egg, room temperature: Adds structure and richness. Room temperature is important, it emulsifies better with the brown butter for a smoother dough.
- Vanilla extract : Always use real vanilla extract. It enhances every other flavor in the cookie.
- All-purpose flour A slightly higher ratio than most skillet cookie recipes. It gives the thicker 8-inch cookie enough structure so the center bakes evenly without collapsing.
- Cornstarch : The secret ingredient! Inhibits gluten development, keeping the center tender while letting the cookie hold its shape.
- Baking soda : Just a tiny amount, enough lift for a soft texture without causing the cookie to dome and collapse. Specifically calibrated for the 8-inch size.
- Salt : Balances the sweetness and enhances the brown butter flavor.
- Chocolate chips or chopped chocolate : I love using a mix of semi-sweet chips and chopped chocolate bars for varied melting. Dark, milk, or a combination all work.
- Flaky salt for finishing: Maldon or any flaky sea salt for a gorgeous salty crunch on top.
How to Brown Butter (Step by Step)
If you’ve never browned butter before, don’t worry,it’s one of the easiest techniques in baking and it makes a massive difference:
- Cut the butter into pieces and add it to a light-colored saucepan (so you can see the color change). Place over medium heat.
- The butter will melt completely, then start to bubble and foam. Stir occasionally.
- After a few minutes, the foam subsides. You’ll see the butter turning golden with little brown specks forming on the bottom, those are the toasted milk solids!
- Once it’s a deep golden amber and smells nutty and fragrant (about 5 minutes), immediately pour into a heatproof bowl. It goes from browned to burned fast.
- Cool for 5–10 minutes before mixing into the dough so it doesn’t cook the egg.
Pro tip: Use a light-colored pan so you can actually see the color change. A dark pan makes it nearly impossible to tell when it’s done.
How to Make This Brown Butter Skillet Cookie (8-Inch)
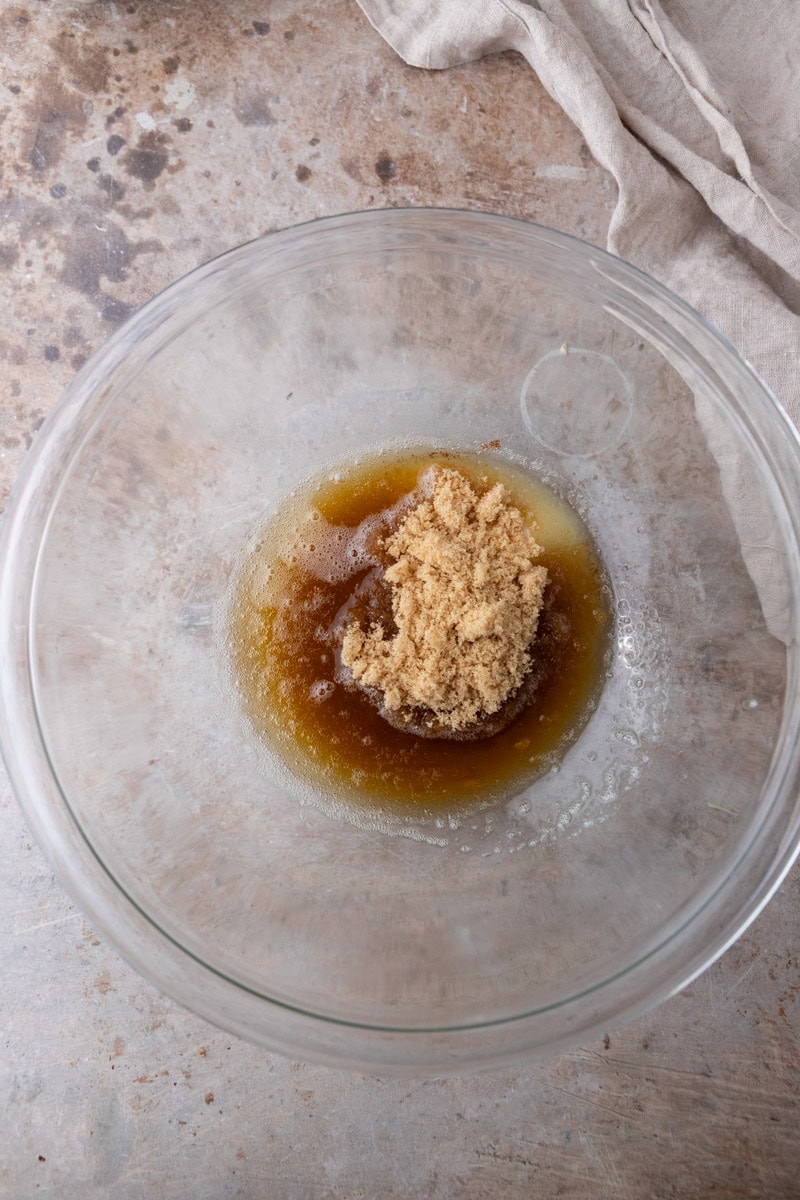
- Step 1: Brown the butter. Melt unsalted butter in a saucepan over medium heat and cook until golden amber with brown specks. Pour into a mixing bowl and cool 5–10 minutes.
- Step 2: Mix the wet ingredients. Whisk in light brown sugar and granulated sugar until glossy. Whisk in the egg and vanilla until smooth.
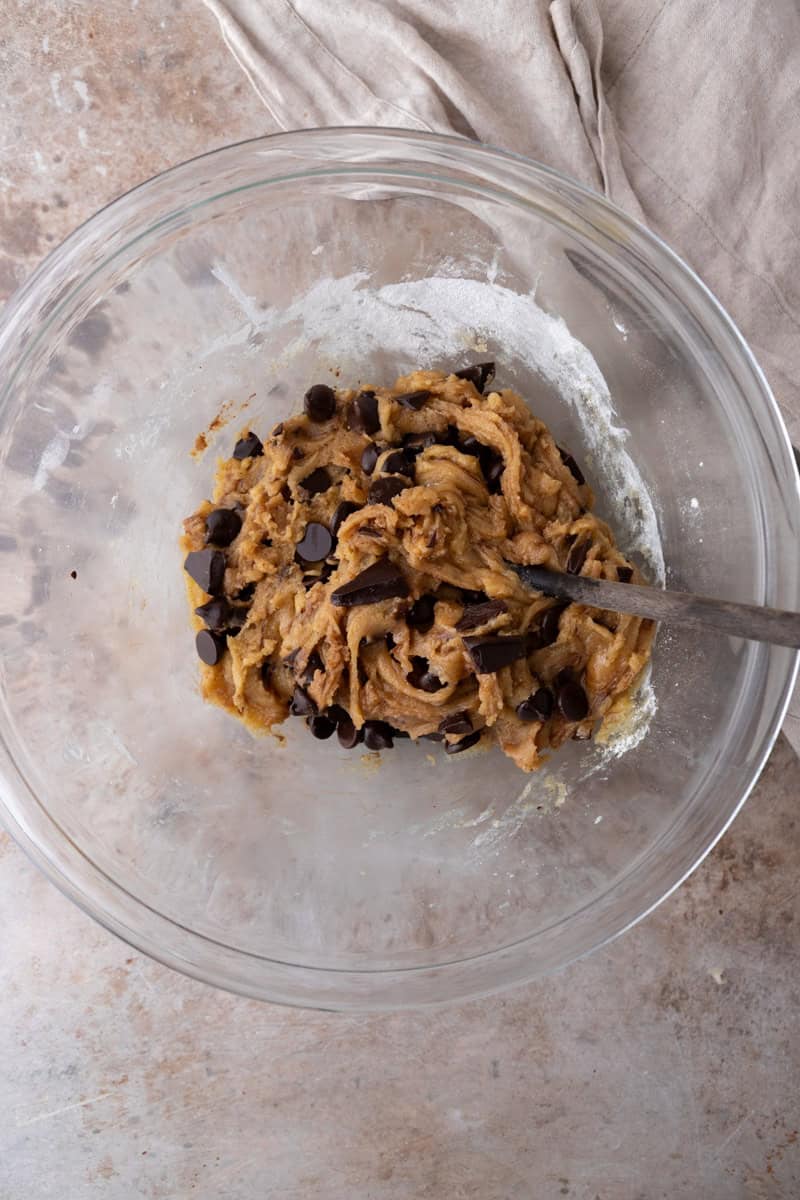
- Step 3: Add the dry ingredients. Stir in flour, cornstarch, baking soda, and salt just until combined, don’t overmix!
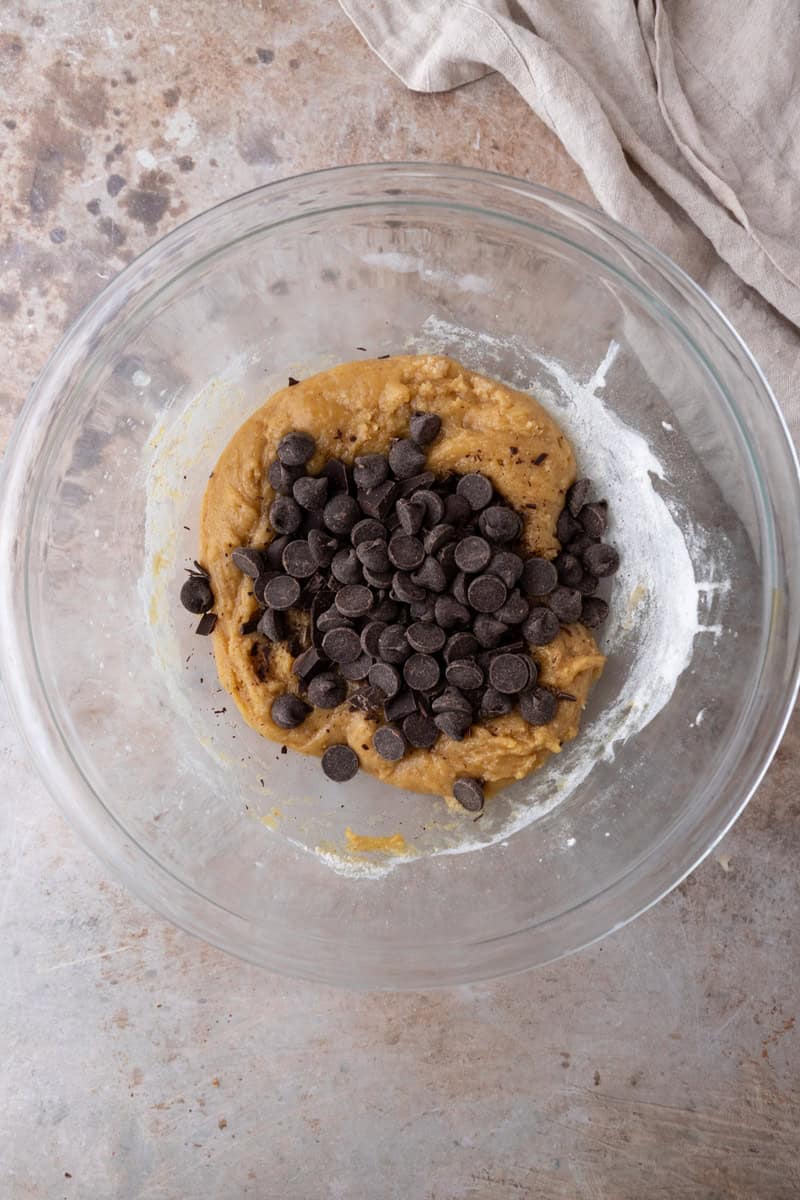
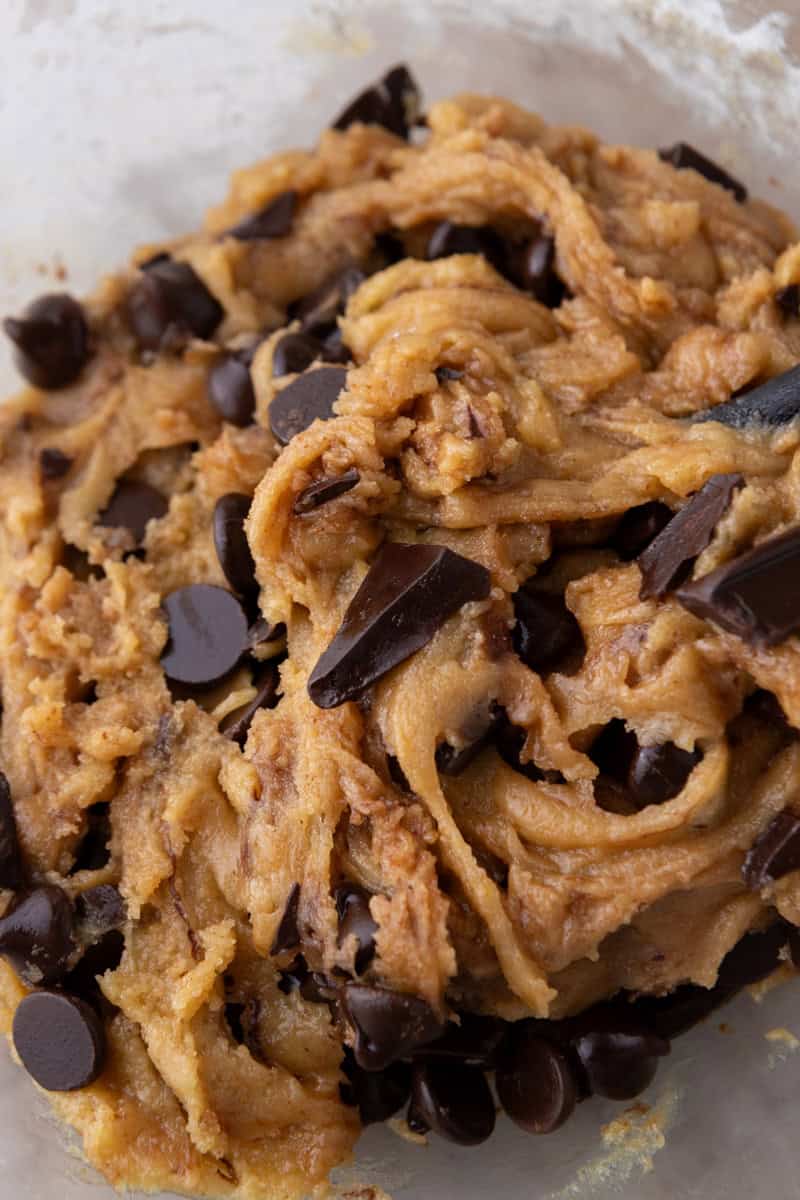
- Step 4: Fold in the chocolate. Add chocolate chips or chopped chocolate and fold gently until evenly distributed.
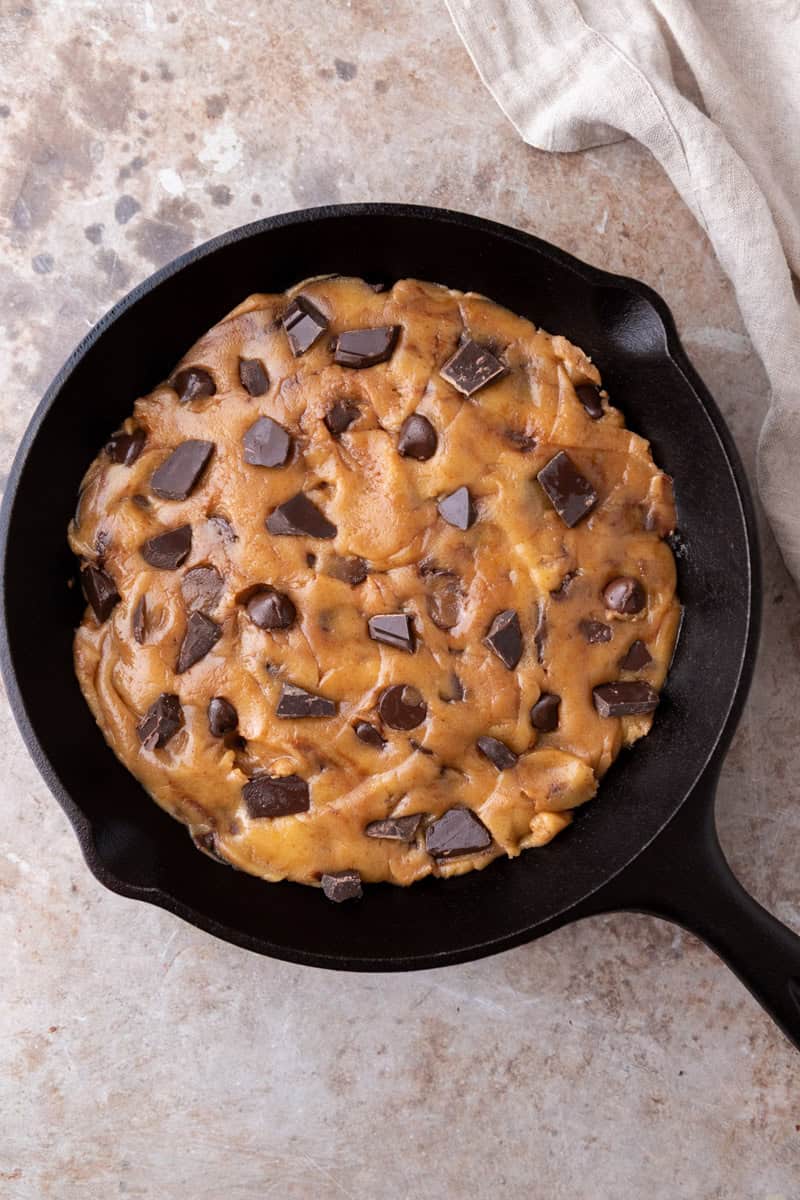
- Step 5: Press into the 8-inch skillet. Lightly grease your 8-inch cast iron skillet. Press the dough evenly into the skillet, smoothing the top flat. An even layer is key, the thicker dough in this smaller pan needs to be uniform for even baking.
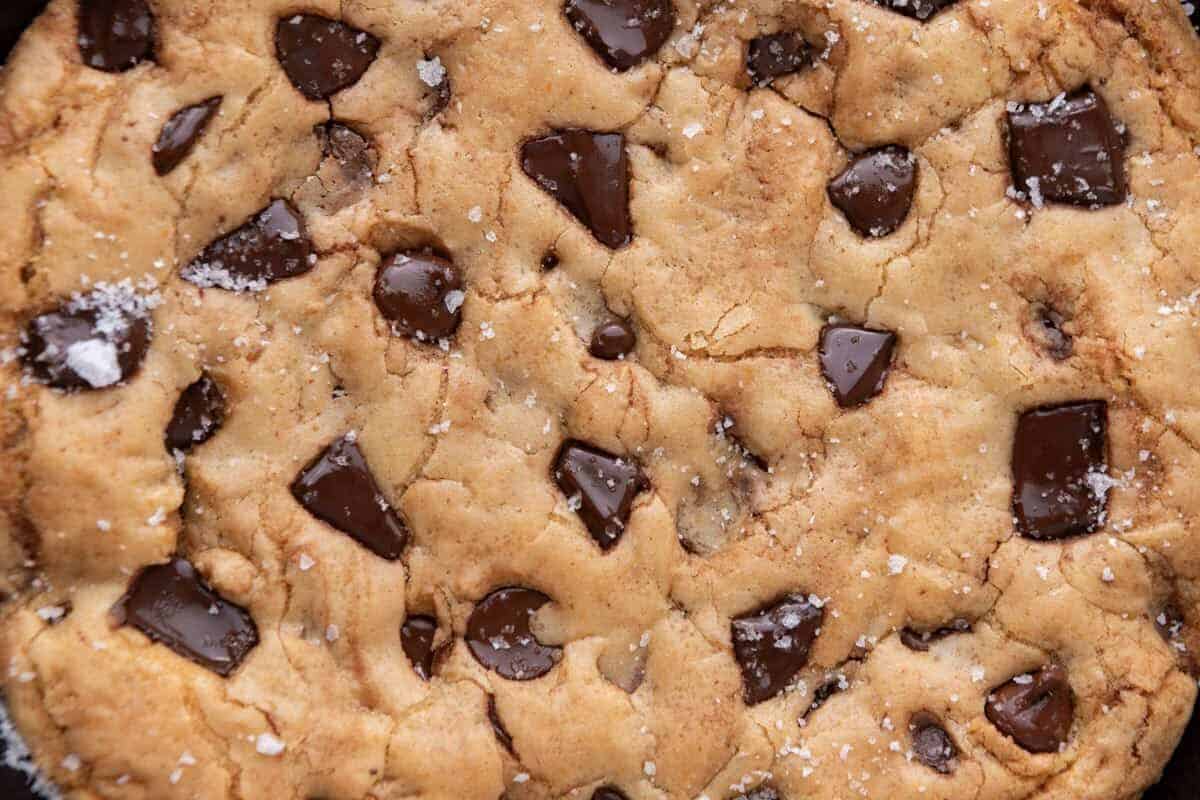
- Step 6: Bake. Bake at 325°F, until edges are set and golden but the center still looks slightly soft. It will firm up as it cools.
- Step 7: Rest and finish. Cool at least 15 minutes. Sprinkle with flaky salt right out of the oven. Serve warm with vanilla ice cream!
Tips for the Perfect 8-Inch brown butter skillet cookie
- Don’t overbake! This is even more important with the 8-inch skillet because the cookie is thicker. The center should look slightly underdone when you pull it. The cast iron’s residual heat keeps cooking it as it rests.
- Press the dough flat and even. Because the dough is thicker in an 8-inch pan, any unevenness is amplified. Take an extra 30 seconds to smooth it out.
- Cool the brown butter before mixing. Too-hot butter will result in scrambled egg bits in your dough. Let it cool at least 5 minutes.
- Use room temperature egg. A cold egg can cause the cooled brown butter to seize up. Room temp ingredients mix more smoothly.
- Use a kitchen scale. This recipe was developed with gram measurements. Measuring cups can vary by up to 30%, especially important in a smaller recipe where every gram counts.
- Let it rest. Give it at least 15 minutes. The good news is this thicker 8-inch version stays gooey way longer than a thinner skillet cookie, so you have plenty of time to top it with ice cream and enjoy.
- This recipe is designed not to cave in. The higher flour ratio, cornstarch, 325°F bake temp, pressing the dough flat, and minimal baking soda (just 1/8 tsp) all work together to keep the top flat and level, no sinking. If your skillet cookies have caved in before, this formula fixes that.
How to Serve This Brown Butter Skillet Cookie
The best way to enjoy this is warm, straight from the cast iron, with a big scoop of vanilla ice cream. Because the 8-inch size is thicker, the cookie stays warm longer than a big thin one, so you actually get to enjoy that hot-cold contrast instead of racing against the clock.
- Classic pizookie style: Grab spoons, set the skillet on a trivet, and dig in. The 8-inch size is perfect for 2–4 people sharing.
- Sliced like a tart: Let it cool 20–30 minutes, then slice into wedges. The thicker cookie holds its shape beautifully.
- With toppings: Drizzle with caramel sauce, hot fudge, or chocolate ganache. The brown butter flavor pairs especially well with caramel.
- With different ice cream: Salted caramel, coffee, or peanut butter ice cream all pair beautifully with the brown butter notes.
How to Store and Reheat
- Room temperature: Cover with foil or plastic wrap, up to 2 days. The thicker cookie retains moisture better than a thinner one.
- Refrigerator: Wrapped tightly, 4–5 days.
- To reheat: 325°F oven for 8–10 minutes, or microwave individual slices 15–20 seconds. Oven method restores the crispy edge better.
- Make-ahead dough: Press into the skillet, cover, and refrigerate up to 2 days before baking (add 2–3 minutes bake time). Or freeze the prepared dough for up to 3 months.
Can I Make This in a Different Size Pan?
I specifically developed this for an 8-inch skillet, but here’s how to adapt:
- Two smaller skillets (5–6 inch): Divide the dough between two mini skillets. Bake at 325°F for 16–20 minutes. Perfect individual pizookies for date night!
- 10-inch skillet: The dough will be thinner, so reduce bake time to 18–22 minutes and watch closely. You’ll lose some of that thick, gooey 8-inch magic. (Or just make my classic chocolate chip skillet cookie instead, it’s designed for a 10-inch pan!)
- No cast iron? An oven-safe non-stick skillet, 8-inch round cake pan, or deep-dish pie plate all work. Edges won’t be quite as crispy without cast iron, but still delicious.
Frequently Asqued Questions About 8 inch skillet cookie – FAqs
You can, but you’ll miss the best part! Use ½ cup (113g) melted butter and reduce by 1 tablespoon (14g) since browning evaporates some water. For a classic version, check out my 10-inch chocolate chip skillet cookie recipe.
Because this is a thicker cookie, the center takes longer to set. If it’s genuinely raw (not just soft and gooey), your oven may run cool. Try baking 3–5 additional minutes. The center should register about 175°–180°F with an instant-read thermometer. It will firm up significantly as it cools.
Because this is thicker than most, the center takes longer to set. If it’s genuinely raw (not just soft), your oven may run cool, try 3–5 extra minutes. The center should hit about 175°–180°F with an instant-read thermometer. It firms up significantly as it cools.
Yes! More molasses means a deeper, more caramel-like flavor. Both work beautifully.
Semi-sweet, dark, milk, white, or a combination all work. Chopped bars create melty pools; chips hold their shape. I love mixing both!
Yes, lightly with butter or nonstick spray. Even well-seasoned cast iron benefits from a little grease for easy release.
Use a 10 or 12-inch skillet, bake 28–32 minutes at 325°F. But the cookie will be thinner. I’d suggest making two 8-inch skillets instead if you have a second pan!
Yes! A pizookie (pizza and cookie) is another name for a skillet cookie. It became popular through BJ’s Restaurant and is now a beloved homemade dessert. This version is a smaller, thicker pizookie with brown butter.
Many readers have had success using a 1:1 gluten-free flour blend. The texture may be slightly different, but it should still be delicious.
My classic uses a 10-inch skillet, regular creamed butter, and traditional cookie dough. This one uses an 8-inch skillet for a thicker cookie, brown butter for nutty caramel flavor, and tweaks like cornstarch and less baking soda for a level top that won’t sink. Both delicious, this one is the more indulgent, bakery-style version!
Brown Butter Chocolate Chip Skillet Cookie (8-inch)
Ingredients
- 1/2 cup unsalted butter
- 1/2 cup light brown sugar
- 1/4 cup granulated sugar
- 1 large egg room temperature
- 1 tsp vanilla extract
- 1 cup all-purpose flour and 2 tablespoons use weight measurement for this
- 1½ tsp cornstarch
- 1/8 tsp baking soda
- ½ tsp salt
- 3/4 cup chocolate chips or chopped chocolate extra for topping
- Flaky salt for finishing
Instructions
- Brown the butter in a saucepan until golden and nutty; cool 10-20 minutes.1/2 cup unsalted butter
- Whisk butter with brown sugar and granulated sugar until glossy.1/2 cup light brown sugar, 1/4 cup granulated sugar
- Whisk in egg and vanilla until smooth.1 large egg, 1 tsp vanilla extract
- Stir in flour, cornstarch, baking soda, and salt just until combined.1 cup all-purpose flour and 2 tablespoons, 1½ tsp cornstarch, 1/8 tsp baking soda, ½ tsp salt
- Fold in chocolate.3/4 cup chocolate chips or chopped chocolate
- Press evenly into a lightly greased 8-inch skillet, smoothing the top flat.
- Bake at 325°F for 24–28 minutes, until edges are set and the center is slightly soft.
- Rest 15 minutes before serving; sprinkle flaky salt on top.Flaky salt for finishing
Nutrition
Nutrition information is automatically calculated, so should only be used as an approximation.

Hello! What is the weight of the flour?
Hi! It’s under the metric measurements on the recipe card. It will be 165g.