This post may contain affiliate links. Please read our disclosure policy.
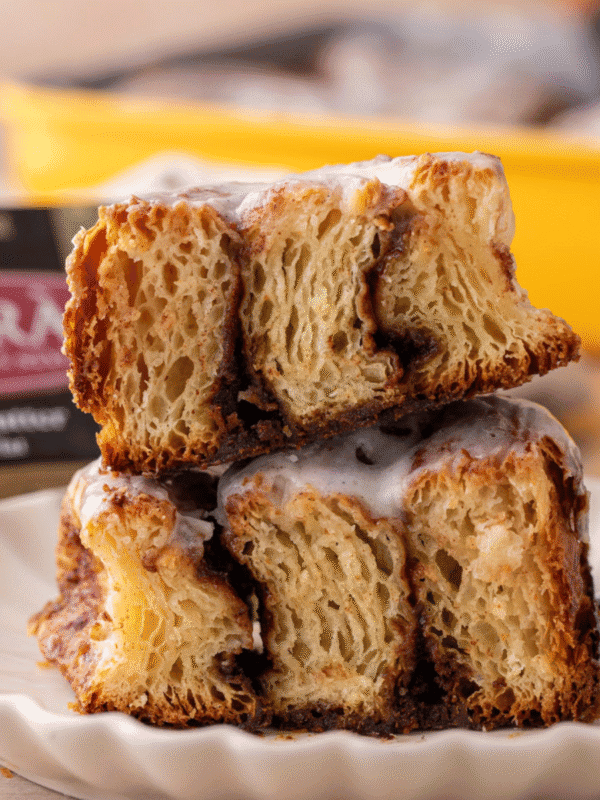
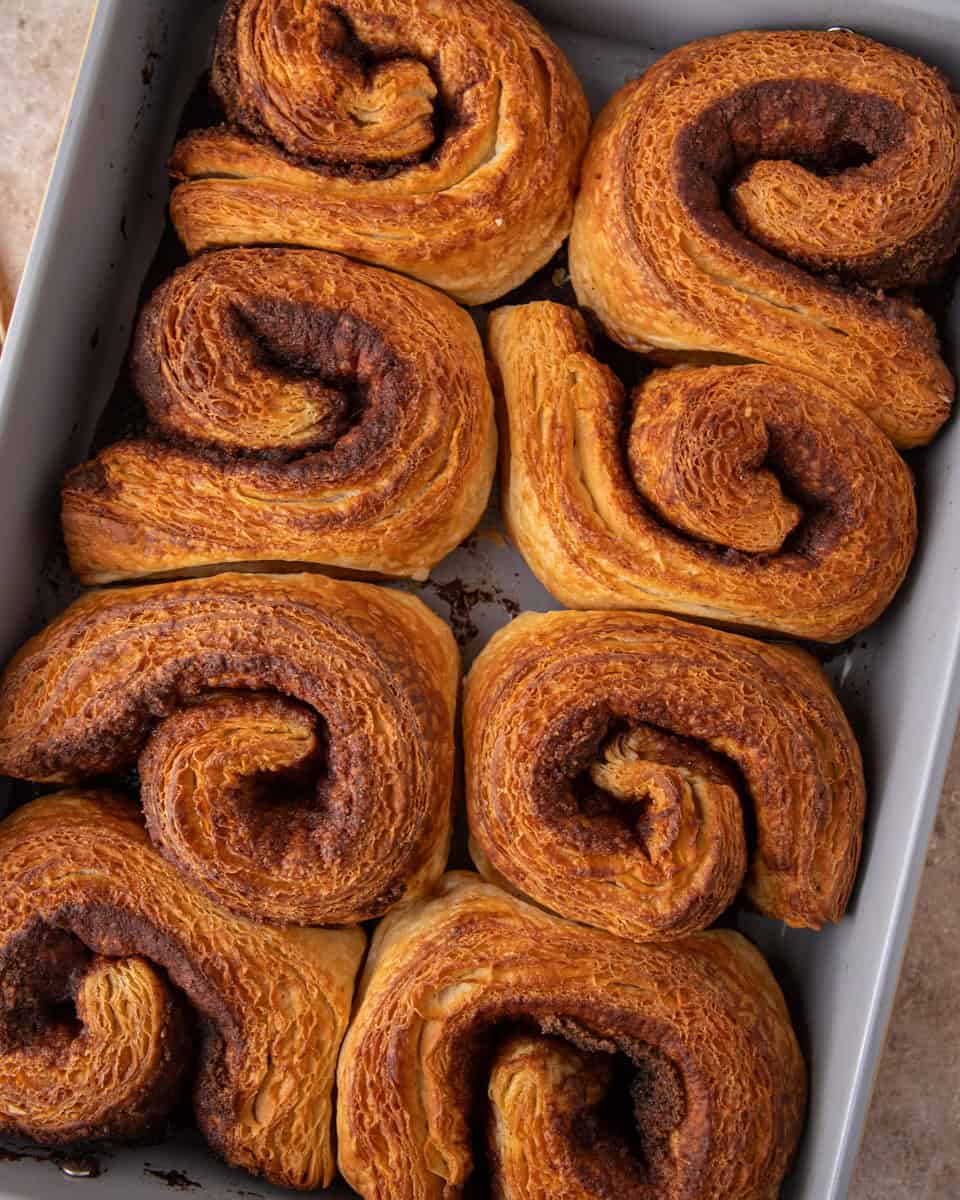
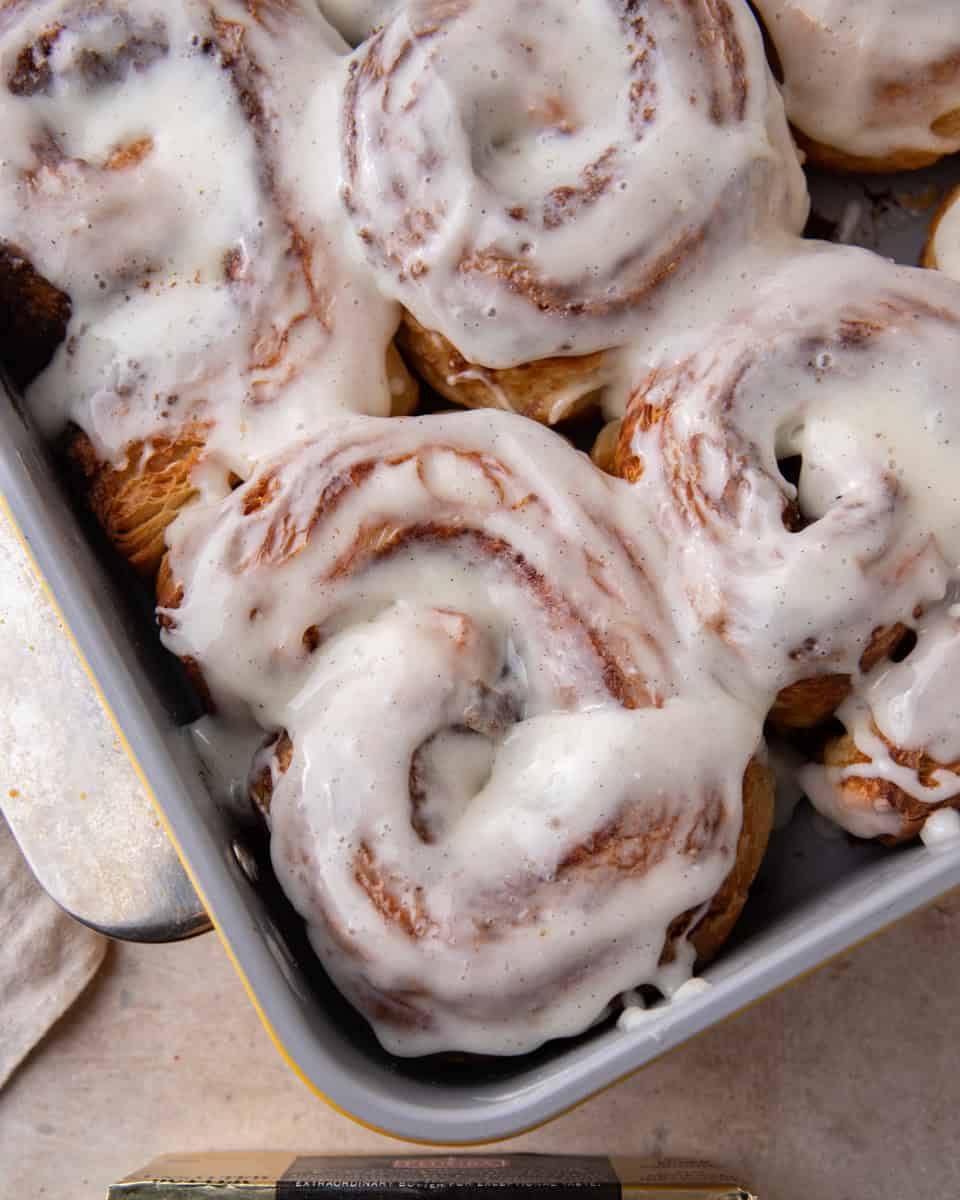
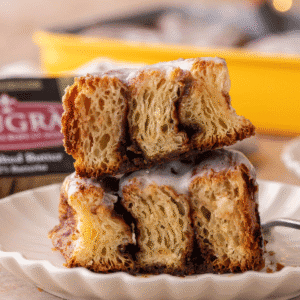
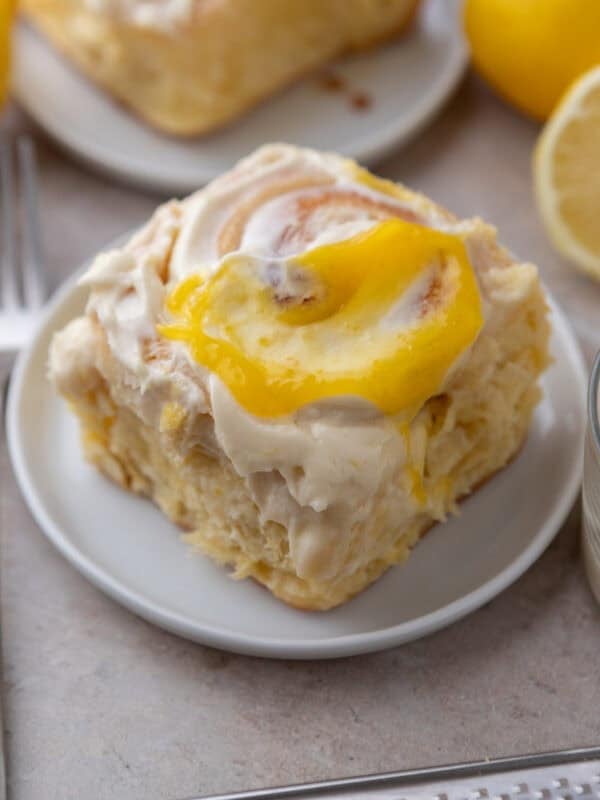
These croissant cinnamon rolls combine the soft cinnamon filling of a classic roll with the delicate layers of dough created through traditional lamination. Using a cold Plugrà butter block, repeated letter folding, and chilled rests in the fridge, this bakery-style recipe produces golden, flaky pastries finished with a smooth vanilla glaze.
This post was sponsored by Plugrà Premium European Style Butter but all opinions are my own. Thank you for supporting brands that make Lifestyle of a Foodie possible!
These laminated rolls are the most advanced recipe in my complete cinnamon roll guide. If you’re looking for an easier starting point or want to explore different dough types, that guide has something for every skill level.
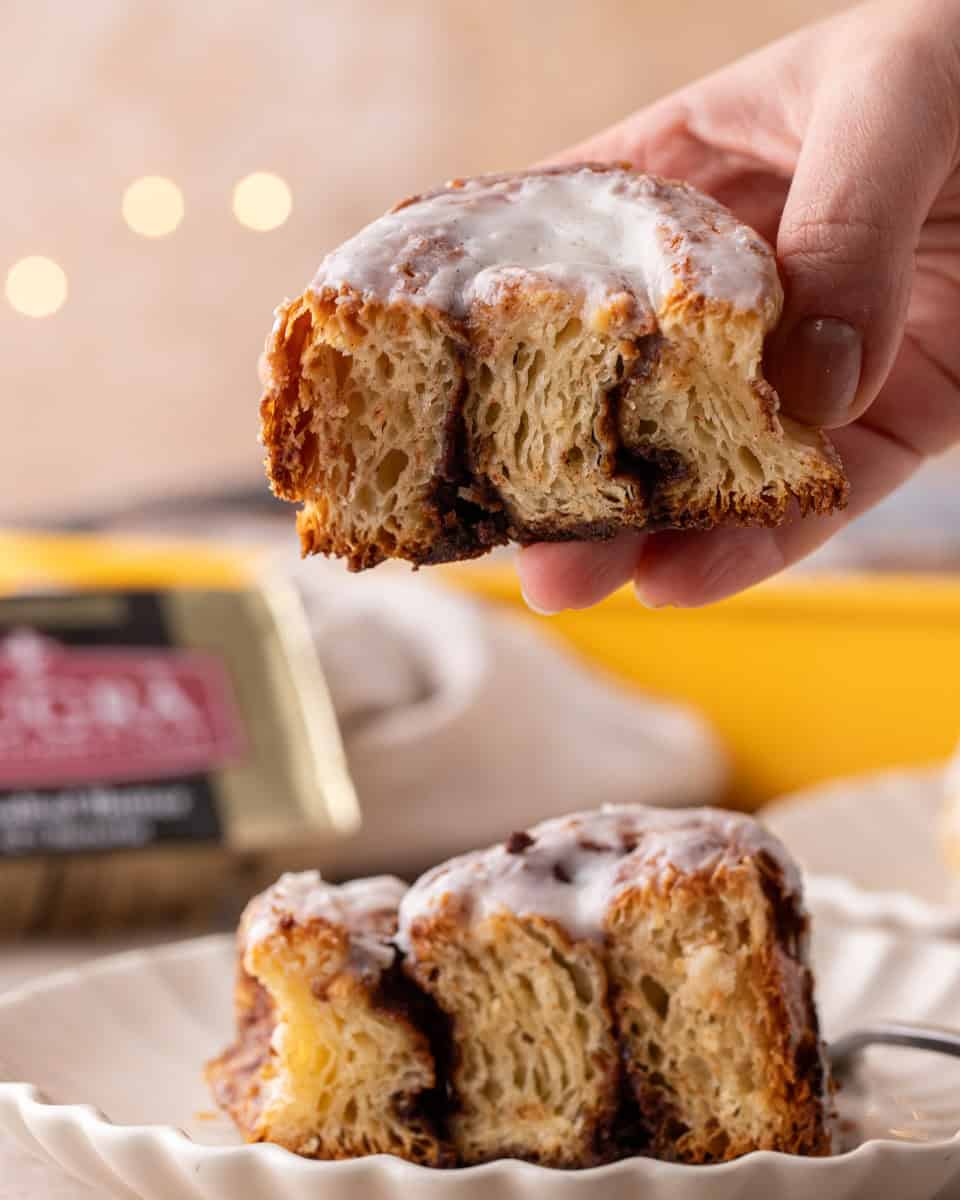
Table of Contents
Why you’ll love this recipe
- Dozens of buttery laminated layers
- Soft cinnamon-sugar centers
- Light, pourable vanilla glaze
- Bakery-style results made at home
- Perfect weekend baking project
Ingredients for Croissant Cinnamon Rolls
These croissant cinnamon rolls are made with an enriched brioche-style dough, a high-fat European style butter block for lamination (Plugrà 82% butterfat is a must!), a classic cinnamon sugar filling, and a light vanilla cream cheese glaze.
Dough Ingredients
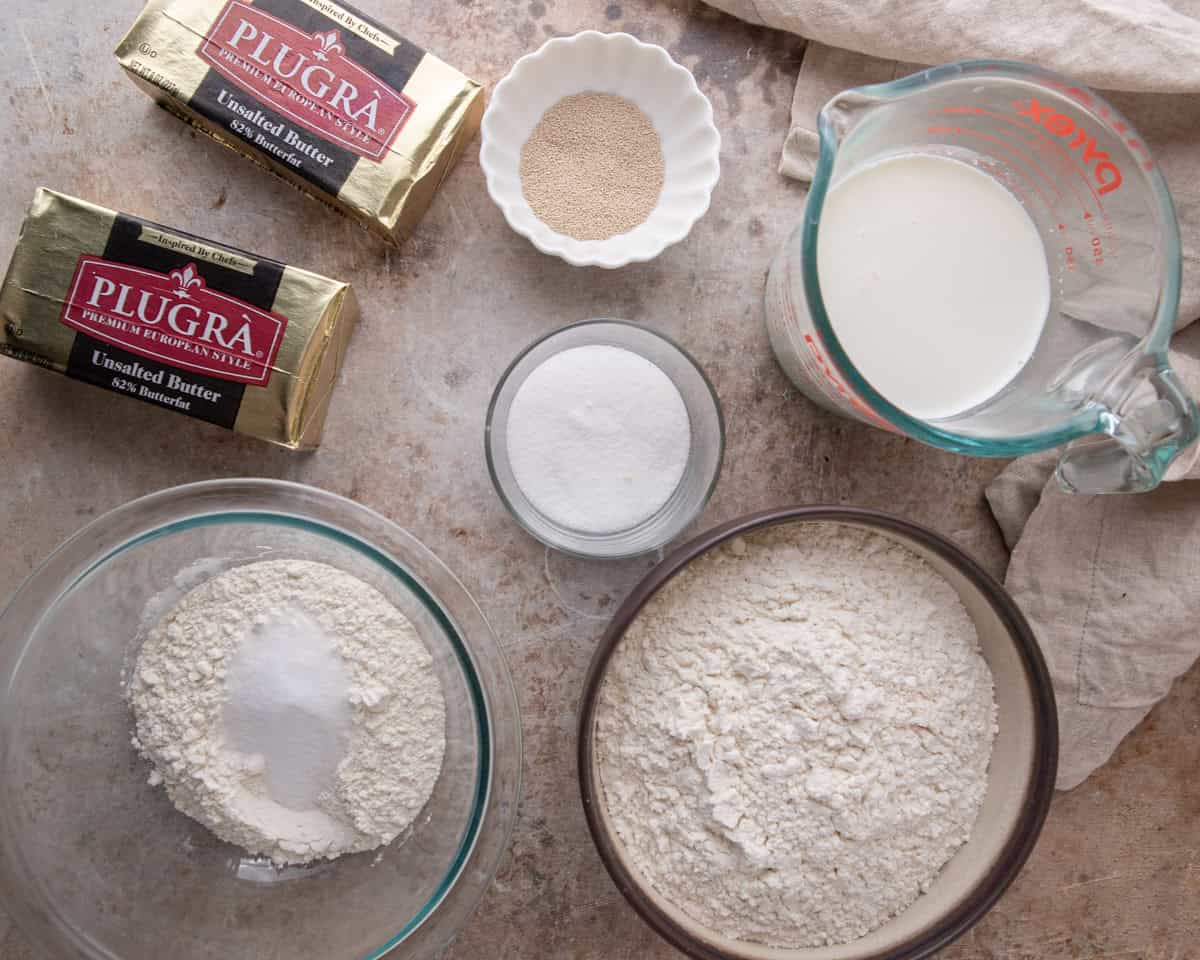
The base dough is slightly enriched to keep the interior soft while still supporting the laminated layers.
- All-purpose flour and bread flour for structure and elasticity
- Granulated sugar for subtle sweetness
- Fine sea salt to balance flavor
- Instant yeast for rise
- Cold whole milk to control dough temperature
- A small amount of softened butter for tenderness
Using both all-purpose and bread flour helps create strength without making the rolls dense.
Butter Block (For Lamination)
Lamination requires a high-fat butter that stays pliable but firm.
- Plugrà European-style unsalted butter
European-style butter contains more fat and less water, which creates cleaner layers and better flake during baking.
Why I Use Plugrà Butter for Laminated Dough
This post is sponsored by Plugrà, and I specifically chose their butter for this recipe.
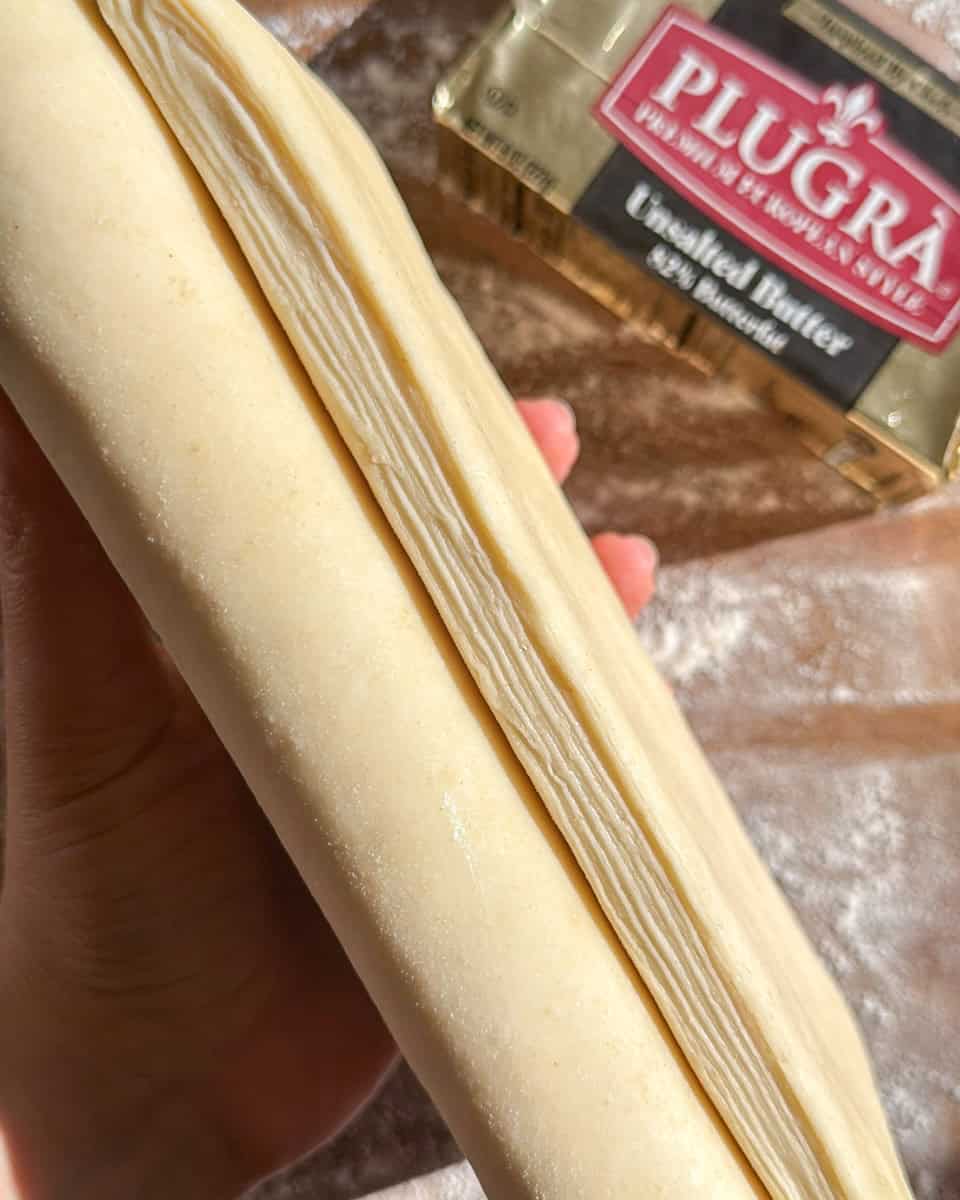
With 82% butterfat, Plugrà has less water and stays more pliable when rolling and folding laminated dough. That flexibility helps create cleaner, more defined layers instead of butter cracking or melting too quickly.
A few years ago, I struggled for the longest time to get visible layers in homemade croissants. The moment I switched to Plugrà, everything changed, the dough handled better, and I finally achieved those bakery-style layers. That’s exactly why I’m using it again here. If you’re making laminated dough at home, I highly recommend it.
Cinnamon Filling
The filling adds warmth and structure without melting into the layers.
- Brown sugar
- Ground cinnamon
- Cornstarch (or flour) to prevent leakage
- A pinch of salt
- Melted butter for brushing
The cornstarch helps keep the filling thick so the layers stay distinct after baking.
Vanilla Cream Cheese Glaze
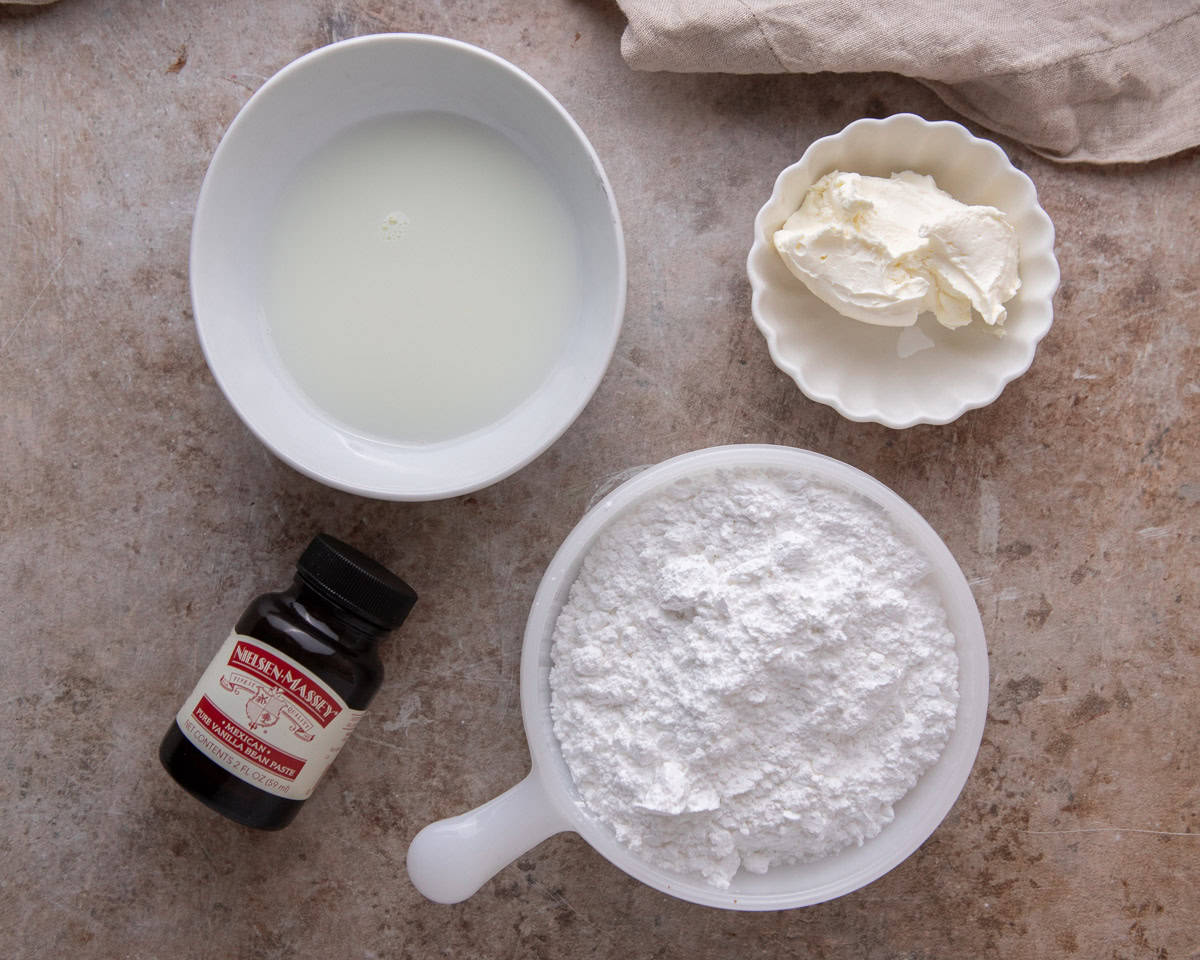
A thin glaze enhances flavor without hiding the laminated texture.
- Cream cheese
- Powdered sugar
- Vanilla extract
- Milk or cream
- Pinch of salt
Keep the glaze light and pourable so the flaky layers remain visible.
How to Make Croissant Cinnamon Rolls
These croissant cinnamon rolls use classic lamination techniques to create visible flaky layers while keeping the interior soft like a traditional cinnamon roll.
1. Make the Enriched Dough
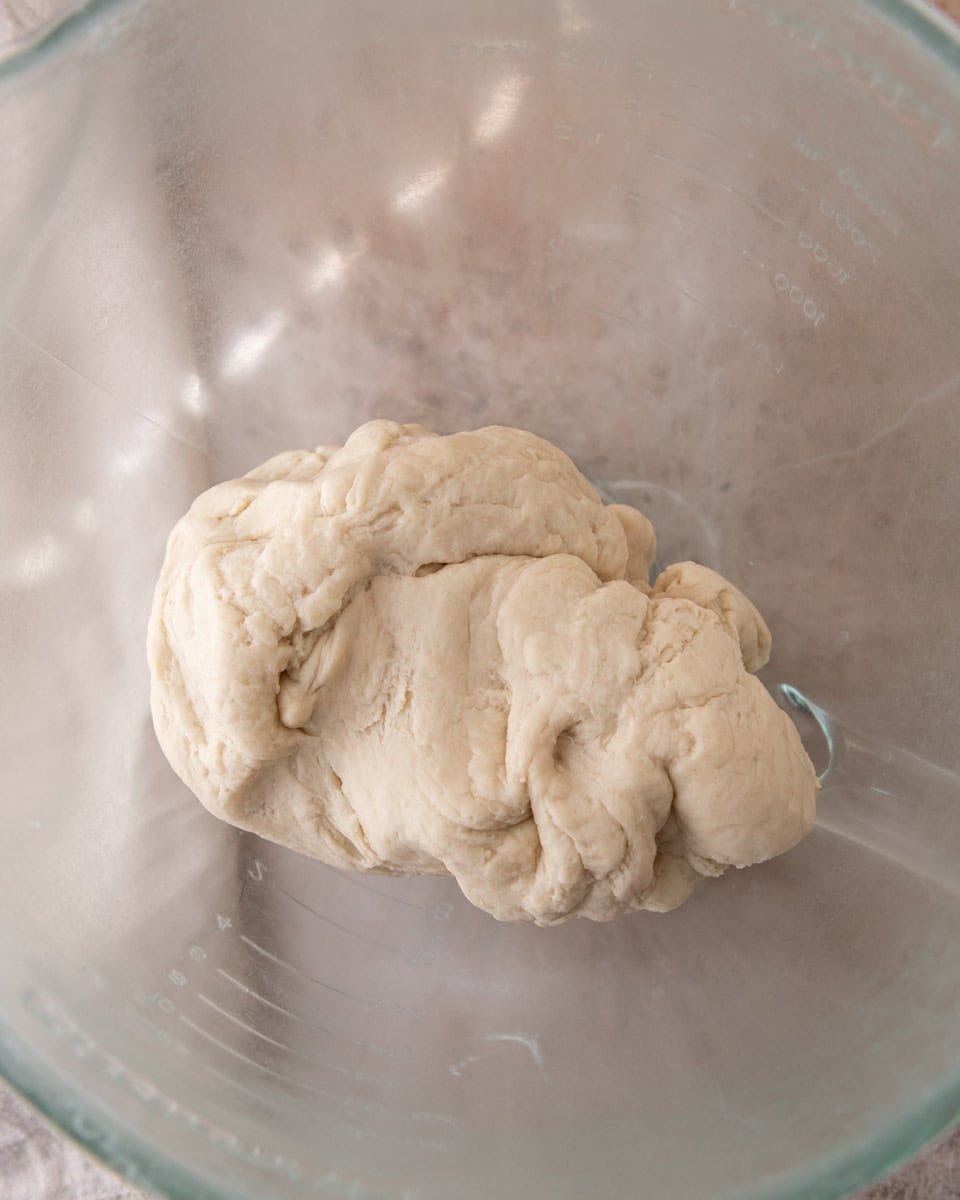
Mix the dough ingredients until smooth and elastic. The dough should feel soft and supple but not sticky.
Cold milk keeps the dough temperature low from the start, which helps control fermentation and prevents the butter from melting too early during lamination. Soft butter blends evenly into the dough without creating greasy pockets, giving the dough richness while maintaining structure.
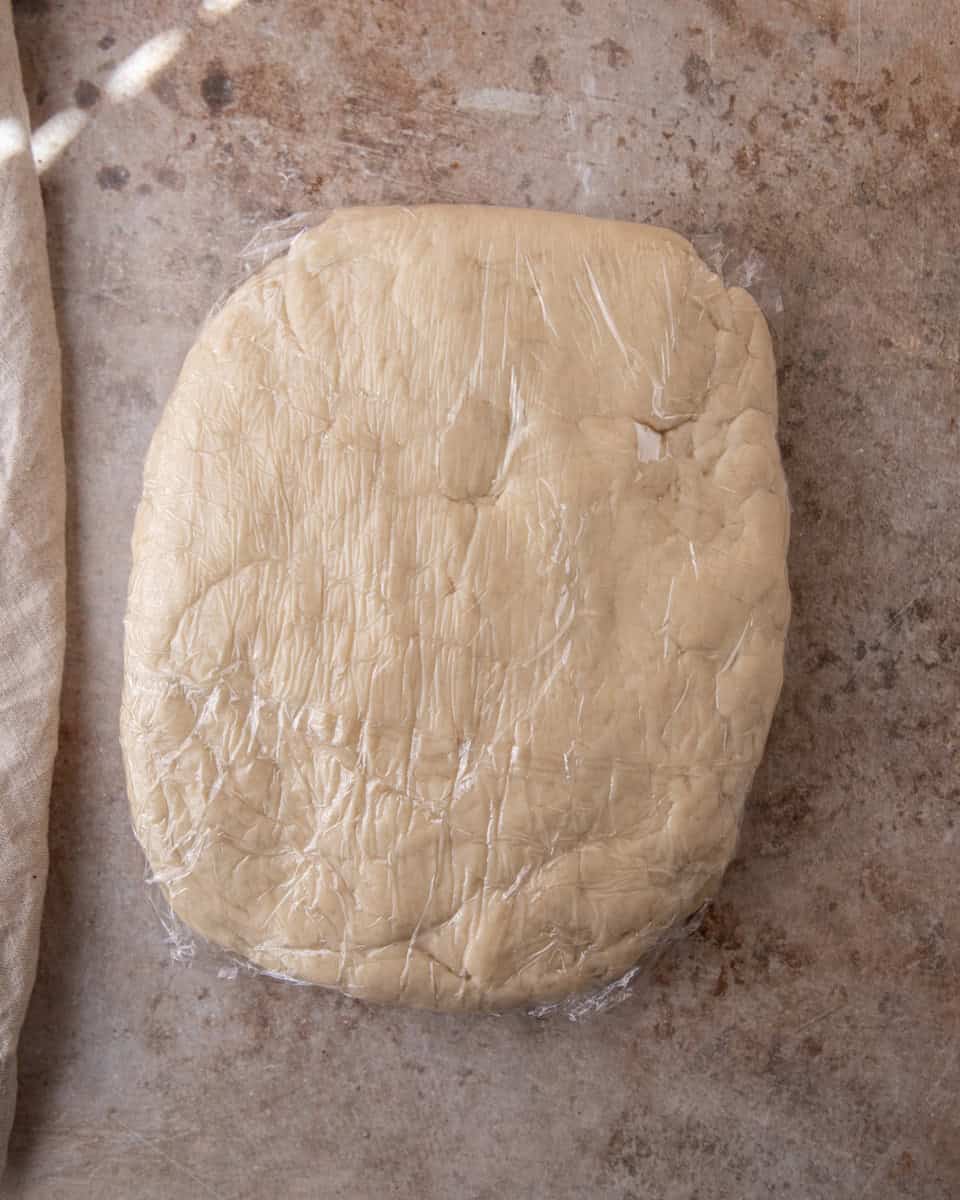
Once mixed, shape the dough into a rectangle before chilling. This makes it easier to roll evenly later.
2. Prepare the Butter Block
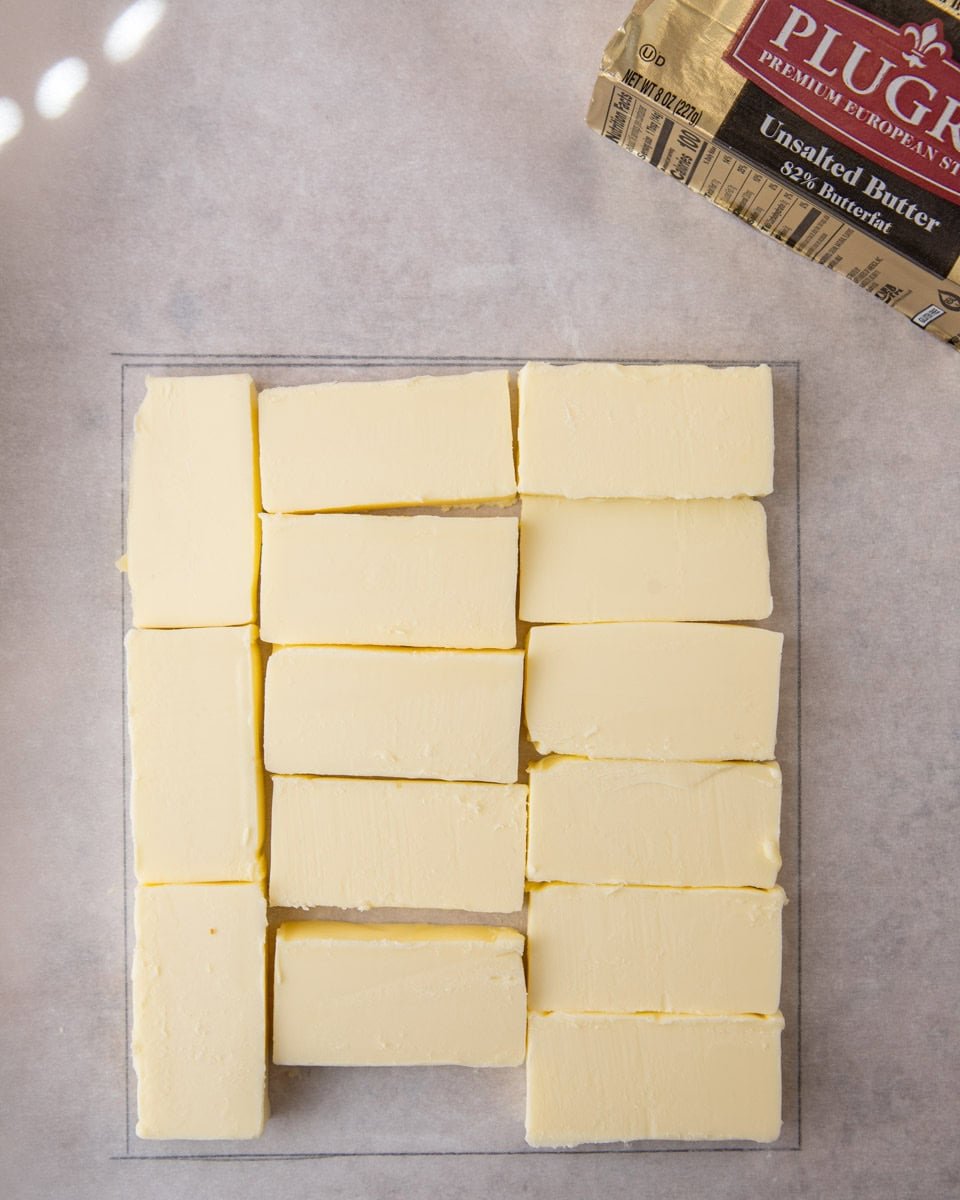
Shape the butter into an even rectangle between sheets of parchment paper. Mark 7-in width x 8-in height on the parchment with a pen/marker. Slice the butter into pieces and fill in the rectangle. Put another sheet of parchment on top, then shape and smooth it with a rolling pin.
The shape matters because the butter needs to fit neatly inside the dough for even lamination. If the butter is uneven, the layers will be uneven.
The butter should be cold but pliable. Firm enough to hold its shape, but soft enough to bend slightly without cracking. If it’s too hard, it will break through the dough. If it’s too soft, it will melt into the layers.

3. Laminate the Dough
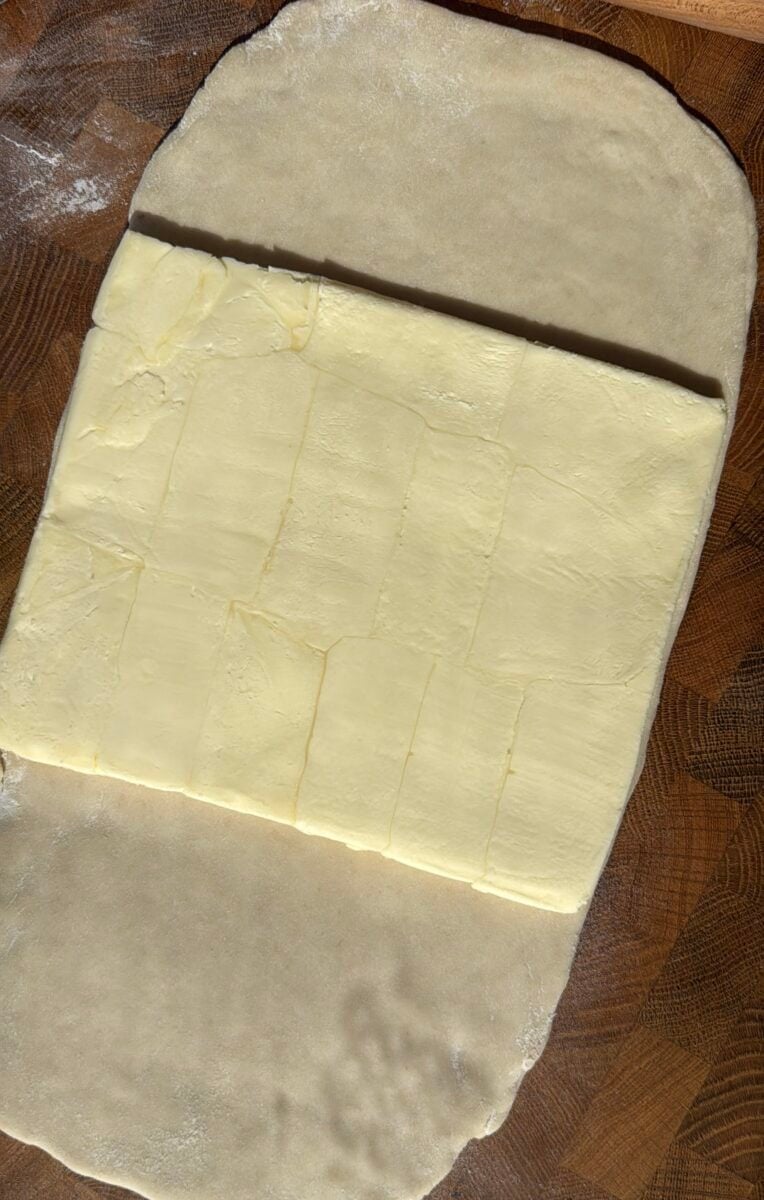
Roll out the dough to double the length of the butter. Enclose the butter inside the chilled dough and begin rolling into a long rectangle.
Fold the dough into thirds like a letter. This creates distinct layers of dough and butter. After each fold, refrigerate the dough to relax the gluten and re-firm the butter.
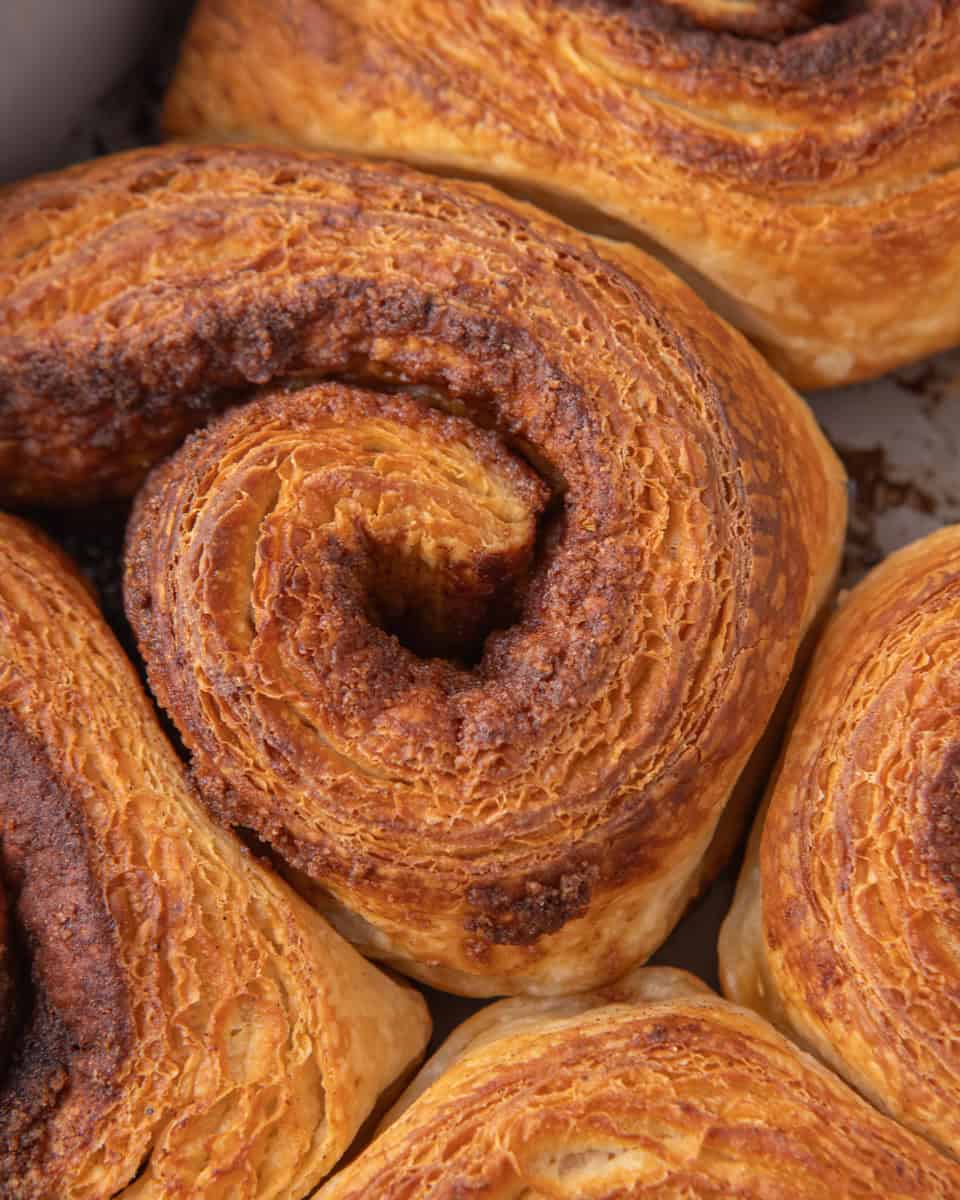
Chilling between folds is essential. If the butter warms up too much, it will melt into the dough instead of staying layered. Proper lamination creates thin, visible layers that expand and separate beautifully during baking.
Clean layers should look defined along the edges, not smeared or greasy.
Handle the dough gently during the final fold to preserve the structure you’ve built.
4. Fill and Shape the Rolls
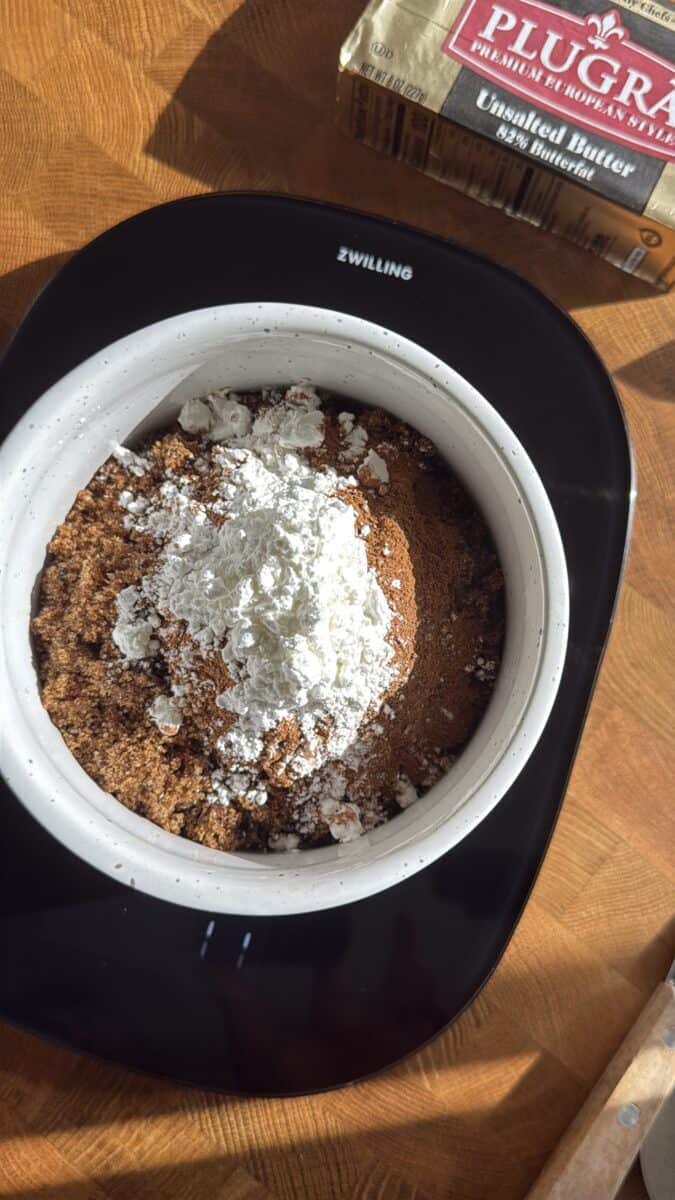
Before rolling, combine the brown sugar, cinnamon, cornstarch, and salt in a small bowl and set aside.
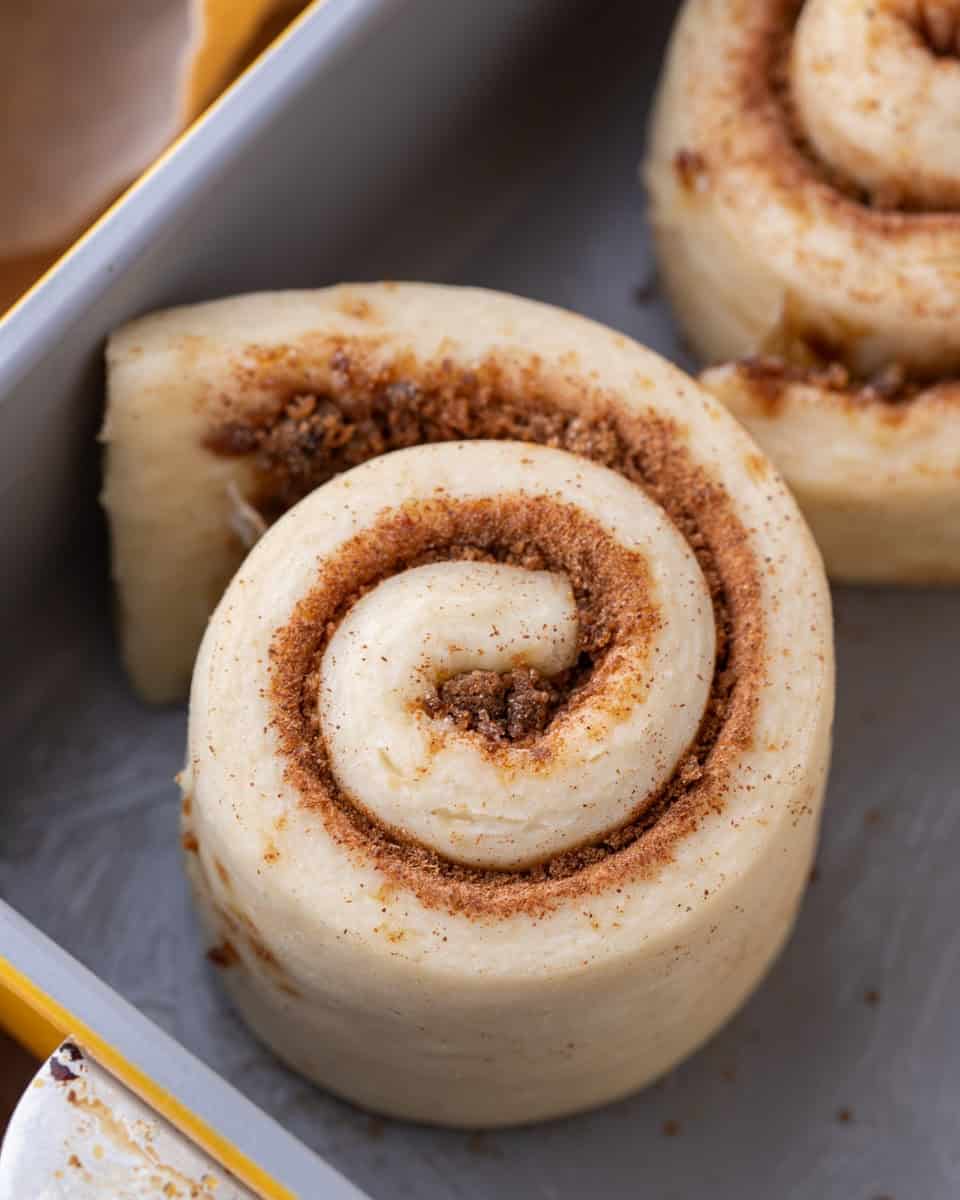
Roll the laminated dough into a thin rectangle and evenly distribute the cinnamon filling.
Roll tightly from the long edge to keep the spiral compact. A tight roll helps maintain structure and prevents gaps between layers during baking.
Cut cleanly using a sharp knife or floss to avoid compressing the layers.

5. Proof at a Cool Temperature
Proof the rolls in a cool room until slightly puffy but not overly expanded.
Because this dough contains laminated butter layers, a warmer environment can cause the butter to melt and leak before baking. Keeping the temperature moderate preserves the structure and helps maintain flakiness.
The rolls should look airy but still hold their shape before baking.
6. Bake for Deep Golden Layers
Start baking at a higher temperature to encourage rapid steam release, which helps the layers expand. Then reduce the temperature to allow the interior to bake through without over-browning.
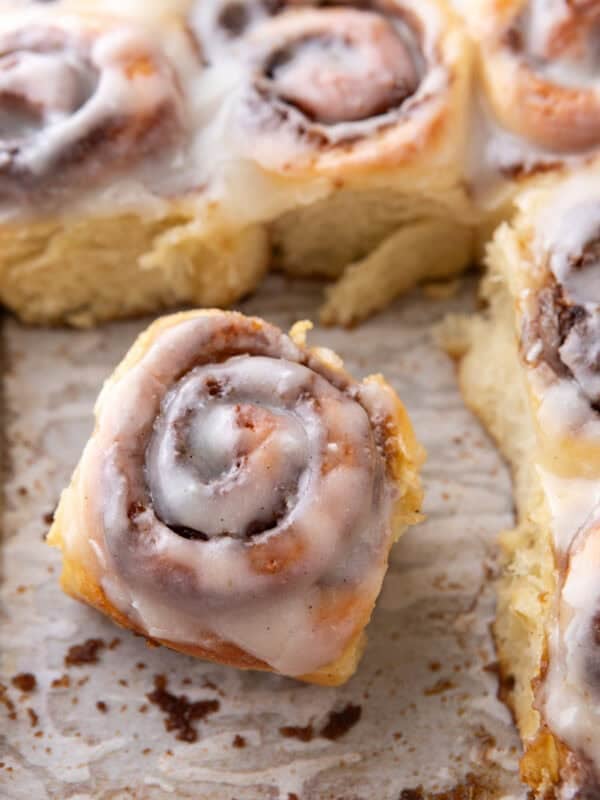
The rolls should be deeply golden brown with crisp, defined edges. Proper color ensures the interior is fully baked and the layers are set.
Use a heavy-bottomed, light-colored pan to keep the bottom from browning too quickly. If you don’t have one, you can put a baking sheet on the oven rack underneath this dish to prevent the bottom from baking too quickly.
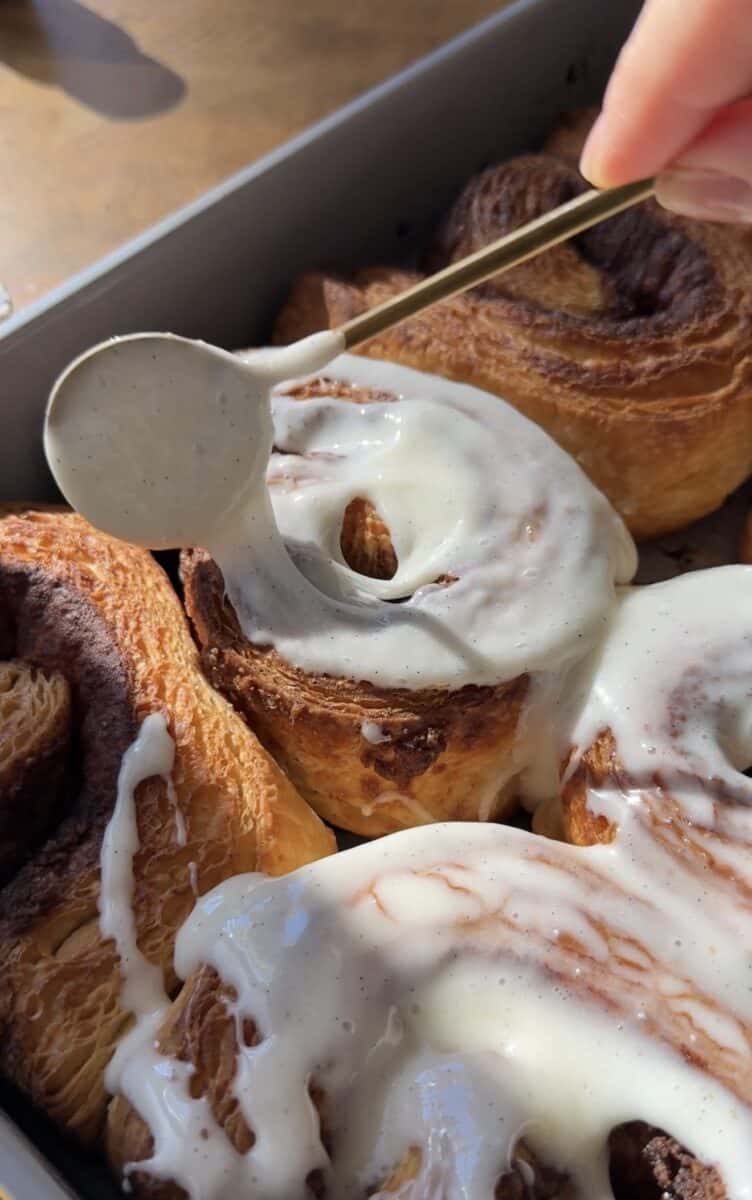
7. Glaze Lightly to Preserve Flakiness
Drizzle a thin layer of glaze over the warm rolls so the flaky layers remain visible and crisp around the edges.
Key Lamination Tips for Flaky Layers
Keep the dough cold during lamination so the butter stays layered rather than melting into the dough. If the butter softens too much, the layers will smear instead of separating.
Roll gently and evenly to preserve clean pastry layers. Pressing too hard can push the butter through the dough and break the structure.
Rest the dough in the refrigerator between folds to relax the gluten and re-firm the butter. This makes rolling easier and prevents shrinkage.
Proof in a cooler environment to prevent butter leakage before baking. If the room is too warm, the butter may melt out of the layers before they have time to set in the oven.
Storage and Reheating
Store baked rolls in an airtight container at room temperature for up to 2 days. For longer storage, refrigerate for up to 4 days.
To reheat, warm in a 300°F oven for 5–8 minutes to help re-crisp the layers. Microwaving will soften the pastry and reduce flakiness.
For freezing, wrap tightly and freeze for up to 2 months. Reheat from frozen in a low oven until warmed through.
Troubleshooting Laminated Dough
Butter leaking during baking usually means the dough became too warm during proofing or lamination.
If layers look compressed rather than flaky, the dough may have been rolled too aggressively or not chilled long enough between folds.
If the rolls shrink while baking, the dough likely needed more resting time to relax the gluten.
More Cinnamon Roll Recipes to Try
- Almond Croissant Cinnamon Rolls
- Red Velvet Cinnamon Rolls
- Black Cocoa Cinnamon Rolls
- Brioche Cinnamon Rolls (Super Soft Tangzhong Bakery-Style)
FAQs
Traditional cinnamon rolls use enriched dough, while these use laminated dough with multiple butter layers, creating a flaky pastry texture.
The Plugrà butter block creates the laminated structure that produces distinct flaky layers during baking.
Yes. After the final fold, the dough can rest overnight in the fridge before shaping and baking.
Croissant-Style Cinnamon Rolls (But Soft Inside)
Ingredients
Dough
- 400 g all-purpose flour Read notes
- 100 g bread flour
- 60 g granulated sugar
- 10 g fine sea salt
- 9 g instant yeast
- 310 g whole milk cold
- 30 g unsalted butter very soft
Butter Block
- 283 g 10 oz Plugrà unsalted butter cold but liable, cut into slices
Cinnamon Filling
- 160 g light brown sugar
- 12 g ground cinnamon
- 8 g cornstarch or all-purpose flour
- Pinch of salt
- 20 g unsalted butter melted (for brushing)
Vanilla Glaze
- 55 g cream cheese very soft
- 180 g powdered sugar
- 20 g milk or cream adjust for consistency
- 1 teaspoon vanilla extract or vanilla bean paste
- Pinch of salt
Instructions
Make the Dough
- In the bowl of a stand mixer, whisk together the all-purpose flour, bread flour, sugar, salt, and yeast.400 g all-purpose flour, 100 g bread flour, 60 g granulated sugar, 10 g fine sea salt, 9 g instant yeast
- Add the cold milk and soft butter.310 g whole milk, 30 g unsalted butter
- Mix on low speed for 3–4 minutes until a shaggy dough forms.
- Increase to medium-low speed and mix another 3–4 minutes until smooth and elastic. The dough should be soft but not sticky.
- Shape into a rectangle about 1 inch thick, wrap tightly, and refrigerate for 30–45 minutes.
Prepare the Butter Block
- On a sheet of parchment paper, draw a 7 × 8-inch rectangle using a ruler and marker. Flip the parchment over so the ink side is facing down (this prevents ink transfer).283 g 10 oz Plugrà unsalted butter
- Put the cold but pliable butter slices in the center of the drawn rectangle on the clean side of the parchment. It’s okay if it doesn’t fill the shape yet. Place a second piece of parchment on top. Using a rolling pin, gently pound the butter to start flattening it. This softens it evenly without warming it too much.
- After pounding, begin rolling the butter outward toward the corners of the rectangle, using the drawn lines as your guide. Keep the edges as straight as possible.
- If needed, lift the parchment and use a bench scraper or your hands to press and straighten the sides so you end up with a neat, even 7 × 8-inch rectangle of consistent thickness.
- Refrigerate the butter block until it is cold but still bendable. It should feel firm, but if you flex it gently, it shouldn’t crack. If it’s rock hard, let it sit at room temperature for 3–5 minutes before laminating.
Laminate the Dough
- Roll the chilled dough on a lightly floured surface into an 8 × 16-inch rectangle. Keep the edges straight and thickness even. If the dough resists or shrinks back, let it rest 5–10 minutes before continuing
First Fold
- Place the butter block in the center of the dough so it covers half the rectangle. Fold the dough over the butter to fully enclose it, aligning edges carefully. Pinch the seams closed and press gently to seal so no butter is exposed.
- Fold into thirds like a letter. Fold the top third down, then fold the bottom third up over it. This completes the first fold. Wrap tightly in plastic wrap and refrigerate for 30 minutes to firm the butter and relax the gluten
Second Fold
- Rotate the dough 90 degrees (so the folded edge is on your left like a book spine). Roll again into a 10 × 20-inch rectangle, keeping the thickness even and edges straight. If the dough springs back, chill 10–15 minutes before rolling further.
- Fold into thirds again. Wrap tightly and refrigerate for 30–40 minutes. The dough should feel cool and slightly firm before continuing.
Gentle Third Fold
- Roll slightly thicker into an 8 × 15-inch rectangle for the final fold. Handle gently and avoid excessive pressure to preserve the layers.
- Fold into thirds one last time. Wrap tightly and refrigerate for 45–60 minutes before rolling out to add the filling and shape the cinnam
Make the Filling
- In a medium bowl, mix the brown sugar, cinnamon, cornstarch (or flour), and a pinch of salt until evenly combined. Set aside.160 g light brown sugar, 12 g ground cinnamon, 8 g cornstarch or all-purpose flour, Pinch of salt
Shape the Cinnamon Rolls
- Roll out the dough: On a lightly floured surface, roll the chilled laminated dough into a 14 × 16-inch rectangle, about ¼-inch thick. Try to keep the thickness even so the rolls bake uniformly.
- Lightly brush the surface of the dough with melted butter (optional but recommended for richer flavor and better filling adhesion).20 g unsalted butter
- Sprinkle the cinnamon sugar mixture evenly over the dough, leaving about ½ inch bare along one long edge to help the seam seal. Lightly press the filling into the dough with your hands or a rolling pin (very gently) so it adheres to the melted butter and doesn’t spill out as much while rolling and slicing.
- Starting from the longer side, roll the dough up into a tight log. Roll steadily but gently, tight enough to create defined swirls, but not so tight that the filling squeezes out.
- Finish with the seam on the bottom of the log and gently press to seal. (Keeping the seam underneath helps prevent the rolls from unrolling during proofing and baking.)
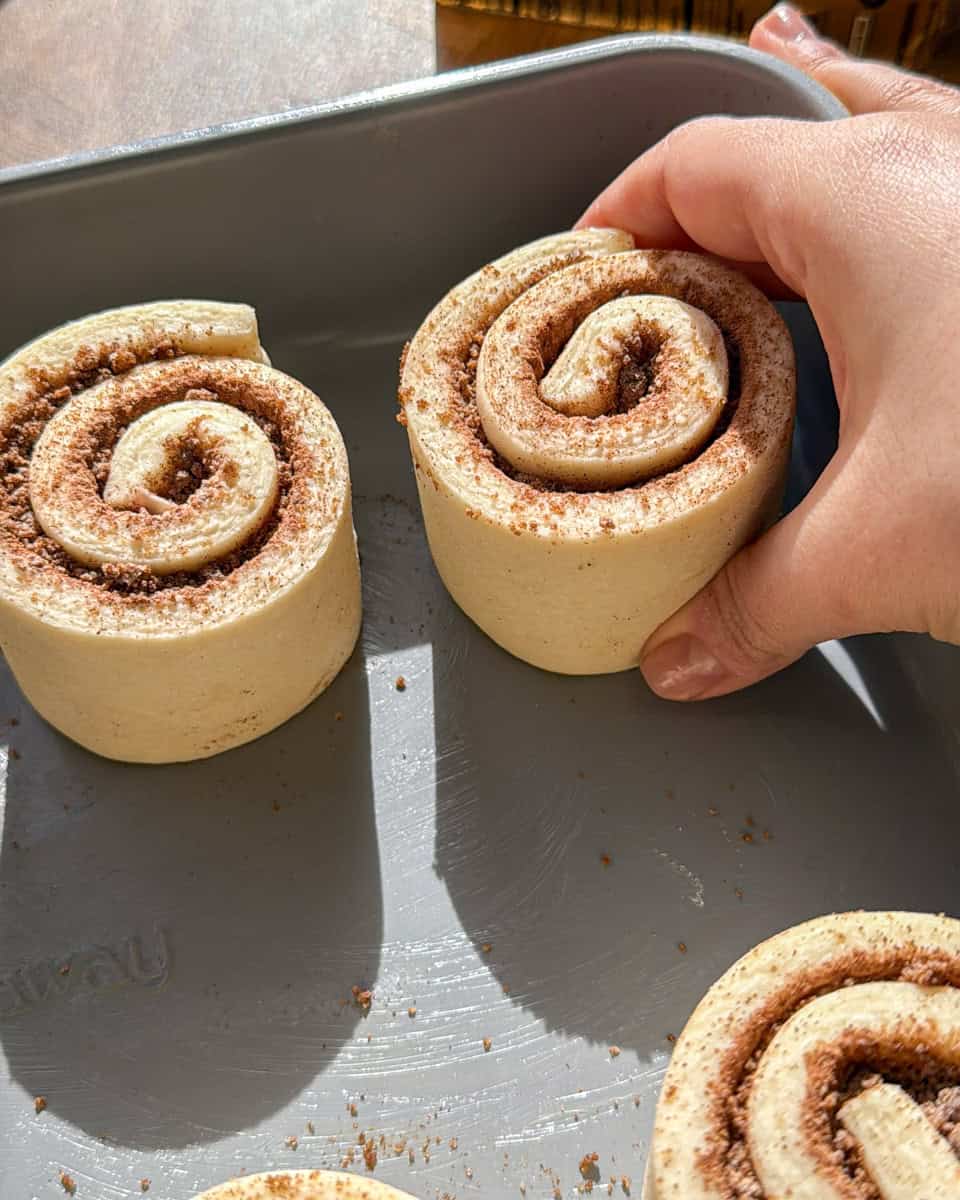
- Trim a thin slice off each end to clean up the edges, then cut into 8 even rolls.Easiest method: Use a very sharp knife and gently slice your rolls.Optional: You can use a pizza cutter to cut the log into sections first, but it can be messier because some filling may slide out.
Proof (timing depends on your kitchen)
- Arrange rolls in a parchment-lined 9 × 13-inch pan, spaced evenly. Place each roll so the loose end (“tail”) is pointing towards another roll (not sticking outward). This helps keep the spiral tight so they don’t open up too much while proofing/baking.
- Cover loosely and proof until noticeably puffy and the rolls are just touching or nearly touching.In a cool kitchen (around 70°F): about 1½–2 hoursIn a warm kitchen: proofing may be faster.Visual cue matters most: They should look lighter, inflated, and jiggly when you gently shake the pan.
- Once proofed, place the pan in the refrigerator for 15–20 minutes while the oven preheats. This firms the butter layers again and helps the rolls bake up flakier with cleaner layers.
Bake
- Preheat oven to 400°F. Bake for 10 minutes, then reduce the oven temperature to 375°F and bake 15–20 minutes more, until deeply golden and baked through.
- Let the rolls cool in the pan for 10 minutes before glazing so the glaze melts slightly but doesn’t disappear completely.
Make the Glaze
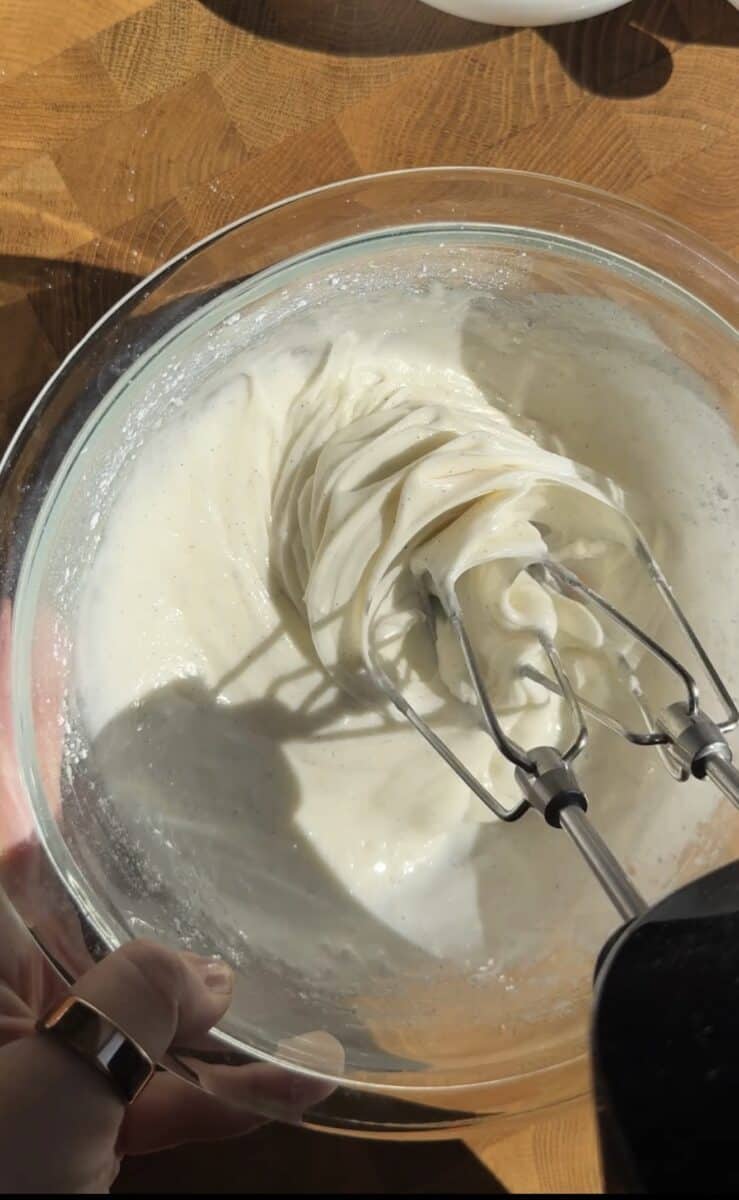
- Beat the softened cream cheese until completely smooth. Add powdered sugar, vanilla, and a pinch of salt and mix until smooth.55 g cream cheese, 180 g powdered sugar, 1 teaspoon vanilla extract or vanilla bean paste, Pinch of salt
- Whisk in milk or cream a little at a time until the glaze is thin and pourable (a thin glaze keeps the flaky layers visible).20 g milk or cream
- Drizzle glaze over warm rolls and serve immediately.
Video
Notes
Quick Troubleshooting
- If butter cracks/breaks through: It’s too cold, let dough sit 5 minutes, then continue rolling gently.
- If dough feels soft/greasy: Butter is warming, refrigerate dough 10–15 minutes before continuing.
- Best proofing spot: A turned-off oven with the light on works well for a gentle warm proof, just watch the dough so the butter doesn’t melt.
- If filling spills out while slicing: Just sprinkle any fallen filling over the tops before proofing, still delicious.
Nutrition
Nutrition information is automatically calculated, so should only be used as an approximation.
Can you please include U.S. measurements?
I will do that for you! Since it is a laminated dough, it is slightly more meticulous and I highly recommend using a kitchen scale. But give me a few minutes and I’ll get that up!