This post may contain affiliate links. Please read our disclosure policy.
Sourdough Starter is one of the most delicious and fun journeys you can embark on! It is a staple in the sourdough-baking world. Whether you are experienced and have already played around with it or trying to make this starter to make your first loaf, I got you covered!
I have this button here to make your life easier, but if this is your first time making sourdough starter, please make sure to reach through the article to learn as much as possible before you start on your sourdough making journey!
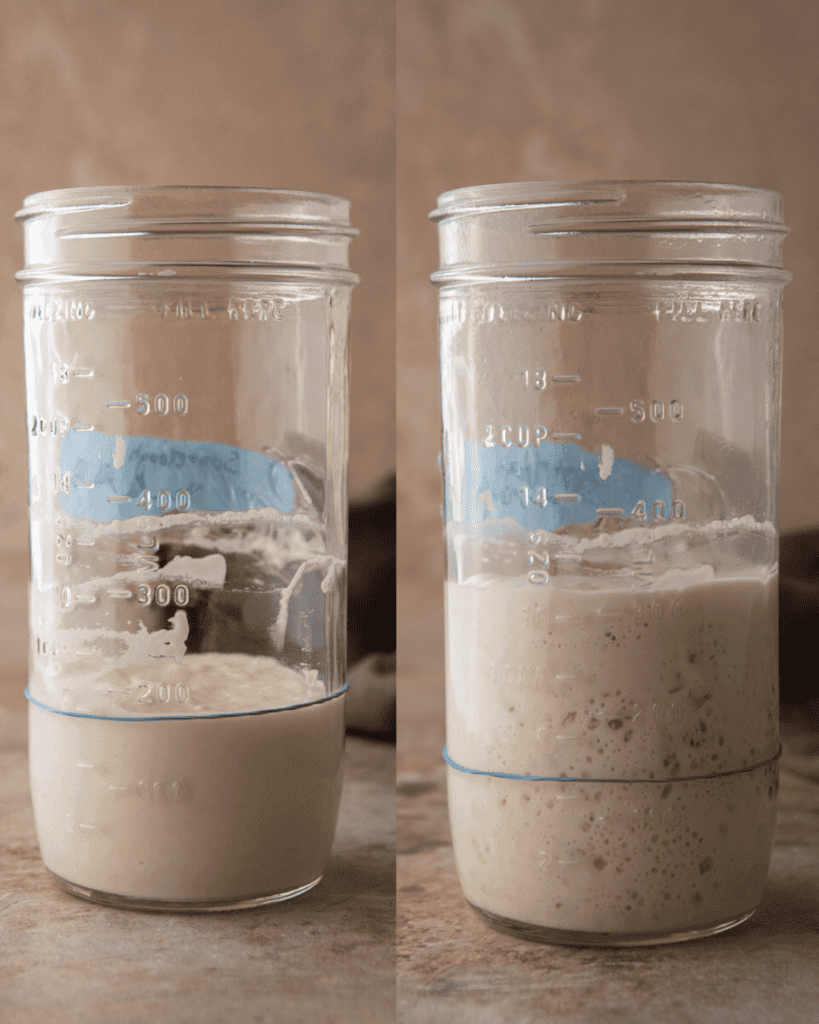
Starting your own sourdough journey at home can feel a bit intimidating, but it doesn’t have to be! The key to making those tangy, crusty loaves with the massive air bubbles inside that you’ve seen all over social media is a good sourdough starter. But don’t worry if you’re new to this, everyone starts somewhere, and I’m here to guide you through it!
In this post, I’ll walk you through the whole process of making your own sourdough starter from scratch in the easiest and best way possible. By the end of it, you’ll have your own bubbly, active sourdough starter ready to bake up some seriously tasty bread and other sourdough recipes anytime you want. Let’s get into it!
If you’re here by mistake and just need some sourdough discard recipes, check out my sourdough drop biscuits, this sourdough discard cinnamon roll recipe, as well as these sourdough discard chocolate chip cookies
Table of Contents
- Why should you make your own sourdough starter?
- How does a sourdough starter work?
- Ingredients you will need to make this Beginner Sourdough Starter Recipe
- How to make a beginner sourdough starter recipe
- Troubleshooting Tips and Frequently Asked Questions for this Sourdough starter recipe
- Beginner Sourdough Starter Recipe
- Beginner Sourdough Starter Recipe
- If you enjoyed this how-to-make sourdough starter recipe and want to save it for later, make sure to pin it!
Why should you make your own sourdough starter?
- Superior Flavor: Homemade sourdough bread has a depth of flavor you can’t get from store-bought bread. The natural fermentation process gives it an amazingly tangy and complex taste.
- Health Benefits: Sourdough is easier to digest than regular bread because the fermentation process breaks down gluten and phytic acid. Plus, it has a lower glycemic index, so it won’t spike your blood sugar as much.
- Cost-Effective: Making your own loaf of sourdough is cheap! All you need is flour, water, and a little time. Once you have a healthy starter, you can keep it going indefinitely, which means endless loaves of bread without spending extra money!
- Creative Control: When you make your own starter, you have full control over the flavor and texture of your bread. I’ve experimented with cheese, nuts, olives, and they’ve all turned out delicious; the possibilities are endless.
- Connection to Tradition: Sourdough has been made for thousands of years and it’s a fun way to tap into that history and bring an ancient practice into your modern kitchen.
How does a sourdough starter work?
A sourdough starter is a living culture of wild yeast and lactic acid bacteria (LAB) naturally occurring in flour and the environment. When mixed with flour and water, these microorganisms begin to ferment, feeding on the sugars in the flour.
The wild yeast produces carbon dioxide, which causes bread dough to rise, while the LAB produce acids that give sourdough its distinctive tangy flavor and help strengthen the dough. When you mix the starter into bread dough, the yeast and bacteria work together during the fermentation process to leaven the dough and develop complex flavors over time.
Ingredients you will need to make this Beginner Sourdough Starter Recipe
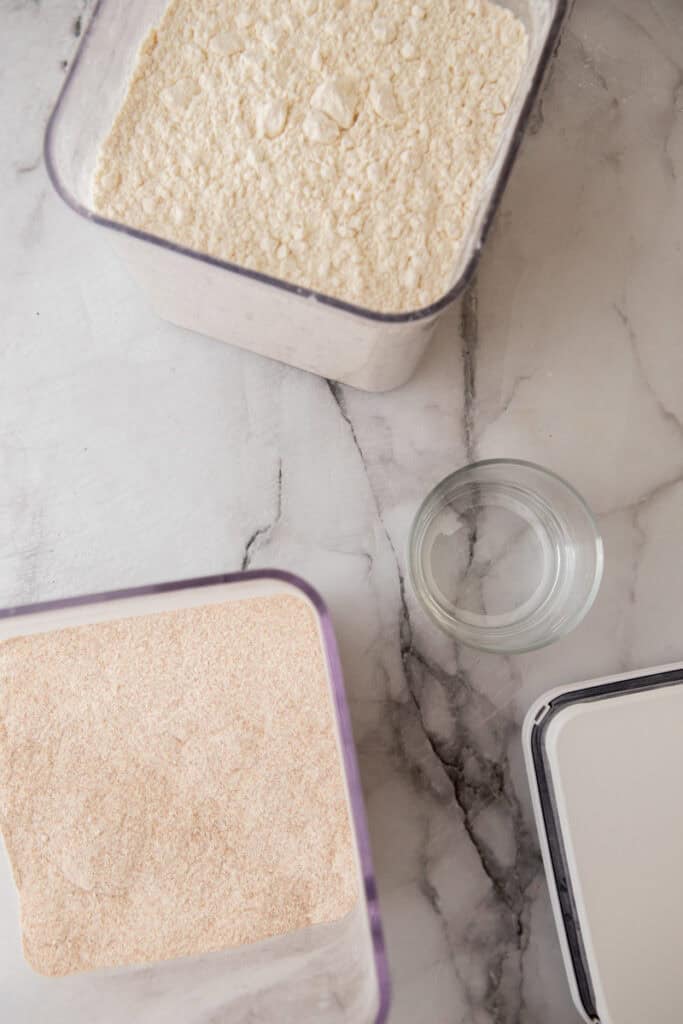
Here are the ingredients you will need to make your own starter. To make the base, it’s very simple. All you will need are equal parts of flour and water. Just know for future reference that you can make however much starter or little you want, but for the sake of this recipe, let’s go with a tablespoon of each to make it easier to manage.
- Unbleached Whole Wheat Flour: It’s super important that you use unbleached flour for your starter. The trace amounts of chlorine in bleached flour will kill the live cultures and necessary bacteria needed to make the dough rise.
- Filtered water: using filtered water is a must for a healthy sourdough starter. Tap often contains chlorine or chloramine which can keep wild yeast and bacteria from growing. For a more natural and friendly environment for fermentation make sure to use filtered water!
- Unbleached All-Purpose Flour: We will use whole wheat flour for the first step and then continuously feed the starter with all-purpose flour. We’ll explain why that is later on in the article.
What if I don’t have filtered water?
If you don’t have filtered water, you can also use:
- Spring Water: A great alternative since it contains natural minerals that nourish your starter.
- Distilled Water + Minerals: If you only have distilled water, add a tiny pinch of non-iodized sea salt or a few drops of mineral supplements to introduce essential nutrients.
This step ensures your sourdough starter has the best conditions to thrive.
How to make a beginner sourdough starter recipe
Day 1: Getting Started
Getting ready to make your sourdough starter is easier than you might think. All you need are a few basic ingredients, a couple pieces of utensils and kitchenware, and a little bit of patience. Over the next few days, you’ll watch as your starter comes to life.
You’ll get to witness it bubble and grow as it ferments, and before you know it, you’ll have a strong and active starter ready to bake the tastiest homemade bread. Just make sure to keep track of your days and pay attention to how the steps change throughout. Now, let’s dive into the simple steps to get your starter going!
These are the step-by-step instructions to make easy sourdough bread starter. Continue scrolling to learn how to care for it once it’s started.
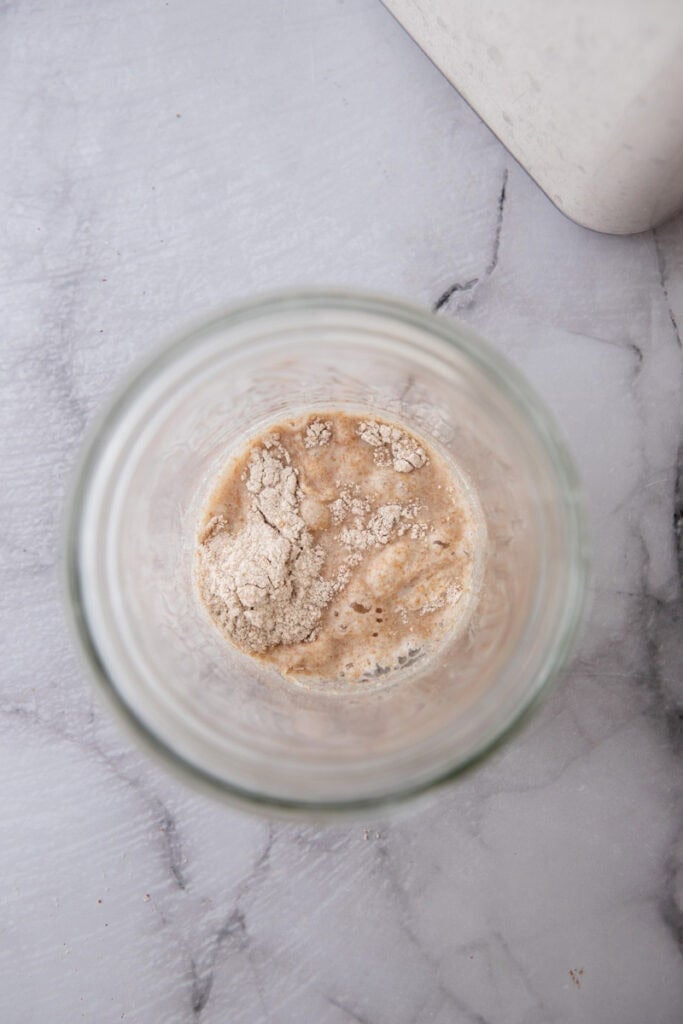
- In a small, clean jar or container, combine the whole grain flour and water.
- Stir until there are no dry spots, creating a thick, smooth paste.
- Cover the jar loosely with a lid or cloth to allow air to circulate. I personally used a coffee filter and secured it over the jar with a rubber band.
- Place it in a warm spot in your kitchen (70-75°F is ideal).
Tip: If your house is cooler, you can put the jar in a turned-off oven with the light on for warmth, or just wrap it up with a kitchen towel to keep it warm.
Day 2-3: First Signs of Life: Check for Bubbles
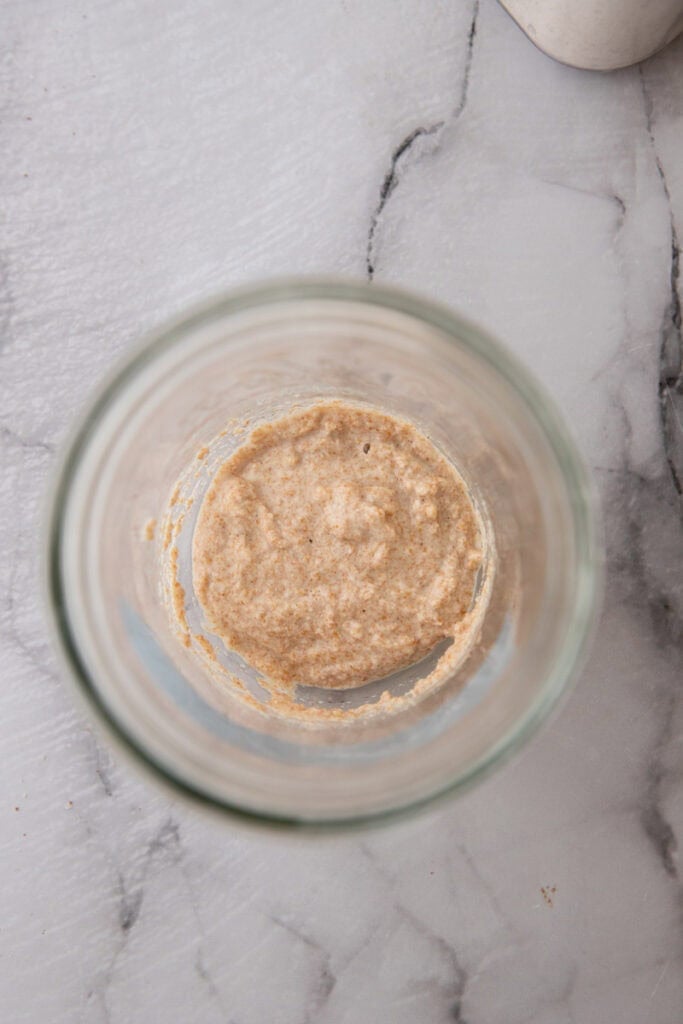
- The next day, after 24 hours, check for bubbles on the surface. These are signs and a good indicator of fermentation.
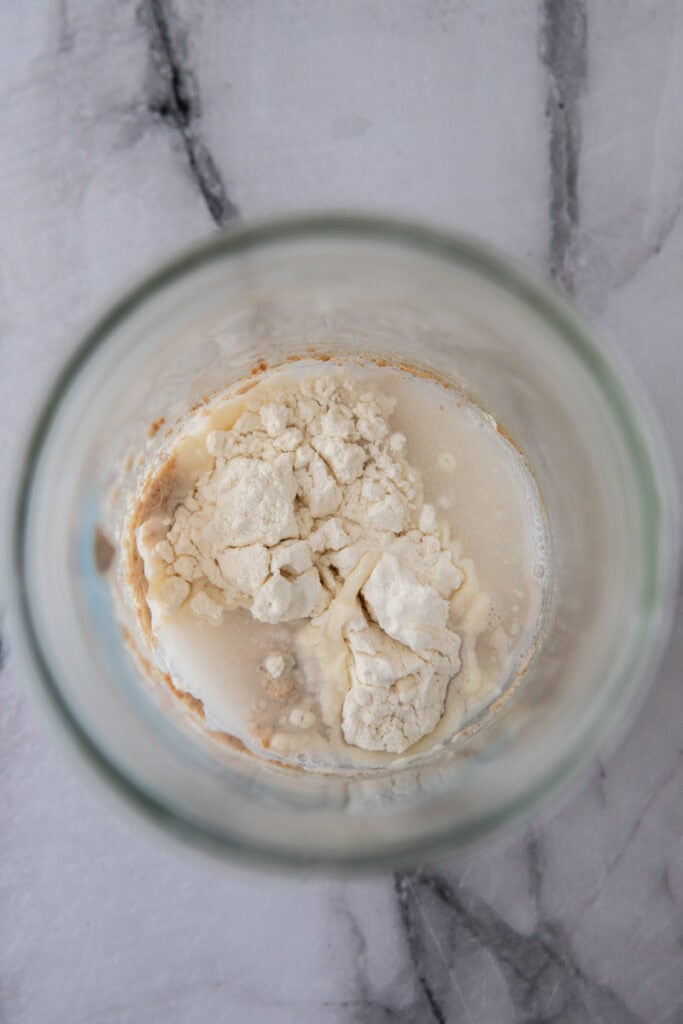
- Time for feeding. Discard half of the flour mixture (about 1 tablespoon) and add 1 tablespoon of all-purpose flour and 1 tablespoon of water to the remaining starter.
- Stir well, cover loosely, and place it back in a warm place on the kitchen counter.
Do the same thing that you did the nights before. Make sure that you keep it nice and tasty so that it thrives.
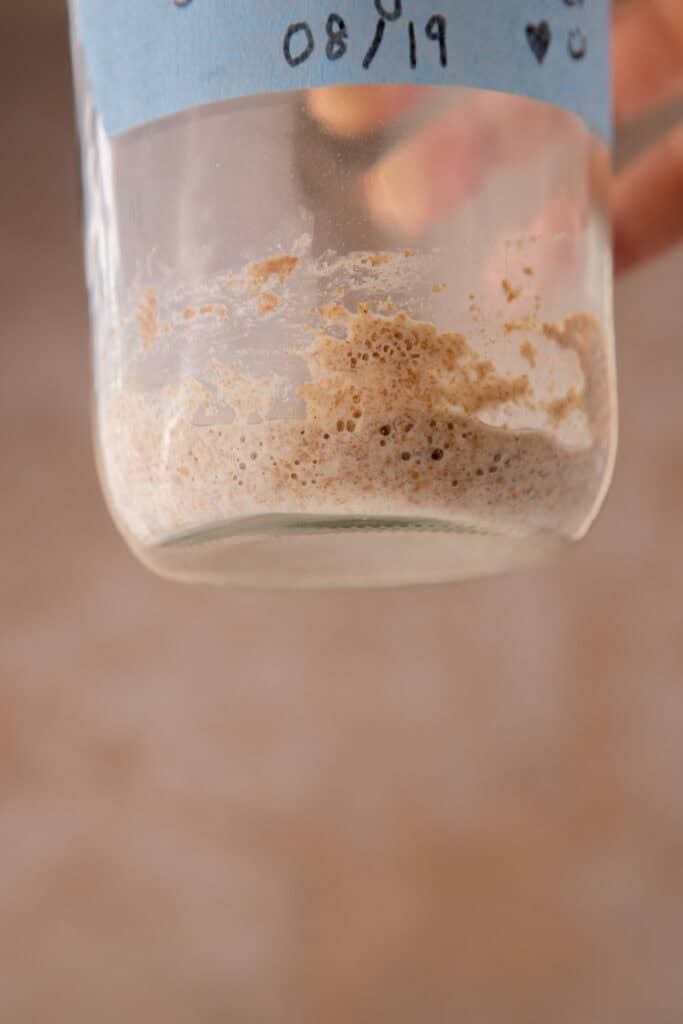
At this point you might notice some slightly darker liquid sitting on top of your starter, don’t worry about it, just mix it well before you discard some of that starter and feed it again.
Days 4-5: Building Strength: Repeat Feeding
- Every 24 hours, discard half of the starter and feed it with 1 tablespoon of all-purpose flour and 1 tablespoon of lukewarm water.
- Stir, cover, and let it rest in the same warm spot at room temperature.
Note: You may notice more bubbles and a slight rise in the starter. This is a good sign! You will also start to smell a very strong and putrid sour smell. Don’t be alarmed. This is normal and a pleasant sour smell will eventually replace the bad sour smell.
Days 6-7: Consistency and Growth: Twice Daily Feedings
- Start feeding your starter fresh flour twice a day: once in the morning and once in the evening.
- Discard half of the mixture each time, then add 1 tablespoon of all-purpose flour and 1 tablespoon of water.
- Stir, cover, and place it back in the warm spot.
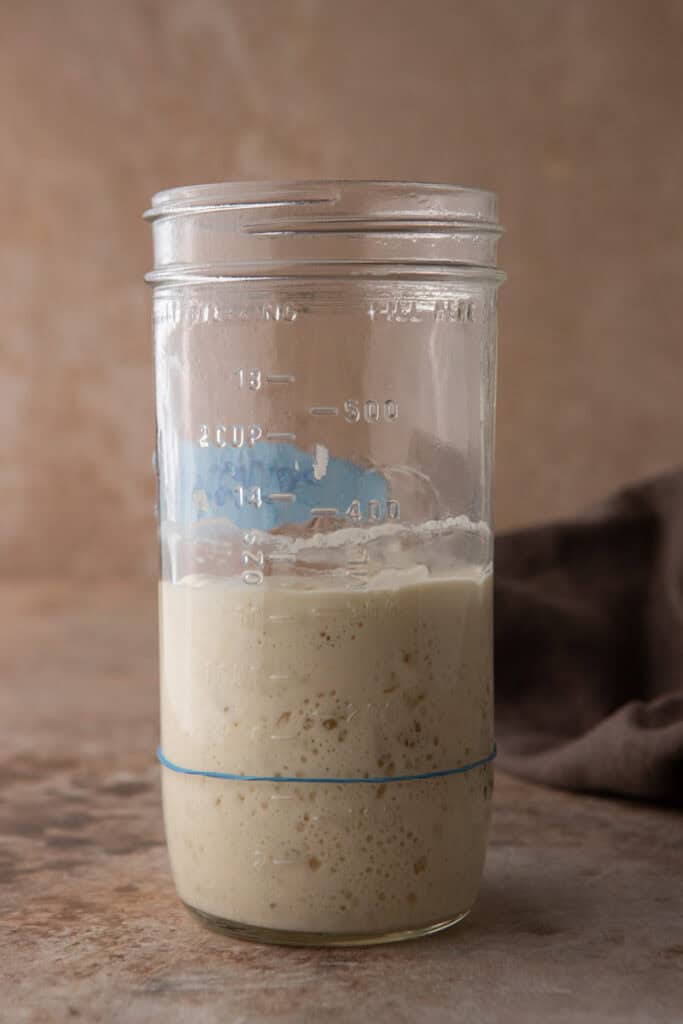
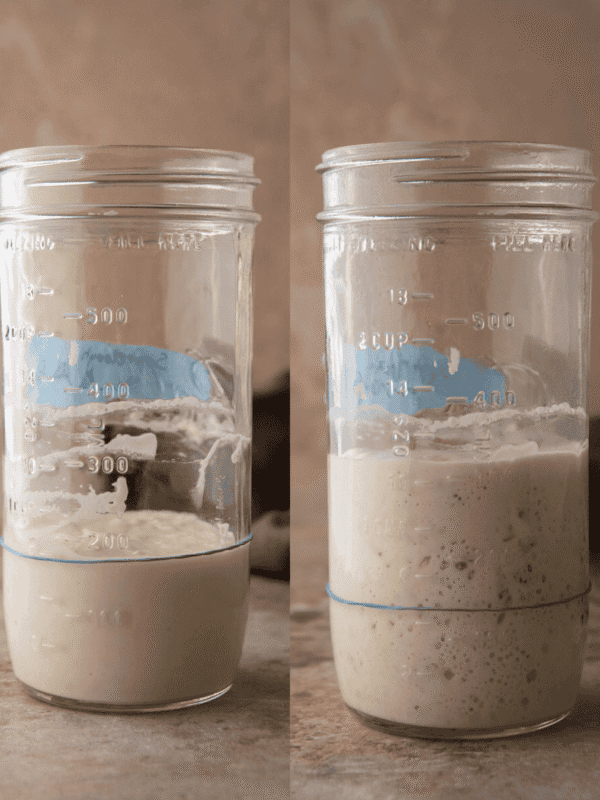
Tip: As the starter becomes more active, it should double in size 4-6 hours after feeding.
Day 8-10: Ready to Use: The Final Stage!
- By now, your starter should be doubling in size within 4-6 hours of feeding, have a pleasant sour smell, and be full of bubbles.
- It’s now ready to use for baking!
This process might take 1-2 weeks depending on the temperature and conditions in your kitchen, but with patience and regular feeding, you’ll have a robust sourdough starter ready to make delicious bread! 🥖 The 8-10 days I mentioned above are estimates, as long as your sourdough starter doesn’t go bad, keep discarding and feeding it because it will get stronger and stronger. You will know that it is ready to use when you see it double in size then drop back down with every feeding.
Troubleshooting Tips and Frequently Asked Questions for this Sourdough starter recipe
Why do we start with whole wheat flour and then move to all-purpose flour?
The whole wheat flour is used just on the first day to help jumpstart the fermentation process because it contains more nutrients and wild yeast than all-purpose flour. After that, you switch to all-purpose flour to feed the starter. This helps keep the process more consistent and less wasteful while still developing a strong, active starter.
So, to clarify:
- Day 1: Use whole wheat flour.
- Days 2-10: Use all-purpose flour for feeding.
This combination ensures a healthy and active starter with minimal waste. You can continue feeding your sourdough starter with whole wheat flour to strengthen it further, or experiment with a mix of flours. A ratio of 1/2 all-purpose flour and 1/2 whole wheat flour is an excellent starting point if you want your starter to become active more quickly.
When you’re ready to transition, you can switch to feeding your starter exclusively with unbleached all-purpose flour if you prefer to avoid whole wheat for baking.
Experimenting with different flours once your starter is active
Experimenting with different flours once your sourdough starter is active can be a fun way to explore new flavors, textures, and baking possibilities. Here’s how you can do it:
- Gradual Transition
- Start Small: Begin by substituting a small portion of your regular flour (like all-purpose) with a different type of flour. For instance, if you usually feed your starter with 100g of all-purpose flour, try using 80g all-purpose and 20g of a new flour, like whole wheat or rye.
- Observe the Changes: If you like the results, gradually increase the amount of flour over the next few feedings. This approach helps your starter adjust to the new flour without shocking it.
- Mixing Flours
- Combine Different Flours: Mix different flours to create a blend that suits your taste. For example, a blend of whole wheat and all-purpose flour can give your starter a slightly nutty flavor while maintaining a balanced consistency.
- Experiment with Ratios: Try different ratios of flours to see how they affect the flavor and activity of your starter. Some people like a 50/50 mix, while others might prefer 70/30 or another combination.
- Explore Unique Flours
- Rye Flour: Rye is a popular choice for sourdough starters because it ferments quickly and adds a rich, earthy flavor. Even a small amount of rye can boost the activity and flavor of your starter.
- Whole Wheat Flour: Due to its higher nutritional content, whole wheat flour adds a nuttier taste and can make your starter more robust. It also tends to produce denser, more flavorful bread.
- Spelt, Kamut, or Einkorn: These ancient grains offer unique flavors and textures. They can be more challenging to work with but can result in a wonderfully distinct loaf.
- Gluten-Free Flours: If you’re interested in gluten-free baking, you can experiment with gluten-free flours like brown rice, sorghum, or buckwheat. Remember that these flours will produce different results and may require some trial and error. I would refer to this how to make gluten free sourdough starter guide for a more comprehensive approach
- Monitor Hydration Levels
- Adjust Water as Needed: Different flours absorb water differently. For example, whole grain and rye flour may need a little more water than all-purpose flour. Pay attention to the consistency of your starter and adjust the water content if it seems too thick or too runny.
- Track the Performance
- Keep Notes: As you experiment, record the types of flour you use, the ratios, and how your starter responds. Note any changes in rise time, flavor, and texture.
- Compare Results: Try baking with your modified starter to see how the flour changes affect the final loaf. You might discover new favorites or unique qualities in your bread.
- Separate a Portion for Testing
- Create a New Starter: If you want to try something drastically different (like switching to a completely different flour type), you can take a portion of your existing starter and start a new one with the new flour. This way, you can experiment without risking your original starter.
Experimenting with different flours is a great way to customize your sourdough to your liking and explore new baking possibilities!
Hydration Suggested Ratios for sourdough starter
To ensure your sourdough starter maintains the right consistency, here are some suggested water-to-flour ratios based on the type of flour you’re using:
• All-Purpose Flour: Use a 1:1 ratio of flour to water by weight (e.g., 50g flour + 50g water). This typically results in a smooth, pancake-batter-like consistency.
• Whole Wheat Flour: Start with a slightly higher hydration ratio, such as 1:1.1 (e.g., 50g flour + 55g water), as whole wheat flour absorbs more water.
• Rye Flour: Rye flour is very absorbent, so aim for a 1:1.2 ratio (e.g., 50g flour + 60g water) for a looser, well-hydrated consistency.
Tip:
• If your starter feels too thick and stiff, add a small amount of water (5-10g at a time) until it loosens up.
• If it’s too runny, mix in a little more flour until it thickens to the desired consistency.
| Type of Flour | Common Hydration Needs | Example | Notes |
All-Purpose Flour | 1:1 (equal flour to water) | 50g flour + 50g water | Produces a smooth, pancake-batter-like consistency. |
Whole Wheat Flour | 1:1.1 (slightly more water) | 50g flour + 55g water | Whole wheat absorbs more water; this ratio ensures the right consistency. |
Rye Flour | 1:1.2 (even more water) | 50g flour + 60g water | Rye flour is very absorbent and ferments faster, creating a looser starter. |
1. Stick to all purpose flour and whole Wheat Flour at first: Start with all-purpose flour and whole wheat flour for simplicity. Experiment with others after establishing your starter.
2. Use a Kitchen Scale: Precision matters! Volume measurements can lead to inconsistencies.
3. Water Temperature: Use lukewarm water (around 75°F/24°C) to encourage yeast growth.
Why does my sourdough starter not have bubbles?
A sourdough starter not bubbling could be due to a few different factors. Here are some common reasons and how to fix them:
- Temperature. Starters thrive in warm environments. If your kitchen is too cold (below 70°F/21°C), the yeast might not be active enough to produce bubbles. Try moving your starter to a warmer spot, like near a sunny window or on top of your refrigerator.
- Feeding Schedule. Your starter might not be getting enough food. Ensure you’re feeding it regularly (start with every 24 hours; if that doesn’t work, feed every 12 hours) with equal parts flour and water. If it’s been a few days since you last fed it, the yeast might have run out of food and gone dormant.
- Flour Type. The type of flour you’re using can impact the activity level of your starter. Whole-grain flours, like whole wheat or rye flour, tend to ferment more quickly because they contain more nutrients for the yeast. If you’re using white flour and not seeing bubbles, try switching to a whole-grain flour for a few feedings. Also, make sure the flour you are using is unbleached.
- Water Quality. If you are using tap water or water containing enough minerals or chemicals, it could inhibit the growth of your starter. Try using filtered or bottled water instead of tap water.
- Time. Sometimes, your starter just needs more time. It can take up to a week or more for a new starter to become fully active, especially in cooler environments. Be patient and keep feeding it consistently.
- Air. If you’re using a lid for the jar, make sure it’s not too tight or switch to not using one at all and cover it with a paper towel instead. You may also want to try giving it a good stir to help the air circulate and the bacteria breathe more.
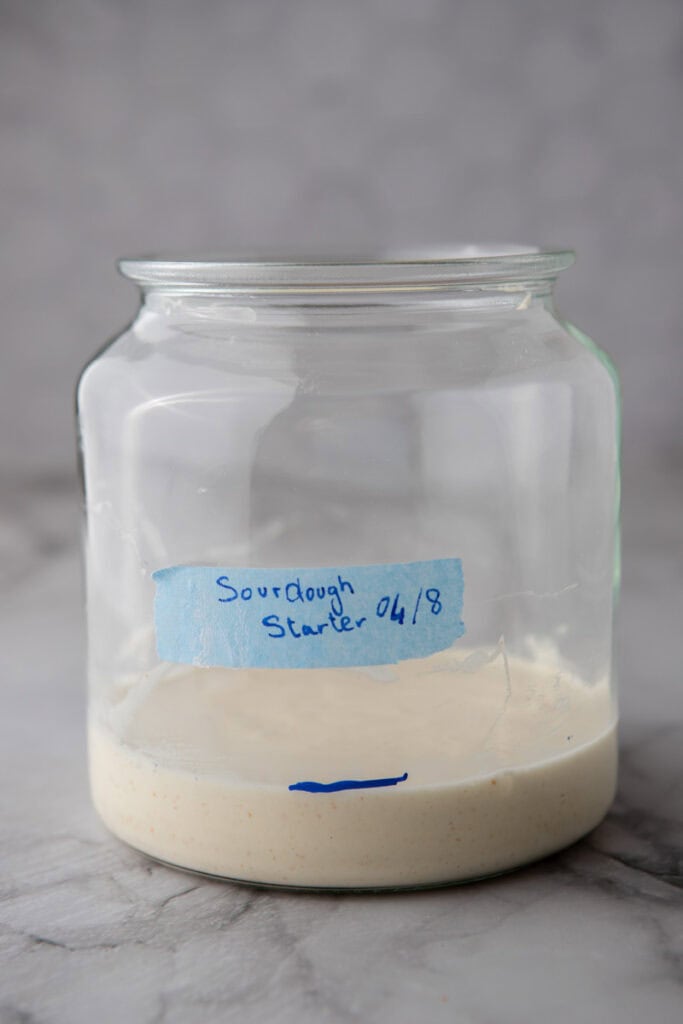
Why is my sourdough starter too runny?
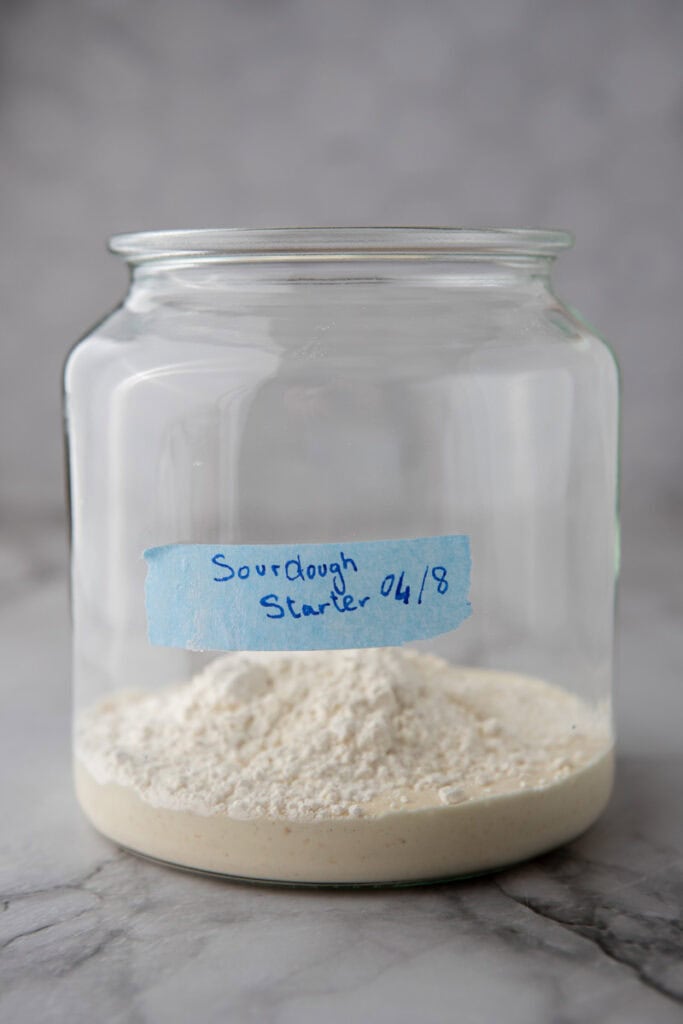
- Incorrect Flour-to-Water Ratio: The most common reason for a runny starter is an imbalance in the flour-to-water ratio. A typical starter should have equal parts flour and water by weight (known as 100% hydration). If you’re using measuring cups, it’s easy to add more water than intended accidentally. Switching to a kitchen scale for accurate measurements can help.
- Type of Flour: Different flours absorb water differently. For example, whole-grain flours like whole wheat or rye absorb more water than all-purpose or white flour. If you’re using a low-protein or highly refined flour, your starter may naturally be runnier. Consider switching to some flour with higher protein content or mixing in a bit of whole-grain flour to thicken it up.
- Environmental Factors: A warm environment can cause your starter to ferment too quickly, breaking down the flour and leading to a thinner consistency (hungrier starter). If it’s hot in your kitchen, try moving your starter to a cooler spot.
- Hungry Starter: When you feed your starter and leave it alone for a while, it will thin out as it starts to get hungry again. Increase your feedings to twice a day to keep it strong and thriving!
Why is my sourdough starter too thick?
- Flour-to-Water Ratio: The most common reason is that there’s not enough water in the mix. A typical sourdough starter should have equal parts flour and water by weight, which results in a thick, pancake-batter-like consistency. If you’re using measuring cups instead of a kitchen scale, adding more flour than water is easy, making the starter too thick. Switching to a kitchen scale can help ensure accuracy.
- Type of Flour: Different types of flour absorb water at different rates. Whole grain flours like whole wheat or rye absorb more water than all-purpose or white flour, leading to a thicker starter. If you’re using whole-grain flour, consider adding more water to balance it out.
- Temperature: In cooler environments, starters can sometimes thicken up because the fermentation process slows down. This can lead to less activity and a denser texture. If your kitchen is cool, try moving your starter to a slightly warmer spot or give it more time.
Why does my sourdough starter have mold in it?
If your sourdough starter has developed mold, it’s a sign that something has gone wrong with the environment or care routine. Here are some common reasons why mold might appear and what you can do about it:
- Contaminated Environment: Mold spores are everywhere, and if your starter is exposed to a contaminated environment, it can lead to mold growth. Ensure your starter is kept in a clean jar with a tight-fitting but not airtight lid, and always use clean utensils when feeding it as well.
- Improper Feeding: If your starter isn’t fed frequently enough, it can weaken and become more susceptible to mold. Starters thrive on regular feedings (every 12-24 hours) with fresh flour and water. If you leave your starter unfed for too long, the mixture can become too acidic, creating an environment where mold can take hold.
- Temperature Issues: Mold is more likely to grow in warm, humid environments. If your kitchen is particularly warm, it might contribute to the problem. Try keeping your starter in a cooler, more stable environment.
- Dirty or Damp Container: If the jar or container you’re using to store your starter is dirty or hasn’t been thoroughly dried after washing, it could introduce mold spores. Always use a clean, dry jar for your starter and avoid sealing it airtight, as a bit of airflow is necessary for fermentation.
- Type of Water: If you’re using unfiltered tap water, it might contain chlorine or other chemicals that can weaken your starter and make it more prone to mold. Switching to filtered or bottled water can help.
What to Do If You See Mold
If you spot mold (usually fuzzy and colored, like green, blue, black, or pink) on your sourdough starter, discarding the entire batch is safest. Mold can penetrate deeper into the starter than what’s visible, so trying to salvage it isn’t recommended.
To start fresh, thoroughly clean your jar or use a new one, and begin a new starter with clean flour and water.
Pro Tip
Weigh the jar your starter is in and note the weight on the bottom of the jar. This way, you can easily calculate exactly how much starter you have and determine how much to feed it.
How do I store my sourdough starter?
Once your sourdough starter is active and bubbly, you’ll want to store it properly to maintain its health and usability. Here’s how:
1. Short-Term Storage (Daily Use)
- Room Temperature: Keep the starter at room temperature if you bake daily or every couple of days.
- Feeding Schedule: Feed it once a day with equal parts flour and water by weight.
- Container: Use a loosely covered jar or container to allow gases to escape while preventing contamination.
2. Long-Term Storage (Infrequent Baking)
- Refrigeration: If you bake less frequently, store the starter in the fridge.
- Feeding Schedule: Feed it every 1–2 weeks to keep it alive.
- Preparation for Use: Remove it from the fridge, discard or use most of it(in a sourdough discard recipe), and feed it at least twice to reactivate before baking.
3. Freezing for Extended Storage
- Freezing: For longer breaks, you can freeze your starter.
- Feed it, let it bubble, then place a portion in a freezer-safe container.
- To Reactivate: Thaw in the fridge, then feed it several times at room temperature to restore activity.
4. Drying for Backup Storage
- Drying: Spread a thin layer of starter on parchment paper, let it dry completely, and store the flakes in an airtight container. Make sure that you have an airtight lid on top of it to keep any bugs from getting in there.
- To Reactivate: Rehydrate with water, then feed it multiple times until it’s bubbly again.
Additional Tips:
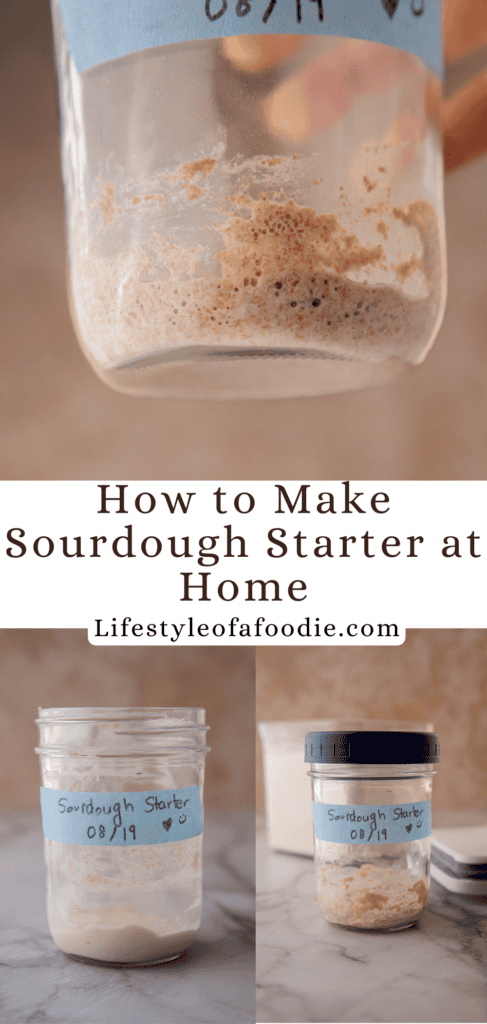
- Always label your container with the last feeding date, especially for refrigerated or frozen starters.
- Keep the container clean to prevent mold or contamination.
- If your starter develops a liquid layer (hooch), stir it in or pour it off before feeding. It’s not bad, it’s just a sign that your starter is hungry.
Proper storage ensures you’ll always have a lively starter ready when you need it!
How do I know if my starter is ready to use?
You will know it is ready when:
- It doubles in size within 4-6 hours of feeding.
- It has a pleasant, slightly tangy aroma.
- It forms bubbles and has a spongy texture.
- A small spoonful of starter at it’s peak (fed and at the height of it doubling) floats in water (the “float test”)
Do I need to use organic flour in this sourdough starter recipe?
Organic flour isn’t really necessary but it may contain more naturally occurring wild yeasts, which can help kick-start your starter!
My Starter Smells off, is that normal?
Yes, during the first few days, the starter might smell like vinegar, alcohol, or even cheese ( gross, I know, but trust the process). This is normal as the bacteria develop. Once it stabilizes, the smell should become more tangy and pleasant.
What if I miss a feeding?
If you miss one feeding, it’s okay. Just feed it as soon as you can. If left unfed for more than a few days, the starter will have some dark liquid on top called a hooch, stir it in or discard it before feeding the starter again.
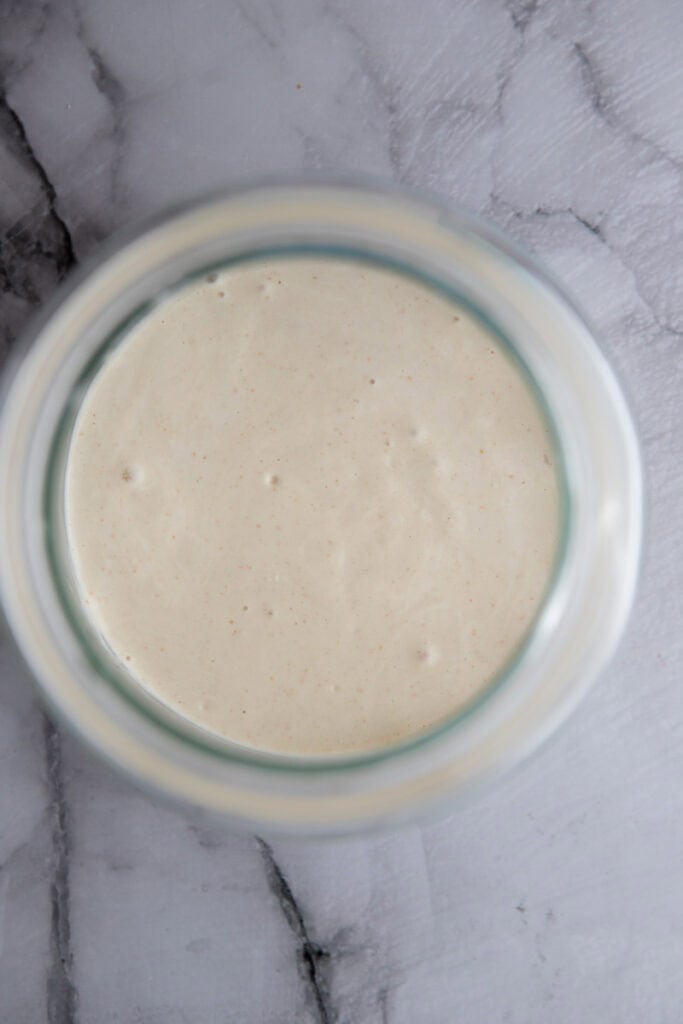
Beginner Sourdough Starter Recipe

Beginner Sourdough Starter Recipe
Equipment
Ingredients
- 1 tablespoon Unbleached Whole Wheat Flour Day 1 only
- Unbleached All-Purpose Flour For feedings Days 2-10
- Filtered Water – 1 tablespoon per feeding
Alternatives for Filtered Water:
- Spring Water: Contains natural minerals that nourish your starter.
- Distilled Water + Minerals: Add a pinch of non-iodized sea salt or mineral drops to provide essential nutrients.
Instructions
Day 1: Getting Started
- In a clean jar, combine 1 tablespoon of whole wheat flour and 1 tablespoon of filtered water.1 tablespoon Unbleached Whole Wheat Flour, Filtered Water – 1 tablespoon per feeding
- Stir until a smooth paste forms, with no dry spots remaining.
- Cover the jar loosely with a coffee filter or cloth secured by a rubber band.
- Place the jar in a warm spot (70-75°F is ideal). If your house is cooler, use a turned-off oven with the light on or wrap the jar in a kitchen towel.
Days 2-3: First Signs of Life
- After 24 hours, check for bubbles on the surface, a sign of fermentation.
- Discard half of the starter (about 1 tablespoon).
- Add 1 tablespoon of all-purpose flour and 1 tablespoon of water to the remaining mixture.Unbleached All-Purpose Flour For feedings
- Stir, cover loosely, and return the jar to the warm spot.
- Repeat the feeding process every 24 hours.
Days 4-5: Building Strength
- Continue discarding half of the starter daily and feeding it with 1 tablespoon each of all-purpose flour and water.
- As fermentation strengthens, you may notice more bubbles, a slight rise, and a sour smell (which will mellow over time).
Days 6-7: Twice Daily Feedings
- Transition to feeding the starter twice daily (morning and evening).
- Discard half of the starter at each feeding and replace it with 1 tablespoon each of all-purpose flour and water.
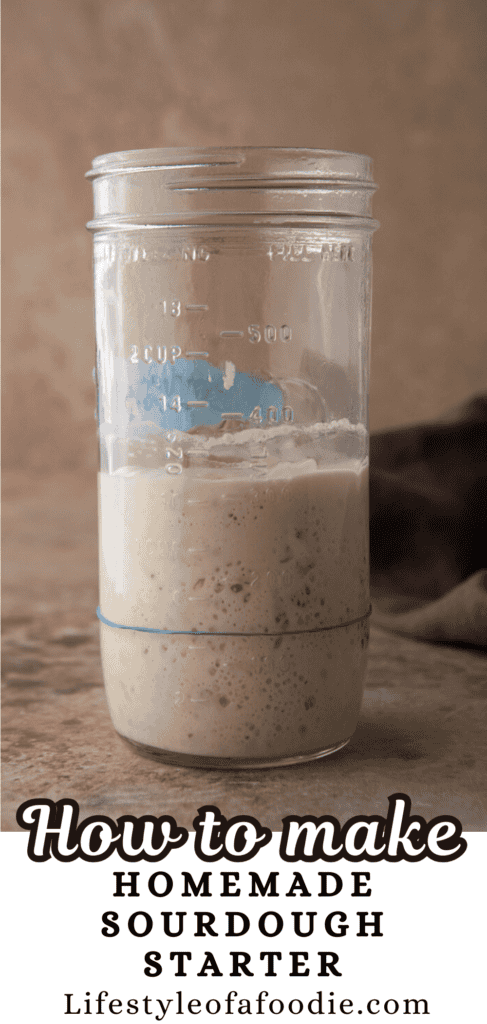
- Monitor activity: the starter should double in size within 4-6 hours of feeding. You can use a rubber band around the jar to see where the starter was before and after the feeding.
Days 8-10: Ready to Use
- By now, your starter should double in size consistently, have a pleasant sour aroma, and be full of bubbles.
- It’s ready to use for baking! If it’s not quite there, continue regular feedings until it’s strong and active.
Notes
- Rye Flour: Boosts activity and adds an earthy flavor.
- Spelt Flour: Creates a nutty, sweet taste.
Nutrition information is automatically calculated, so should only be used as an approximation.
If you enjoyed this how-to-make sourdough starter recipe and want to save it for later, make sure to pin it!
This was THE BEST I have read so far on learning about Sour Dough. Thank you so much for this. I am succeeding with an old starter.
I am always here to help!
Thank you SO much for this easy to follow and understand starter recipe. I only have one question and that is this. If such a small amount is used in creating the starter, how does it grow so it can be used over and over? By not discarding? And if not discarding, does a person just arbitrarily decide how much “food and water” to give the starter or ???
Thank you again!
Thank you so much for your kind words! 😊 I’m so glad the starter recipe has been helpful for you!
To answer your question, sourdough starters grow over time through regular feedings. Even though you start with a small amount of starter, the key is to feed it with flour and water to keep it growing. If you’re not discarding, you just need to feed your starter the right amount to ensure it has enough “food” to grow and stay healthy.
Here are some basic feeding ratios to help make it easier for you:
Basic Feeding Ratio (1:1:1) – For Maintenance
• 1 part starter (e.g., 50g)
• 1 part flour (50g)
• 1 part water (50g)
This ratio works well for regular feeding. If you’re not baking frequently, you can store it in the fridge and feed it once a week.
Scaling Up Your Starter – When You Need More for Baking
• 1:2:2 ratio → Doubles the amount of starter
• Example: 50g starter + 100g flour + 100g water
• 1:3:3 ratio → Triples the amount
• Example: 50g starter + 150g flour + 150g water
If You Don’t Want to Discard Often
• Keep a smaller amount of starter (around 20-30g) and feed it with the 1:1:1 ratio as needed.
So, you’re not arbitrarily guessing—just follow these ratios based on how much starter you want and need! Feel free to adjust the amounts if you’re baking a lot or if you’re keeping it small. Hope that clears things up, and happy baking!
Does the temperature of the water matter? My previous starter I fed with 95 +/- 3 degrees Fahrenheit water. For starting a new starter do I need heated water or room temperature?
Room temperature is fine, but room temperature does vary obviously depending on where you live so the ideal temperature is 75-80 degrees F, but you do have a broad temperature range for sourdough starter to work so it shouldn’t be a big deal.
Wow! These were, by far, the BEST instructions for making a starter. This is my first attempt at this process and you’ve outlined succinctly all the steps and tips to ensure a great result. I’ve printed a copy and am including it in my cooking binder.
Thank you!
Glad I could help!
Do u have to use unbleached flour. Why does the recipe call for wheat flour at the beginning?
These are great questions! You have to use wheat flour in the beginning to make the starter stronger. As for the unbleached flour, this one is really important because it has the necessary bacteria for the starter to grow.